20 in 2020: Model Building During a Pandemic
By Chris Banyai-Riepl
Overview
The year 2020 has been one for the history books, to be sure. What started out with global environmental concerns over wildfires around the world quickly shifted far more serious and immediate problems with a global pandemic. The result of that changed the lives of just about everyone on the planet in one way or another. In my small corner of the globe, stay at home orders just so happened to coincide with me finalizing a legitimate working space for modeling. For those lifelong Internet Modeler followers, you all know my model build speed borders on the glacial. In fact, looking at my modeling display case (another first for my modeling life) revealed a sum total of 17 completed models since 1990. That doesn't mean I hadn't started any models, though, as going through the started pile revealed dozens and dozens of those. With my new work space secured in my office next to my workstation, I now had no excuses to put off finishing things any more.
The Builds
The last model I finished (not counting my 24-hr Wildcat build) was probably three years ago, so I approached my newfound setup with a goal of getting back into the groove. I dedicated everything this year to basically relearning everything I had forgotten, to try out new products and reacquaint myself with old ones, and to finish more started models than new models. Along the way I did three "group" builds with the other Internet Modeler editors, with some joint modeling sessions over that other pandemic staple, Zoom. Dishing out some good-natured ribbing while modeling makes for a very enjoyable evening, and I can see that continuing even beyond the current pandemic. Long known as a solitary hobby, social modeling with good friends is just a lot of fun! But enough of the process, let's look at what I did over the last year (actually, last nine months, as I didn't start building the Mirage until the end of March). A couple of these have more detailed articles already up here at Internet Modeler, and I'm working on some additional feature articles on others as well, so stay tuned for those.
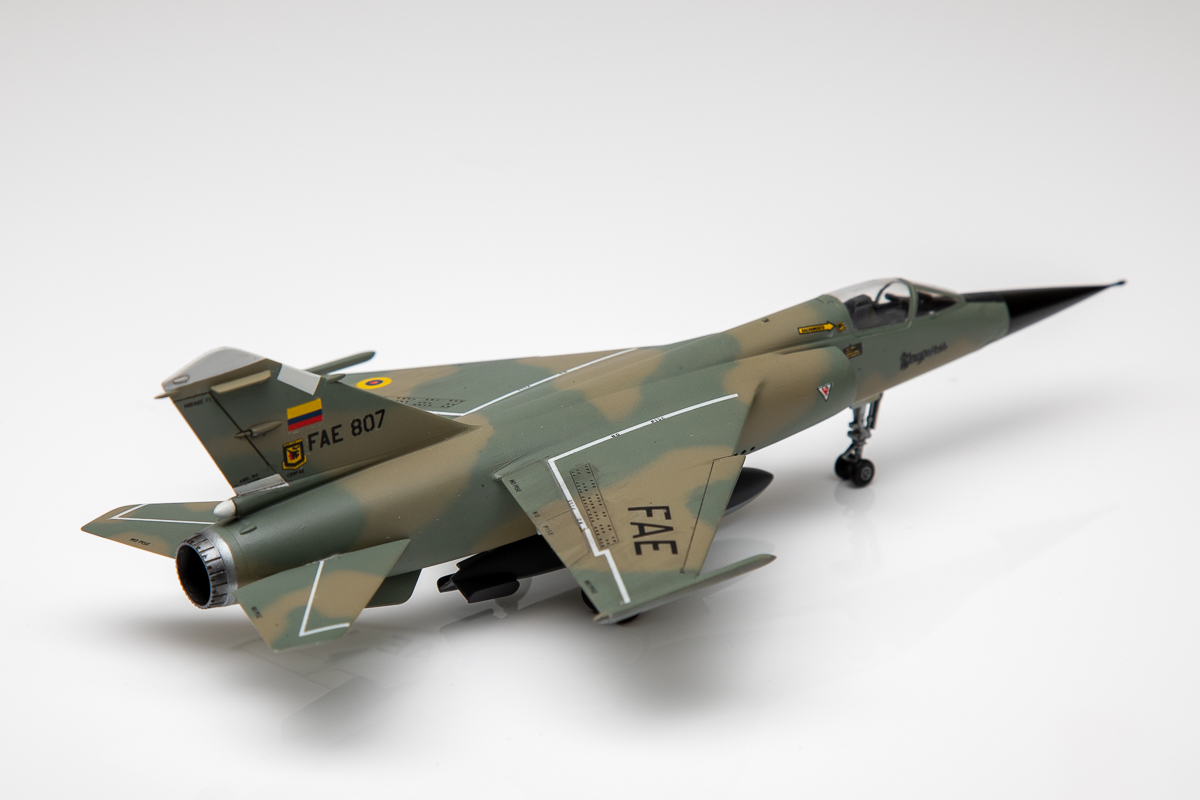
1. Hasegawa 1/72 Mirage F.1C
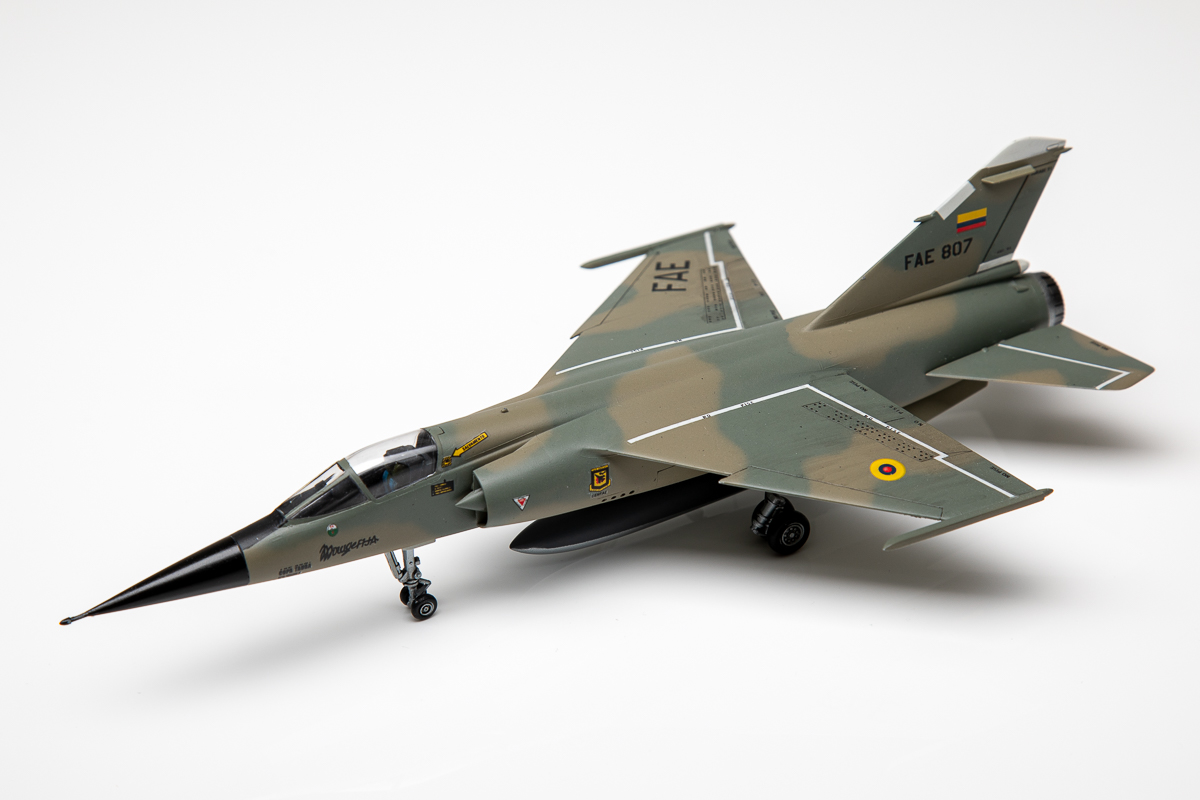 This was my first real step back into the hobby, and the main thing I wanted to experiment with was Vallejo Model Air paints. I also wanted to see how some of the older decals in my stash have held up, so I used an old FCM sheet to build it up as a Mirage F.1C from Ecuador. It had been quite some time since I tried a freehand airbrush camouflage, and with new paints as well, but overall I was quite pleased with the outcome of the painting. The decals were another story, though, and they just did not want to settle down much at all. Now whether this is due to the original decals or the age of the decals, I don't know, but I probably won't be using any of those old FCM sheets again (unless someone has some tricks to getting them to work better than I did).
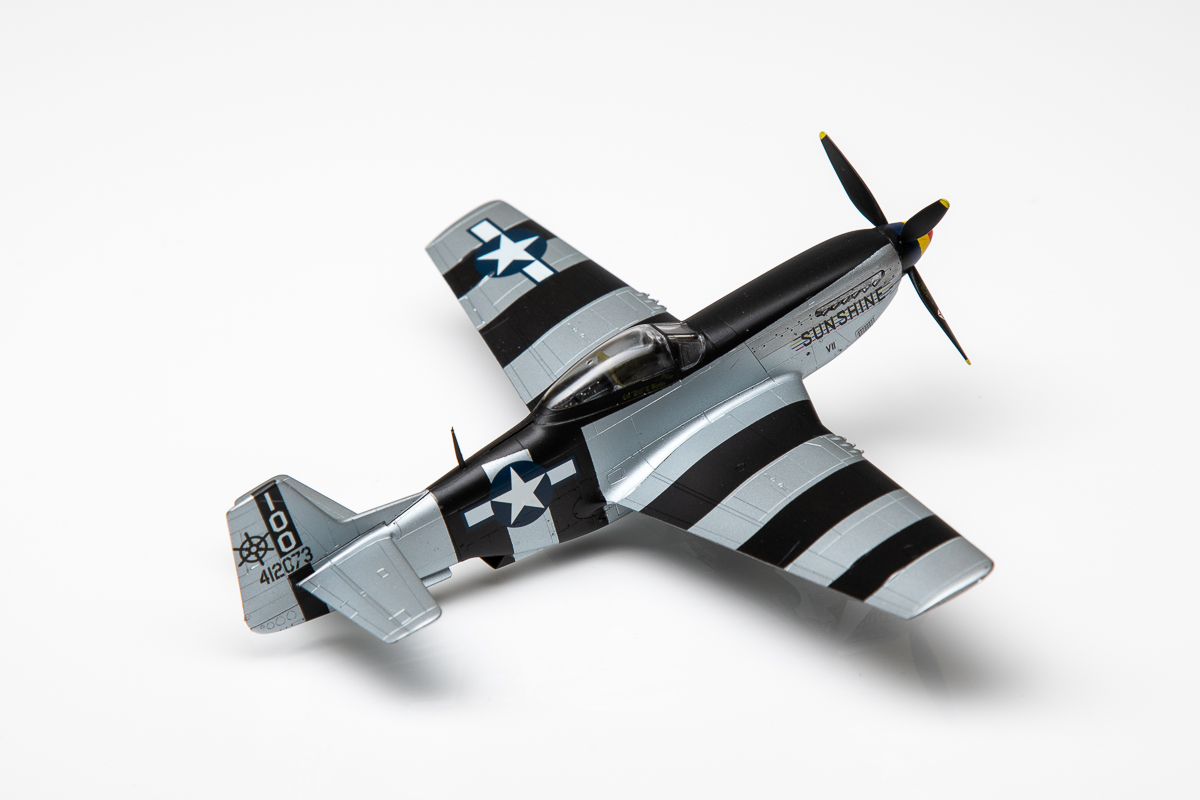
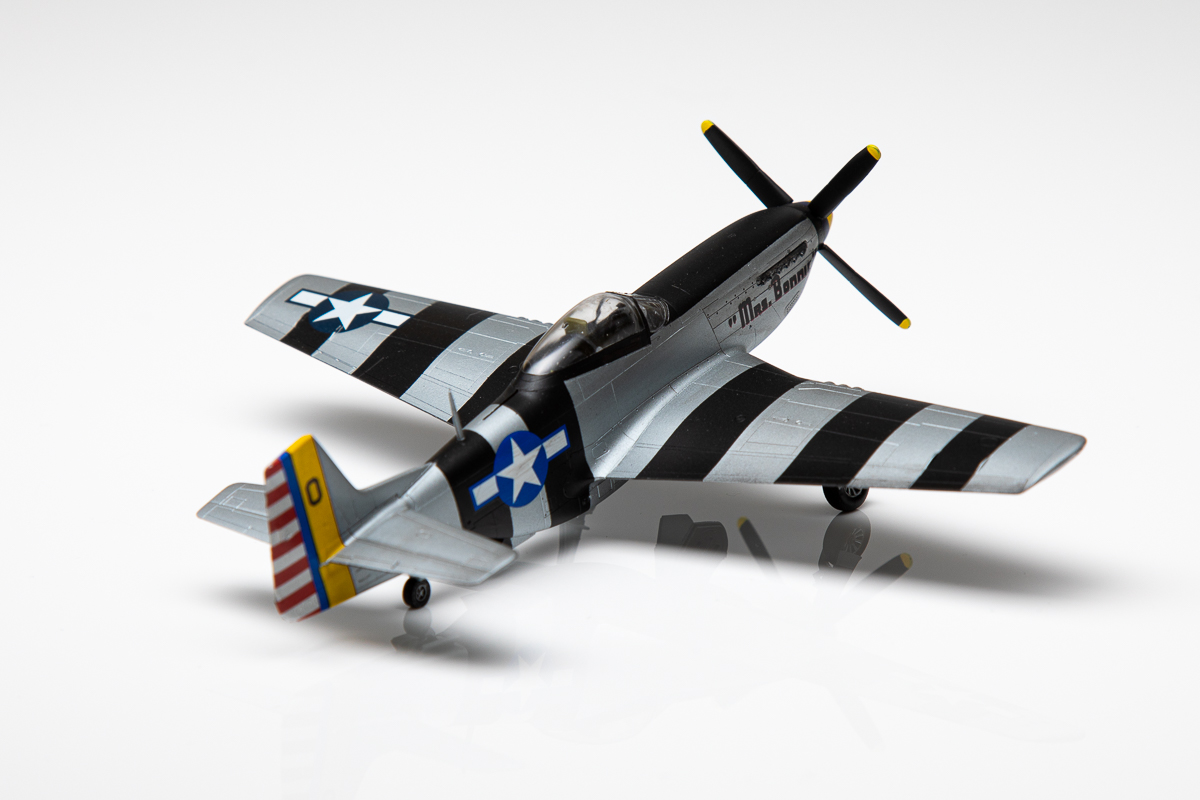
2 & 3. Hasegawa 1/72 P-51D/K "Pacific Aces Combo"
 While the Mirage F.1C was a fresh build from the beginning, this Mustang set was one I had started ages ago. How long ago? Well, I first reviewed the kit back in 2013, and I started them shortly thereafter. I managed to get the cockpits done and fuselages glued together before they got relegated to their box and set aside. Luckily, though, the Hasegawa Mustangs are very easy ones to build, so finishing these was quite simple. Having had a good experience with the Vallejo Model Air on the Mirage, I decided to push the Vallejo envelope and use their silvers on these. That, coupled with the big black stripes that needed to be masked, made for a great experiment. I used the Vallejo Model Air Steel for my weather-worn aluminum finish, and I was pleased overall with how it turned out. I also tried a different gloss coat on these, using a different Vallejo gloss finish instead of the Premium I used on the Mirage.
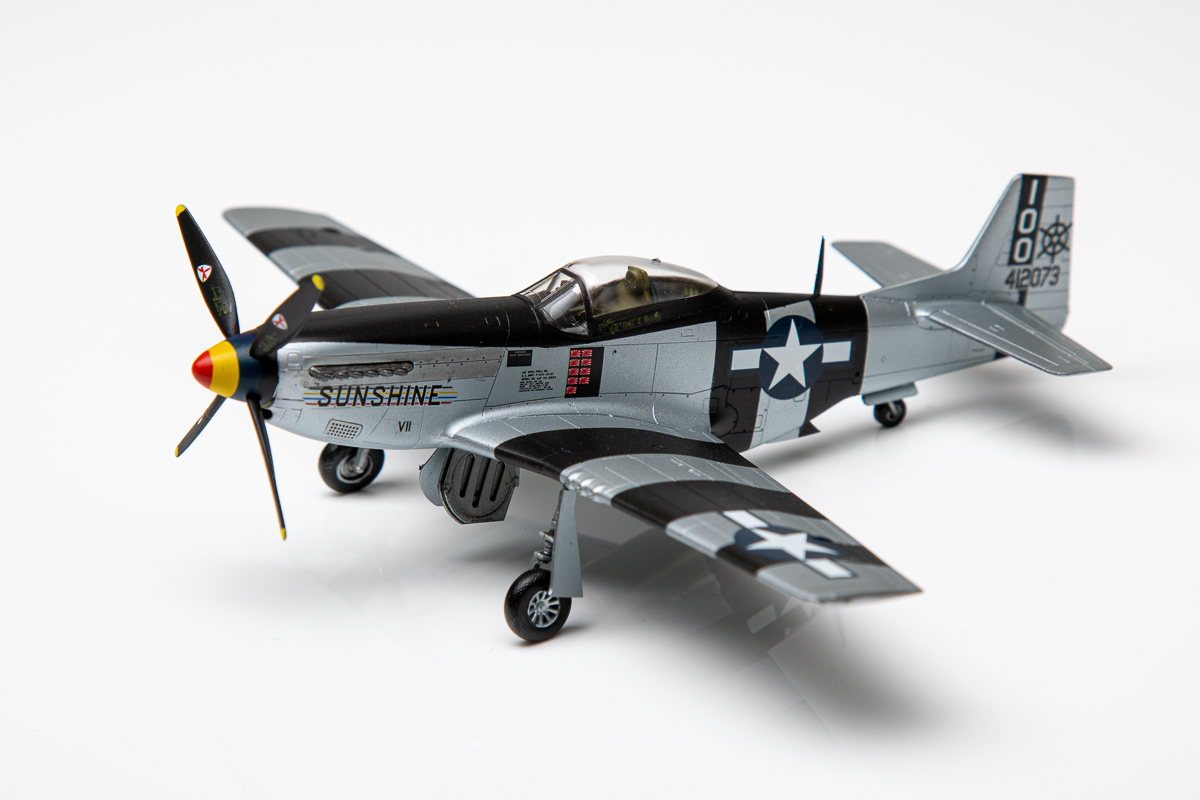 I used the kit decals throughout, including the spinner stripes. While the decals worked nicely everywhere else, those spinner stripes proved to be worse than useless. Not only did they not fit well at all, they ended up breaking and generally just being completely useless. So I had to refinish both of the spinners and paint on the stripes, a process that took me a couple of tries to remember the easy way to do (basically, start from the tip and work down, to make sure your tape has as sharp a line as possible). I also used some different tape for the canopy masks, working with thin strips to build up the edges and then filling in the rest with Tamiya tape. While that works, I definitely love using the Eduard pre-cut masks. They make this job so much easier.
4. Hasegawa 1/72 F-104G Starfighter
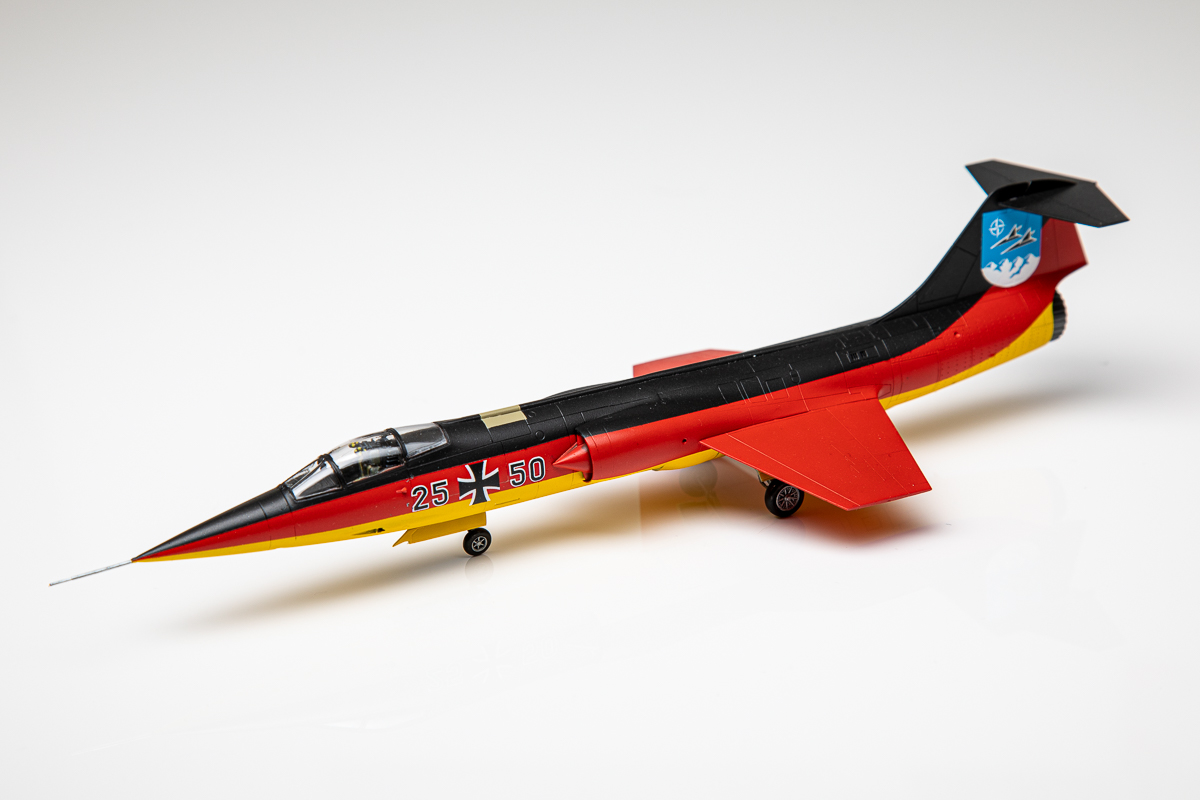 Next up is another started model, this one dating WAY back. I know I picked this model up decades ago, I think back in 1993 or thereabouts. It was started so long ago that it had red putty on it, and I haven't used that since about 1998. I had managed to get the fuselage together, but that was where it languished for I don't know how long. Which is really odd, as at that point, it's basically ready for paint. At any rate, I raided my decal stash once again, trying to find something unique but not too unique for this bird and I came across an old Microscale sheet that had some colorful F-104s and I just so happened to have red, yellow, and black paint. So, more Vallejo Model Air (I'm sold on this stuff, I really like how it sprays and masks), and some old Microscale decals that went on very nicely.
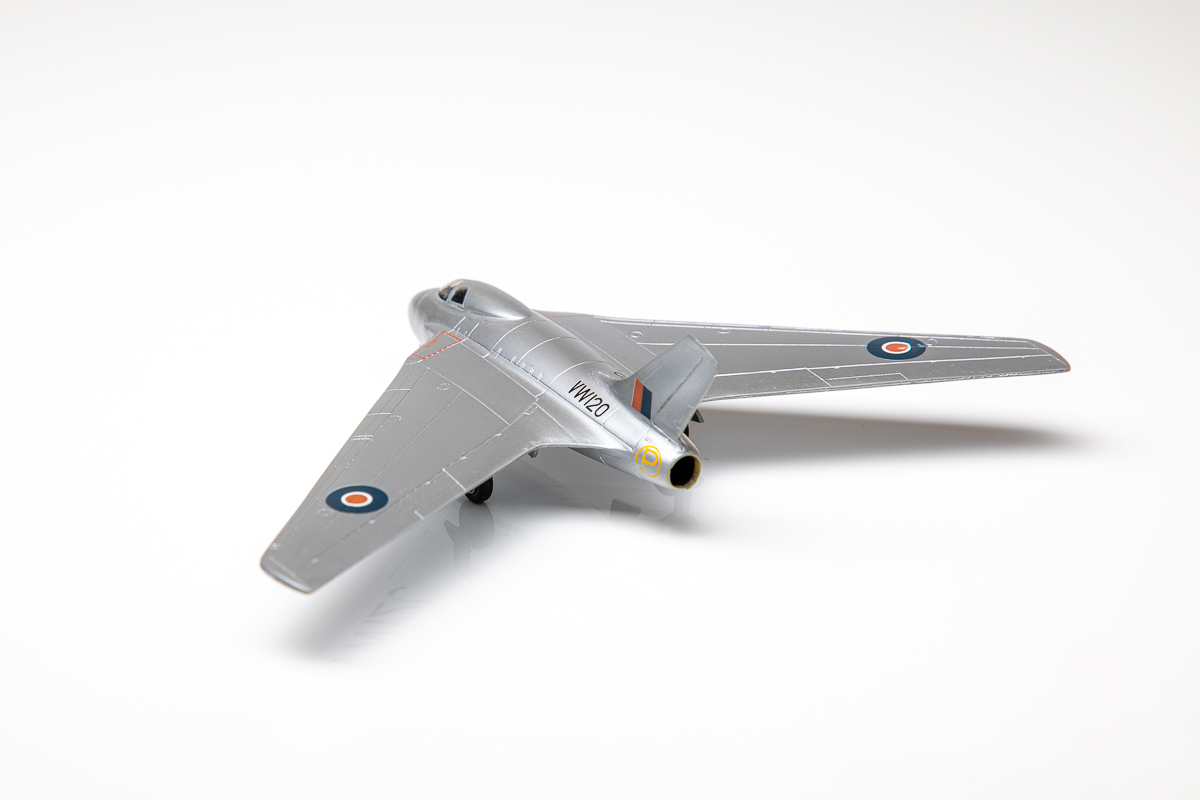
5. Planet Models 1/72 de Havilland DH108 Swallow
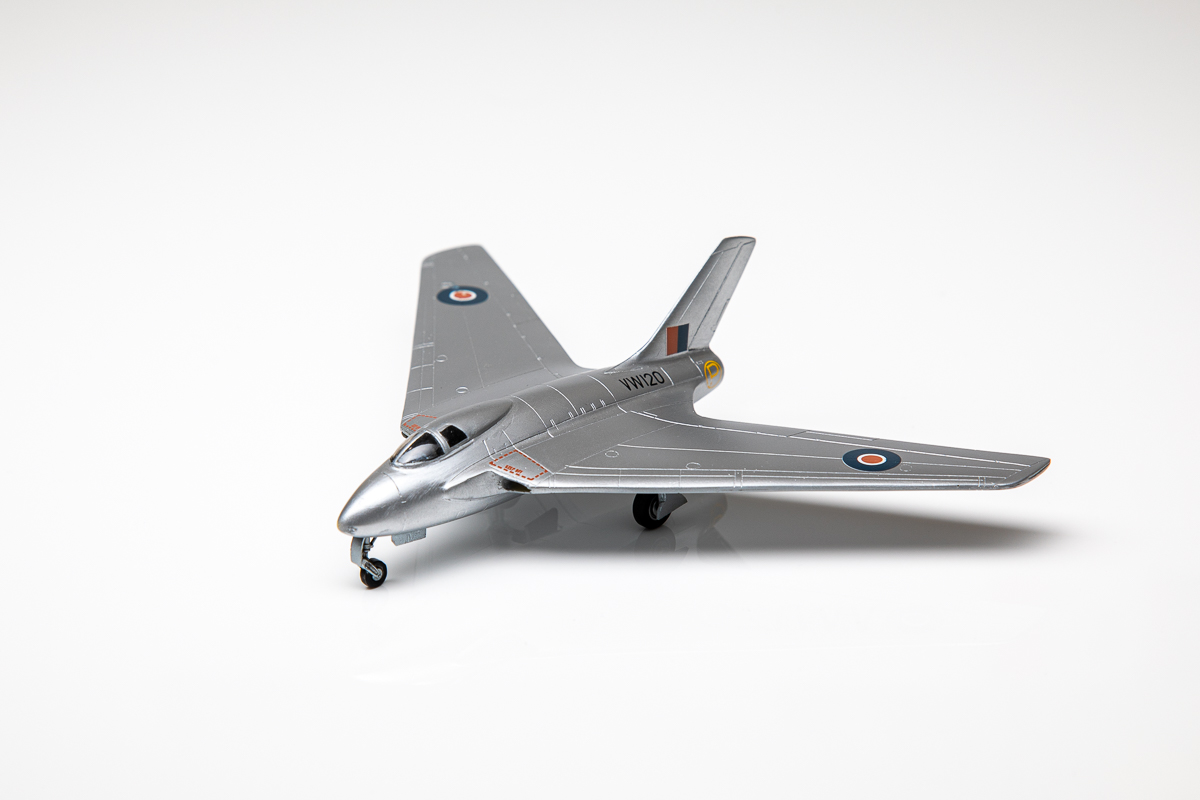 This is probably the saddest of the bunch for a started model. It also dates WAY back as well, following me through nine different living locations since 1999. Even worse was how far it was finished: painted, decaled, and canopy glued on. The only thing left to finish it off was to add the landing gear, and since it was all in resin, and older Czech resin, that meant a wafer with landing gear bits sandwiched in between. At some point I had made the decision to simplify this process and added a set of Heller Vampire landing gear to the box this model was in, so I busted those out, painted them up, and a few drops of super glue had this one in the finished pile. Twenty-one years later. The red on the roundels and fin flash is a bit too brown, so I might dig up some new ones and replace those, or maybe not. Either way, I can call this one complete.
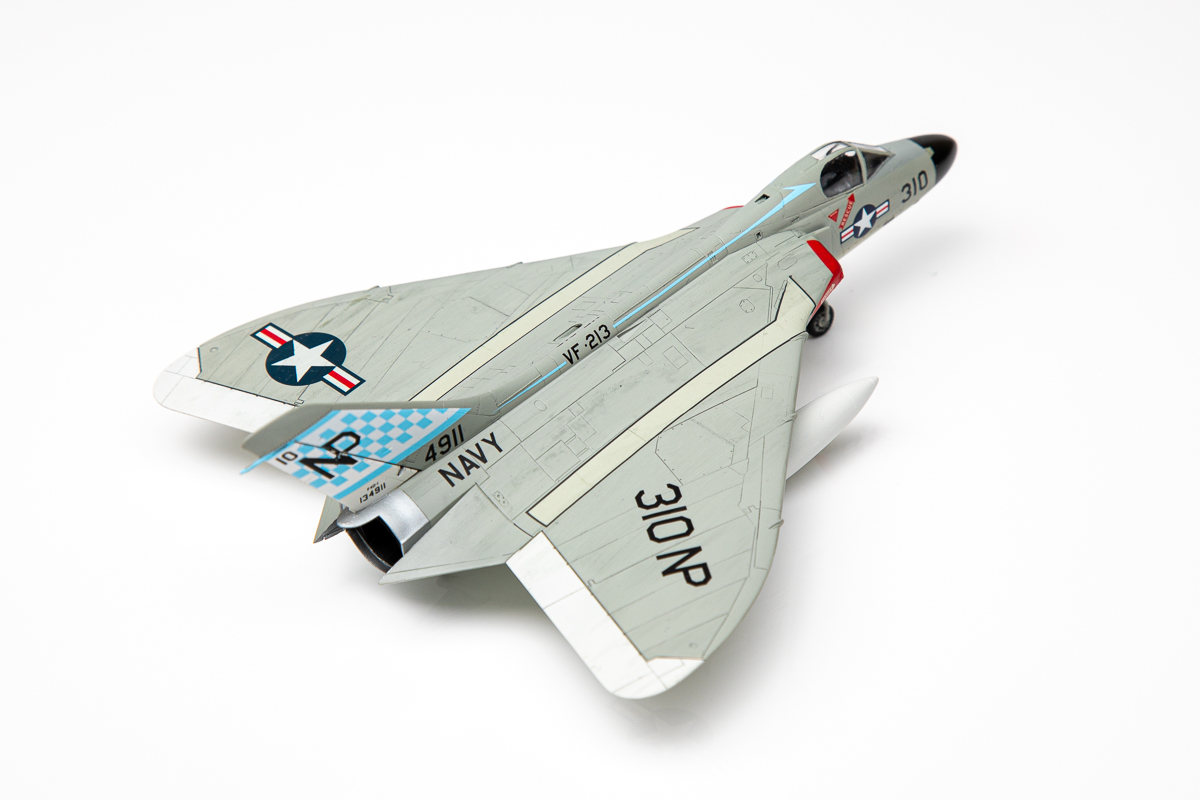
6. Tamiya 1/72 F4D Skyray
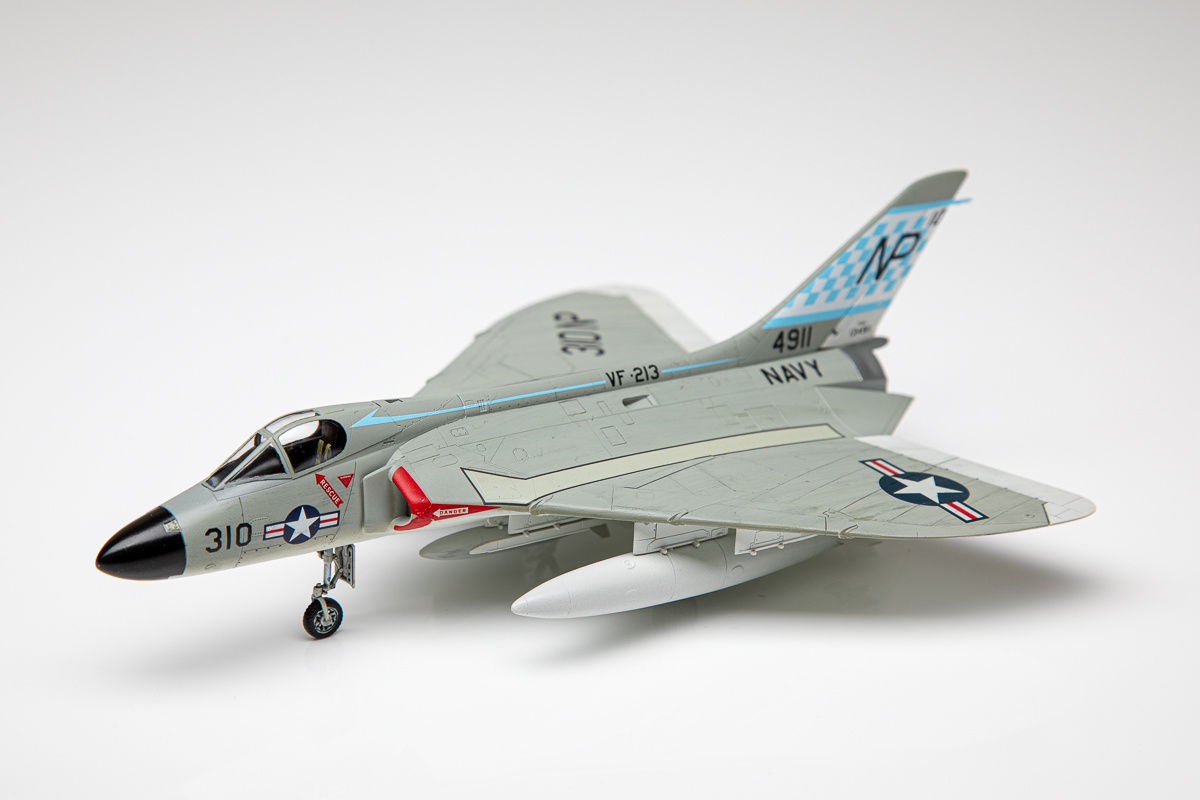 This one is another started model that dates back to the early 2000s. I had managed to get the cockpit painted a base coat, and a bunch of parts cleaned up, but that was about it before it went back in the box (I believe I have a 1/72 Tamiya F-84G Thunderjet that is at the same level of completion somewhere). As I have a lot of US Navy aircraft I want to build in the gull gray and white scheme, this was the one I used to find a good match for that gull gray. The Vallejo Model Air shade is too dark by quite a bit, so I tried out Mission Model paints on this one. The gull gray is a great match, and while a good paint, I don't find it as easy to use as the Vallejo. But, for my Navy stuff, I'm stuck with it as it is the best match I've seen so far. I also used some Cutting Edge decals on it, which I liked for the most part. Another good sign as I have a lot of Cutting Edge decals I want to use in my stash.
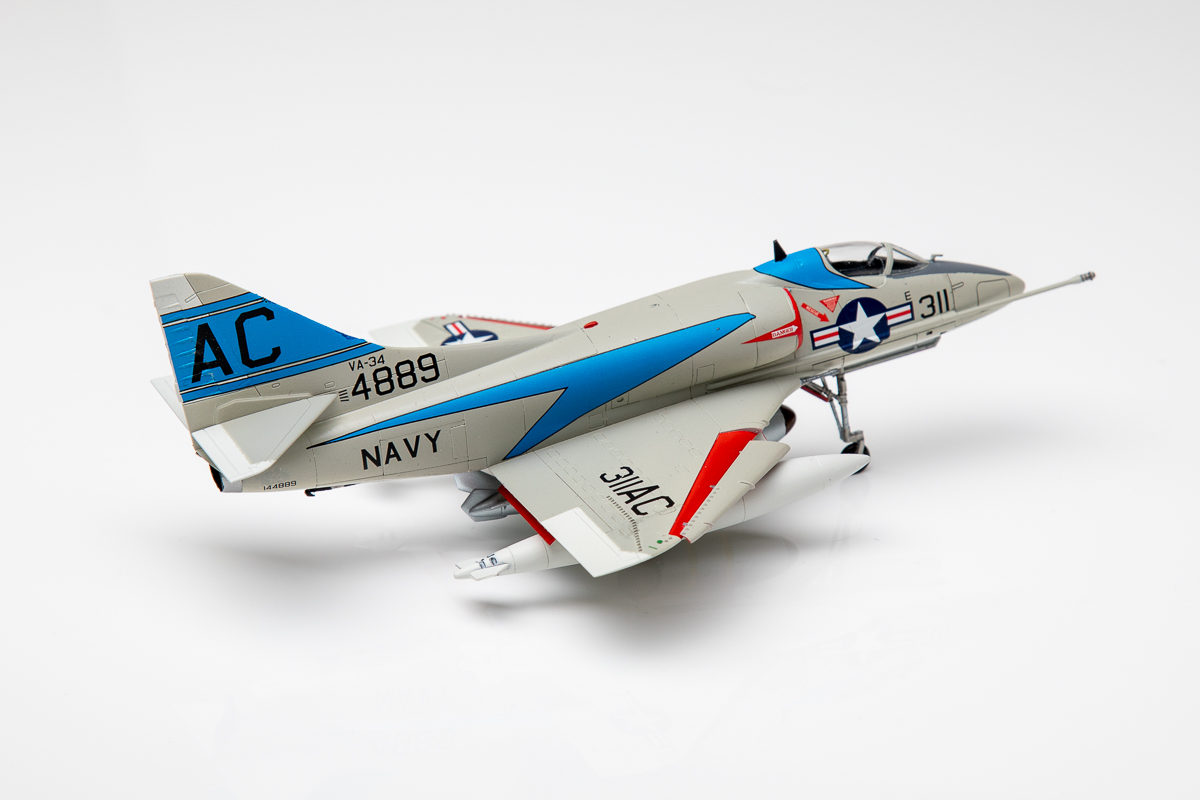
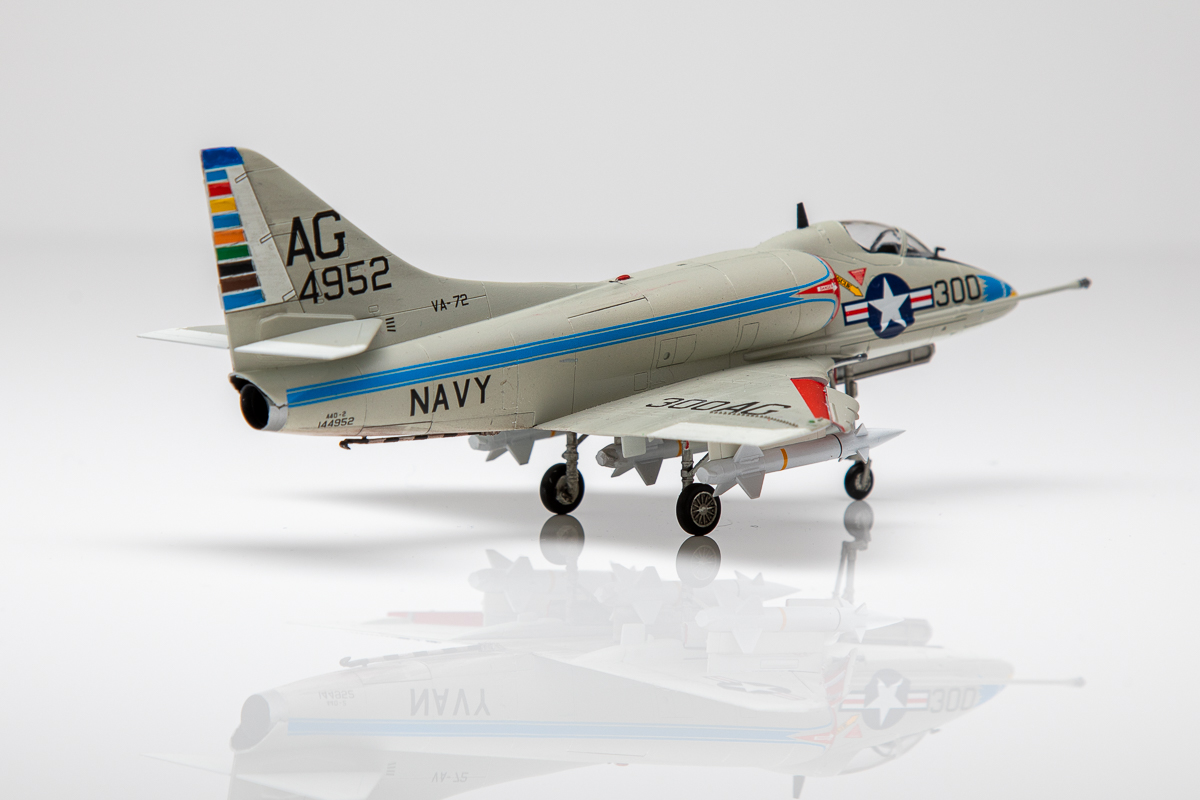
7 & 8. Airfix 1/72 A-4B Skyhawks
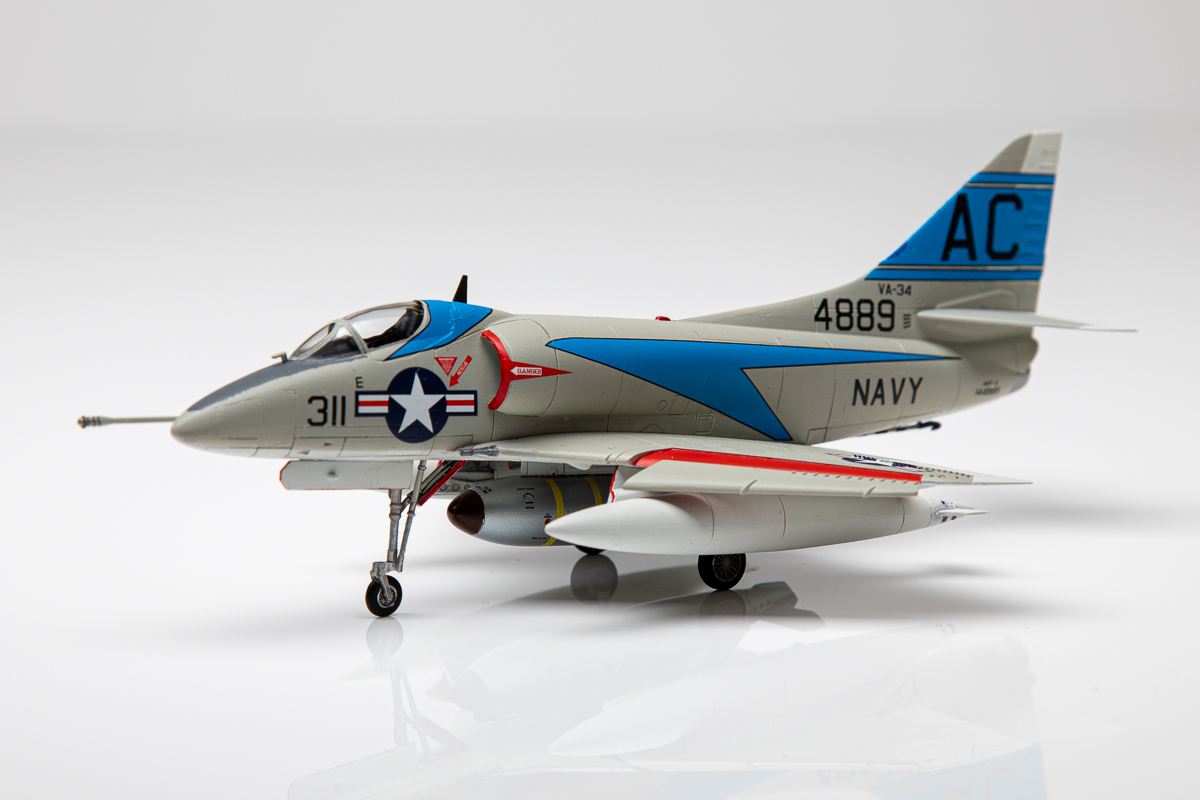 Stepping up to the first Internet Modeler editor group build, we all decided to tackle the Airfix 1/72 A-4B Skyhawk, as it seemed like a simple enough kit (I had great luck with my Airfix Wildcat, which probably helped with the decision making). I happened to have two kits, so while the other editors did their one I built both of mine. I had my paints sorted out with the Skyray, so for this build I decided I would try some new decals (Print Scale), some weathering techniques, and some modifications. For my VA-72 CAG bird I decided to load it up with three AGM-12 Bullpup missiles, which required some modification to the pylons, especially the centerline one. For the VA-34 one, I decided to drop the flaps, add drop tanks from an ESCI A-4E, and slap a nuke under the centerline, courtesy of a Valom 1/72 RB-45C kit. Seeing the little Skyhawk with a big nuclear bomb underneath is just a really weird sight. I guess actually flying the plane on a mission with one of these bombs would have been an experience to say the least.
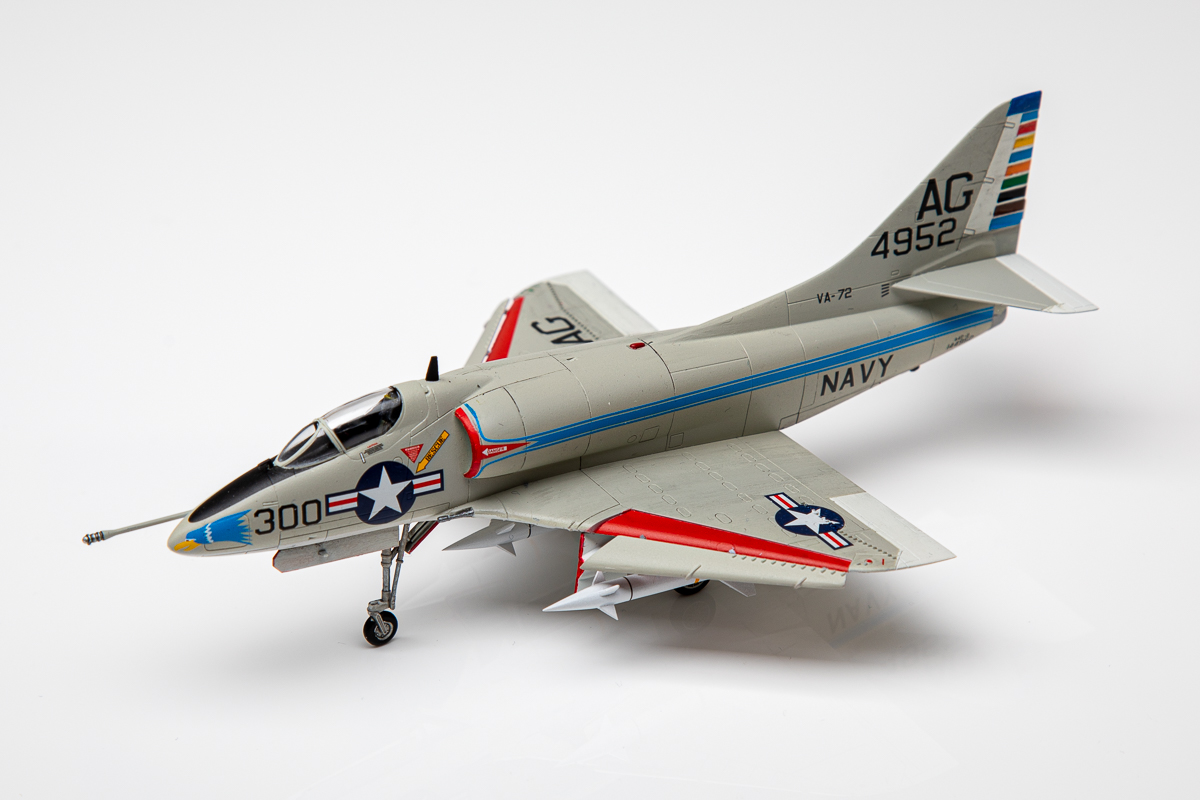 While the overall build went well, the decals proved to be exceptionally challenging. The Print Scale decals were extremely thin and did not want to maneuver much at all on the model. I had quite a few break on me, and the stripes on the CAG bird did not fit quite right. It is a pity, given how colorful the schemes are on that sheet. I am planning on building another Airfix A-4B, but this third one will actually be converted to an A-4L with an A-4C nose conversion, the hump from an ESCI A-4E, and some scratchbuilt antenna bits. Dropping the flaps on one of these kits was an extremely easy modification, simply sanding off the bottom of the flap on the upper wing half and cutting a new one from plastic card and adding the separate fairing piece, so I'll definitely do that on the A-4L as well. I'm looking forward to that one and its colorful scheme!
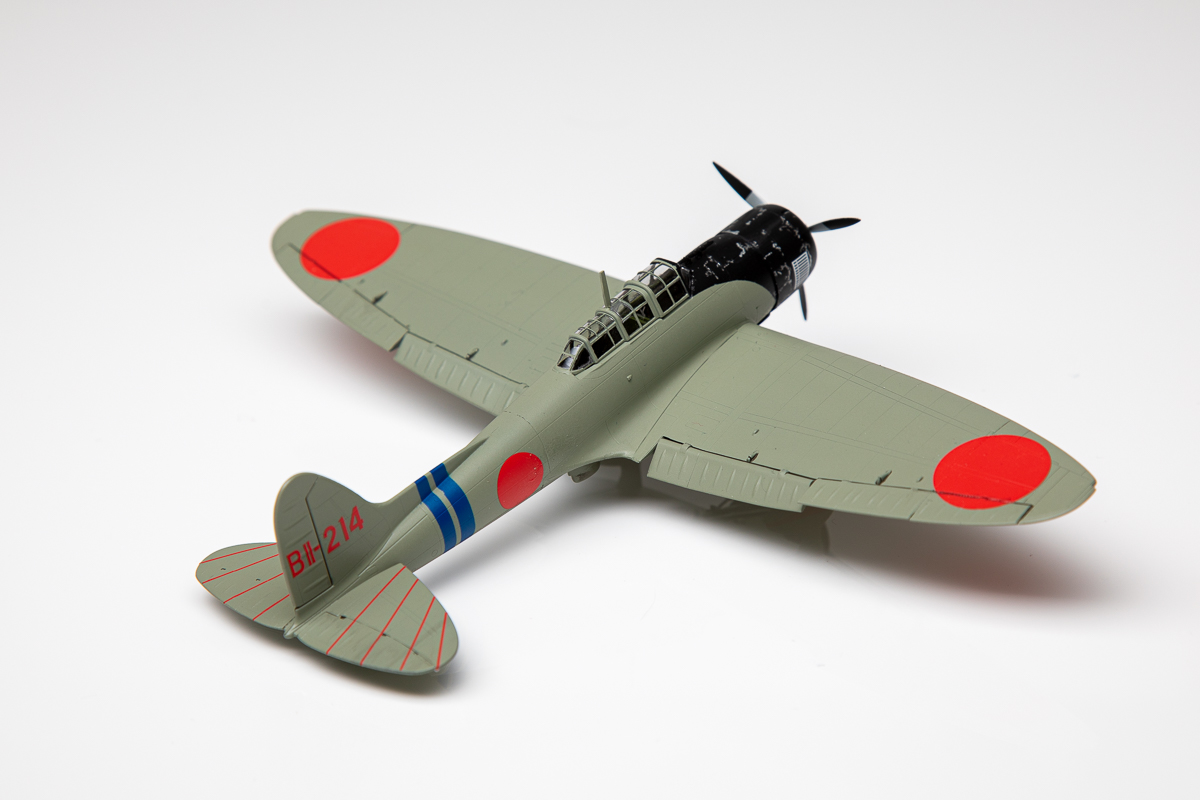
9. Cyber Hobby 1/72 D3A Val
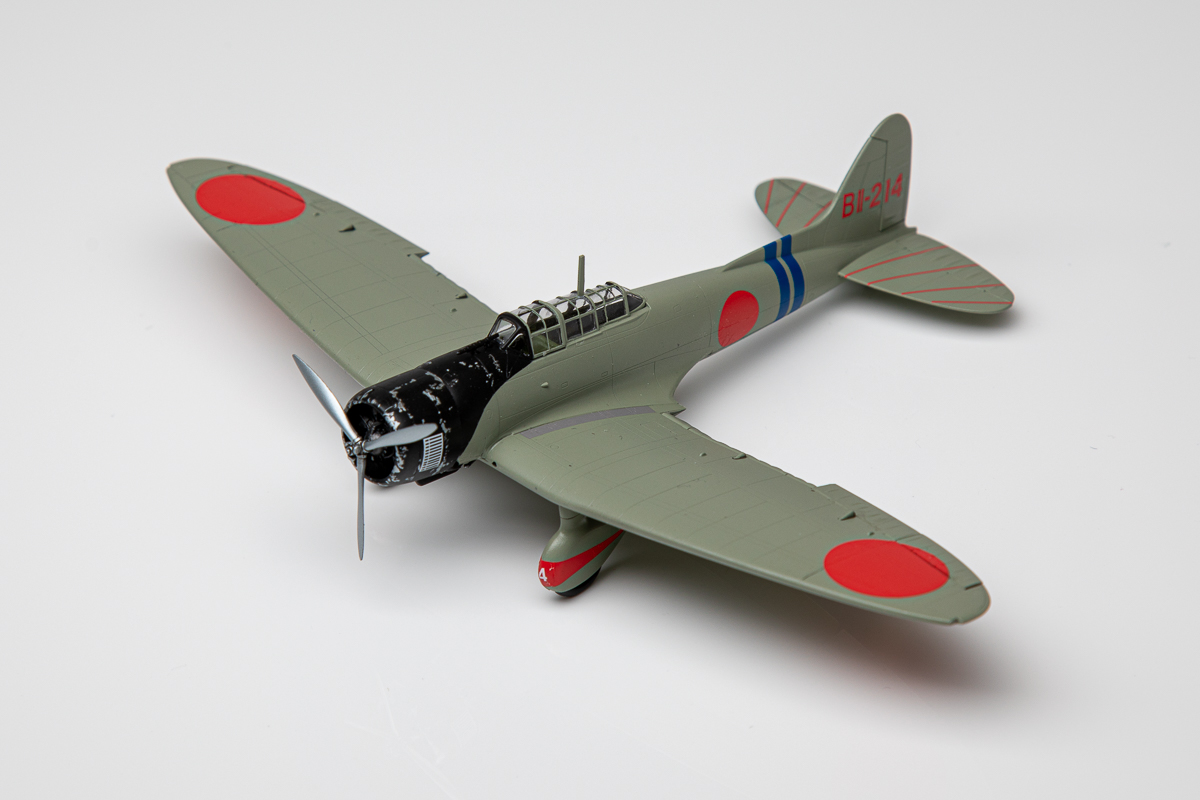 The Cyber Hobby Val was one that was started not too long ago, but was put aside because of the canopy issue (basically, the one-piece canopy is molded as if it was the individual pieces that were designed to nest over one another). I had managed to get quite a ways on this one, with the main airframe assembly together. With my challenges on getting USN gull gray sorted out, I discovered that the Vallejo Model Air gull gray actually made a pretty passable rendition for the gray on the Val, so I decided to just whip this one out and practice some paint chipping on the cowl. For the most part, there wasn't any real challenges with this build, but it did take me a while to get back into my paint chipping groove. So this one is probably more weatherworn than it should be.
10. Mark I Models 1/144 HS 748
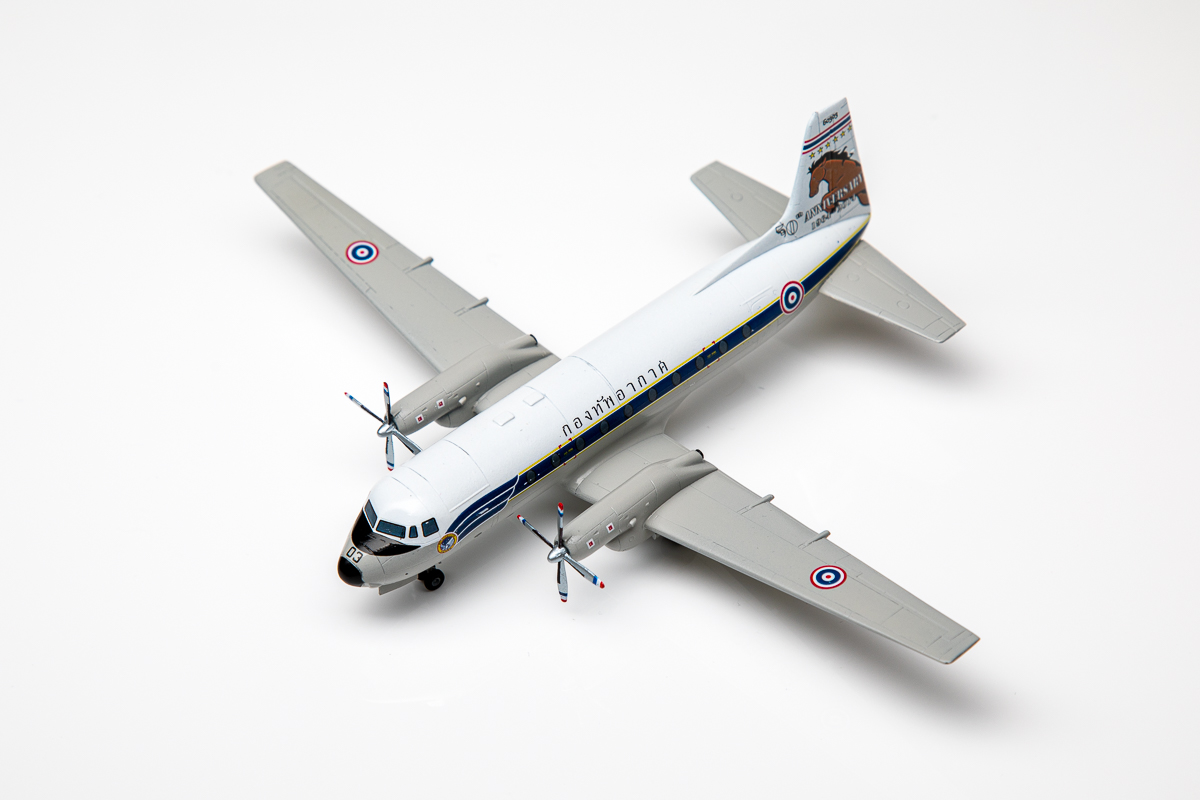 Next up was an unplanned one, as it was a review kit that showed up this year. The Mark I Models 1/144 HS 748 is a really nice little kit that builds up pretty quickly and has a ton of marking potential. Once again I busted out the Mission Model paints to finish this one, and because it was a recent review item, I didn't try anything new on it. There is a full article on it, though, so check that out for more useful tidbits. It does have me wanting to build another airliner, too, so I'll probably be adding one of those started projects to my 2021 finish list. I know I have a few that I've started, but I'm not sure I know where all the parts are. I've also got a couple unstarted ones that are very tempting as well, so either way, I'm doing an airliner next year.
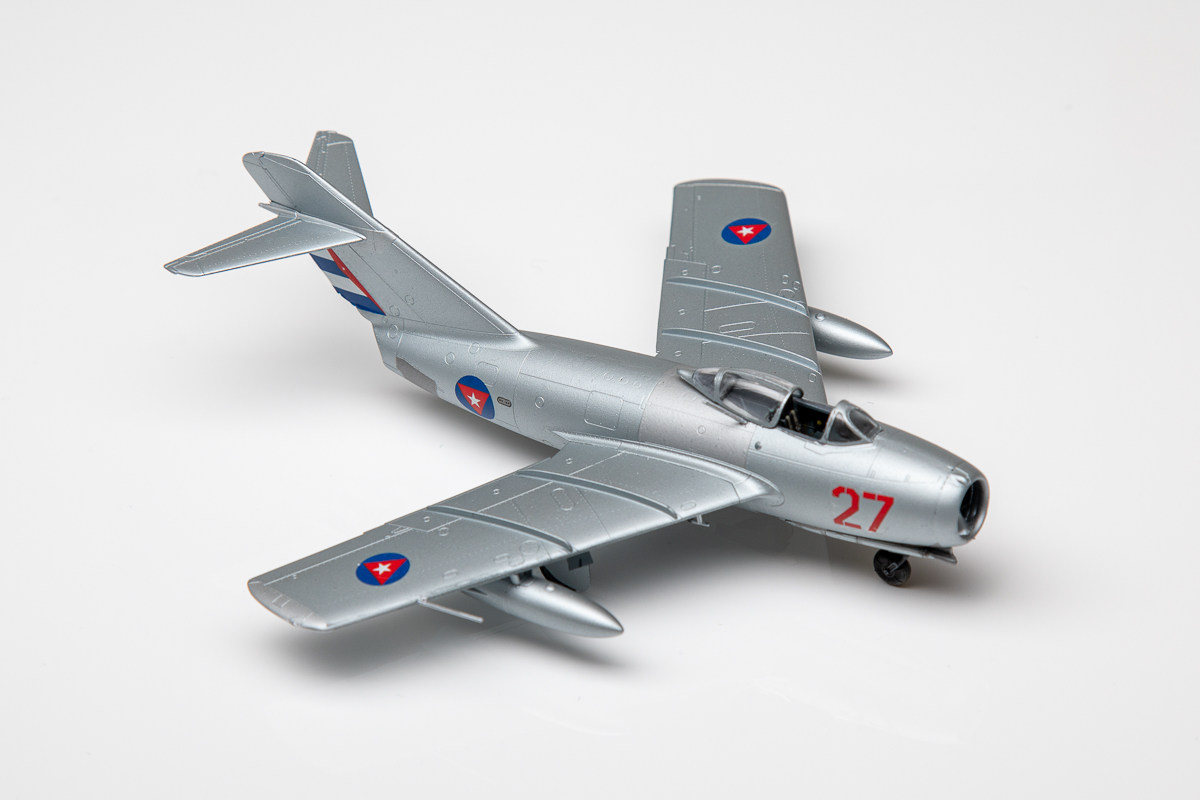
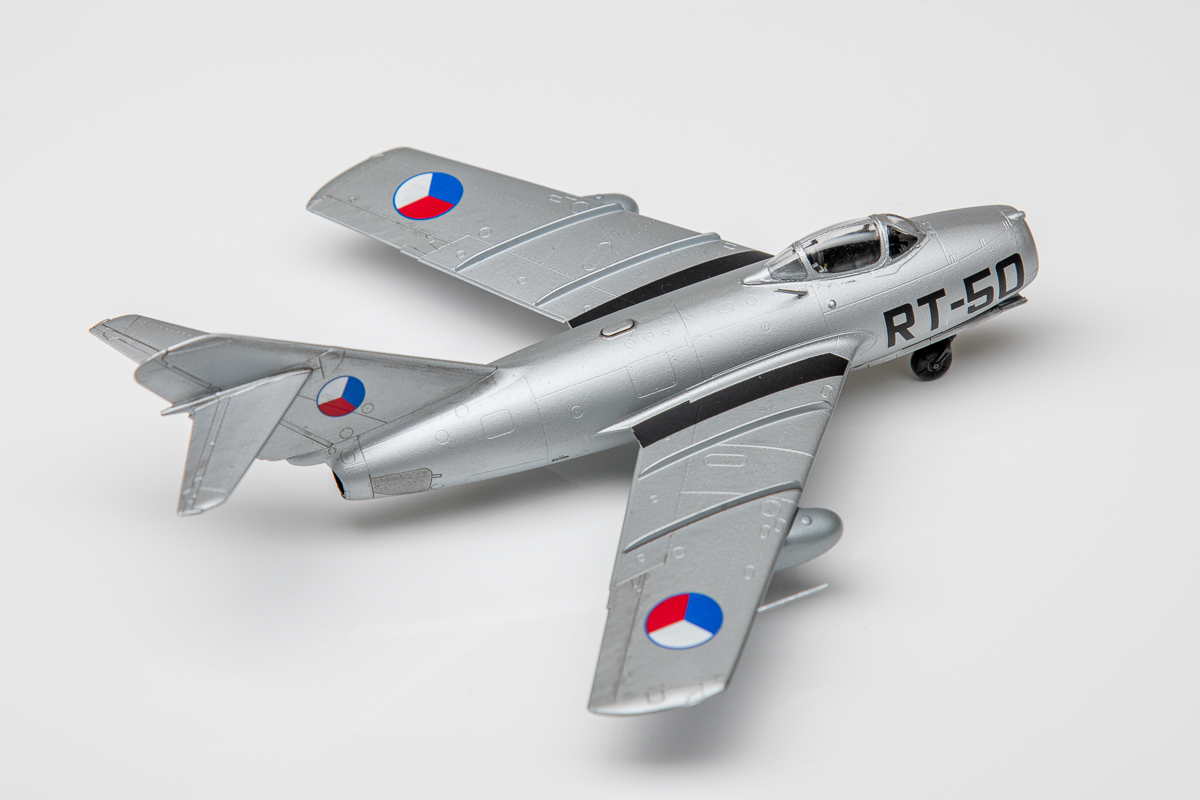
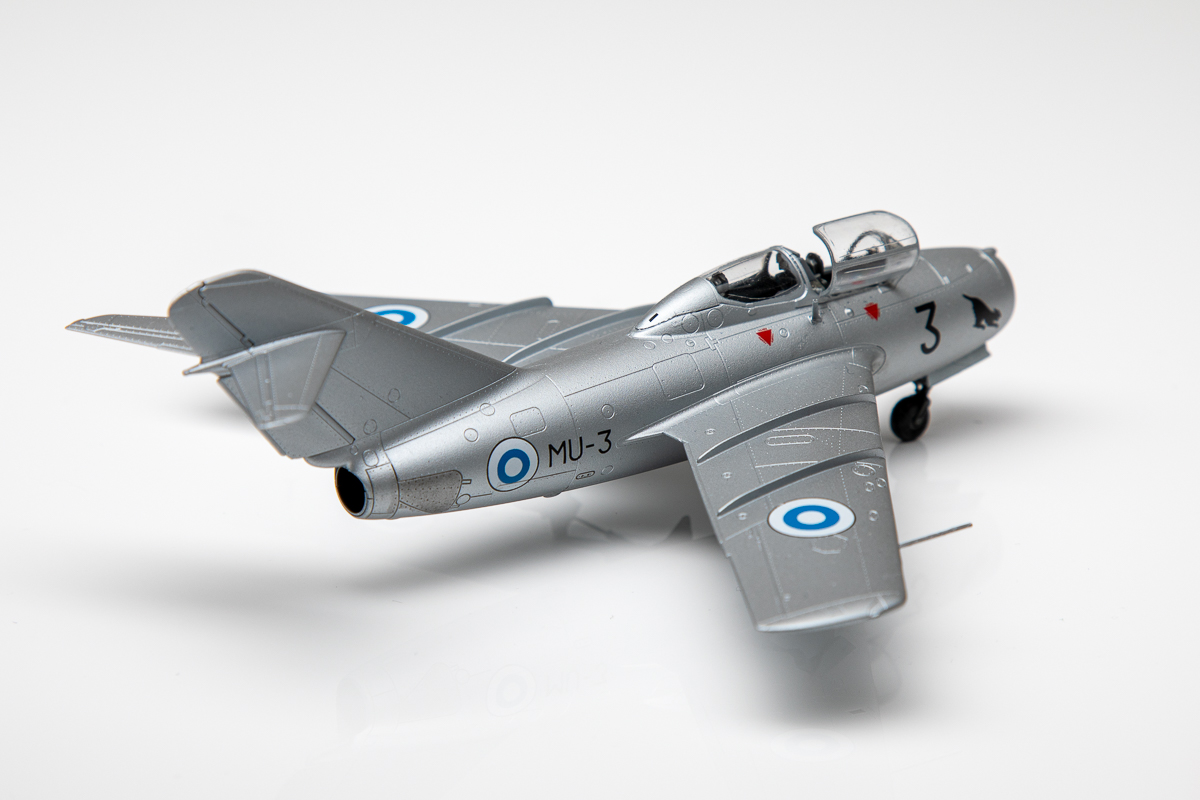
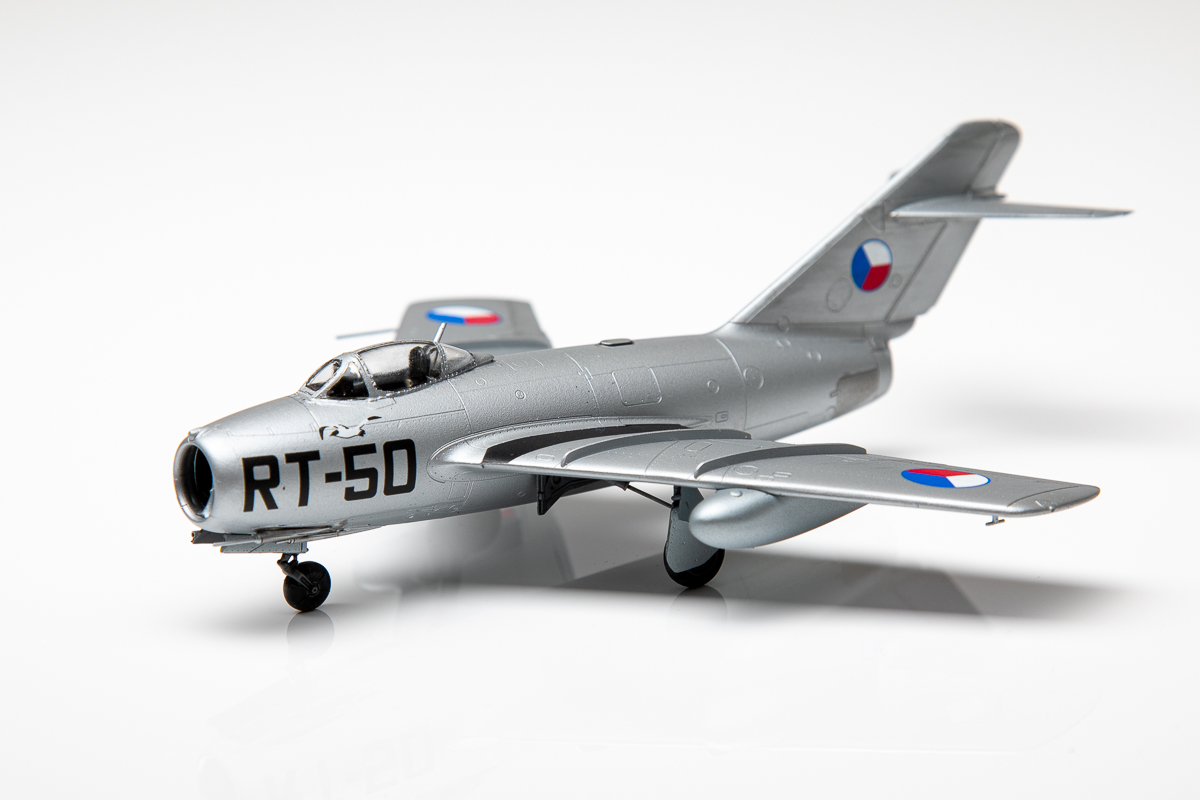
11, 12, & 13. Eduard 1/72 MiG-15 Trio
 With the Skyhawks done (or, at least mine anyway), our illustrious editorial team decided to do another group build, this time focusing on the Eduard 1/72 MiG-15. I had a hunch that this one would go sideways fast, so to make sure our editorial team of three had three finished MiG-15s, I built three of them simultaneously: a standard MiG-15, a MiG-15bis, and a MiG-15UTI. The standard I had as a Weekend release, while the bis and UTI I had as overtrees, all with photoetch. This was my first go at pre-painted photoetch interiors, and boy was that a LOT of fun to do! Interestingly, each photoetch set had a slightly different shade of gray for the interior, so I had to custom mix the paints for each kit. While the base painting was easy enough once the colors were mixed, the real fun was in weathering things up, and I tried a bunch of different techniques in all the cockpits. The net result is that all of these planes look like they've flown more than a few times.
 While the photoetch was fun, the kit assembly was more challenging. The tolerances on this kit are extremely good, which means it is very easy to get things out of alignment. By the third one, though, I had figured out the process to glue things together to pretty much eliminate any need for filler. The key for me was with the wings. I glued the upper wing halves to the fuselage first, then slid the lower wing half and glued that to the fuselage, making sure both of those seams were perfect. Then I glued the wings together. When I glued the wings together first, I ended up with a small gap at the front. That's not that big a challenge to fix, but it was an extra step. Another thing I noticed was that the cockpit parts fit perfectly right out of the box. So perfect, in fact, that after a couple coats of paint, the fuselage no longer held closed. So I had to make sure to clean all the mating surfaces to not only get a good glue up, but also to get back to the original part tolerances and ensure a clean fuselage fit.
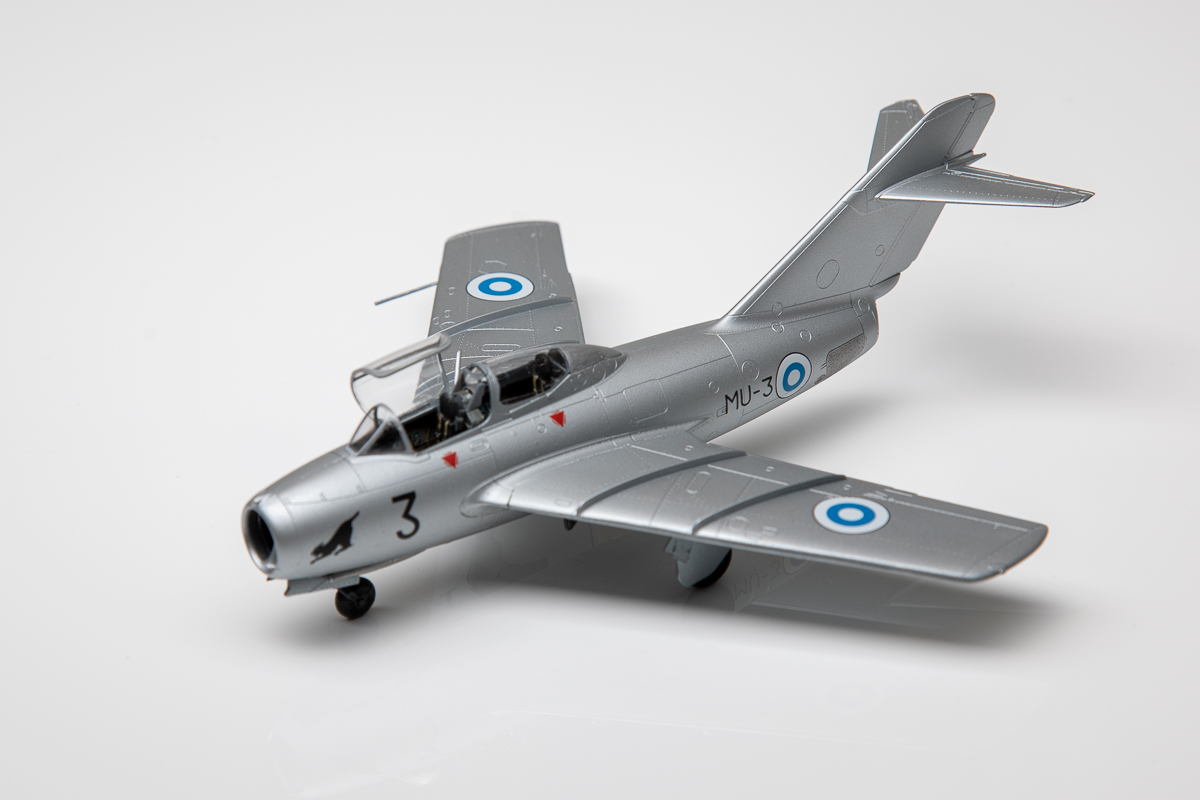 For painting, I decided to do more experimenting. I went all in on the Mission Model paints, and had a horrendous experience. I apparently had my mixtures wrong and the paints did not adhere at all. I discovered this when I noticed a slight blemish on the nose and tried to polish it out with some wet sanding with 6000-grit sandpaper. The water washed the paint clean off, without even having me touch the model. I definitely practiced my calming breaths that night. I ended up switching to Vallejo and did the Finnish UTI and Czech standard in just an overall silver, while the Cuban bis got different color paint for different panels, for some variation. I will return to the Mission Model metal paints soon, because I have seen some gorgeous models finished in them and I will definitely want to figure out how to best use them.
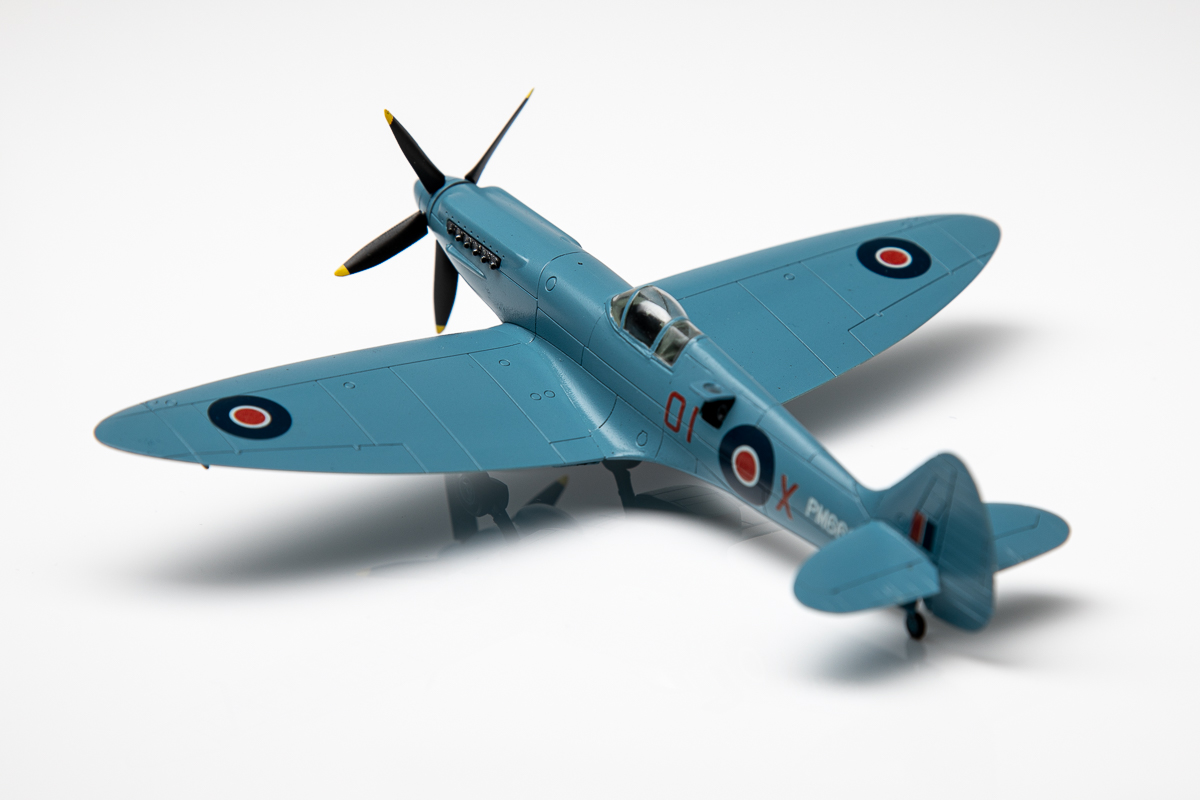
14. Airfix 1/72 Spitfire PR XIX
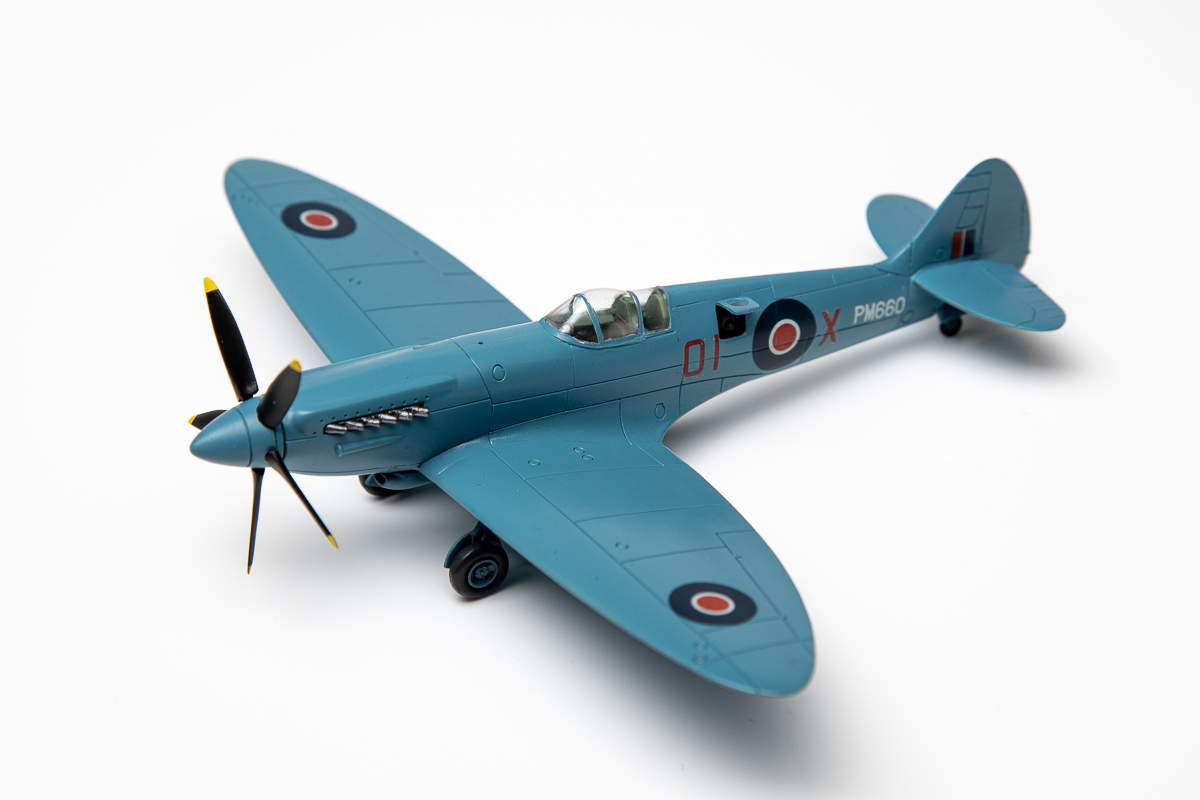 This is another surprise that I discovered. I vaguely remember starting this one, doing a Pavla interior and camera bay, replacement wing radiator, and replacement spinner & propeller, but I thought I had maybe gotten the fuselage together with the intentions of building it up as a Swedish example. I came across the box and opened it up to discover that, not only had I gotten the fuselage together, but I had also painted and decaled it up as an RAF aircraft. In fact, most of the construction was done, so all it really needed was painting the spinner & propeller, painting the landing gear, and doing the final assembly. So, a couple days' work and it was done. Makes me wonder how many other models I have hidden away that are much further along that I remember.
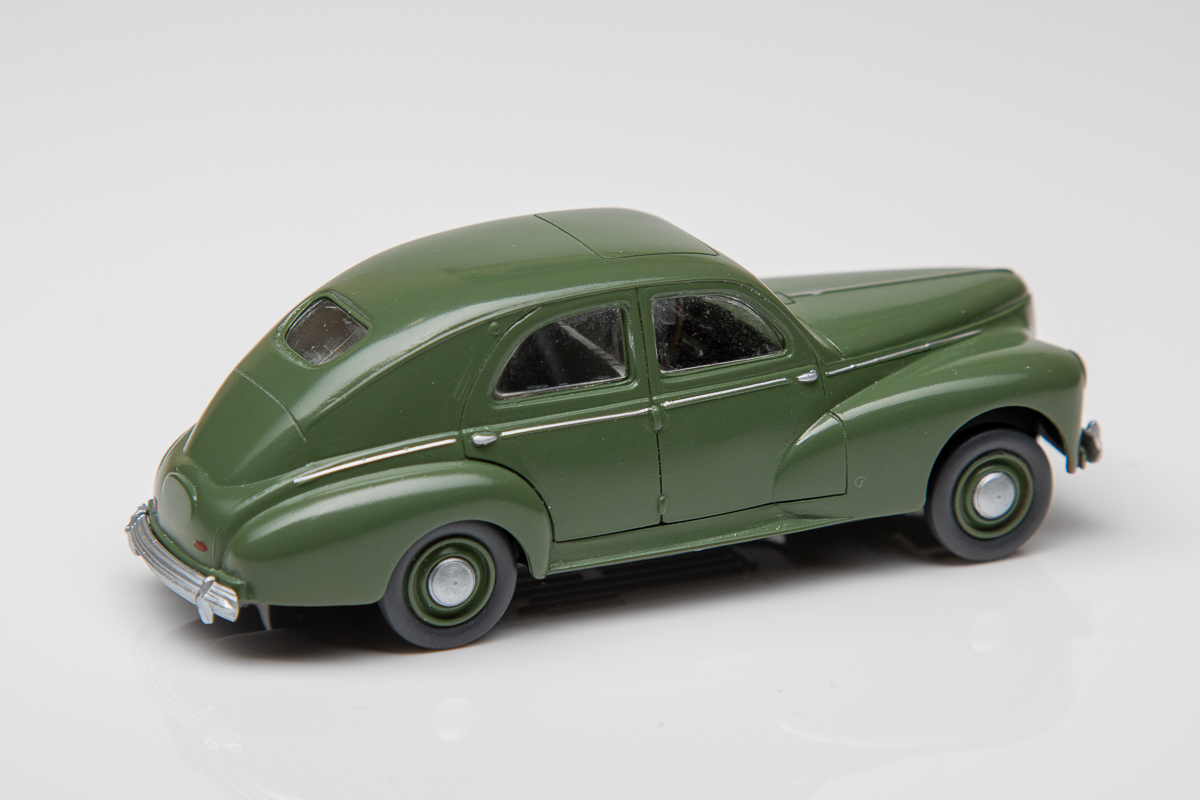
15. Heller 1/43 Peugeot 203
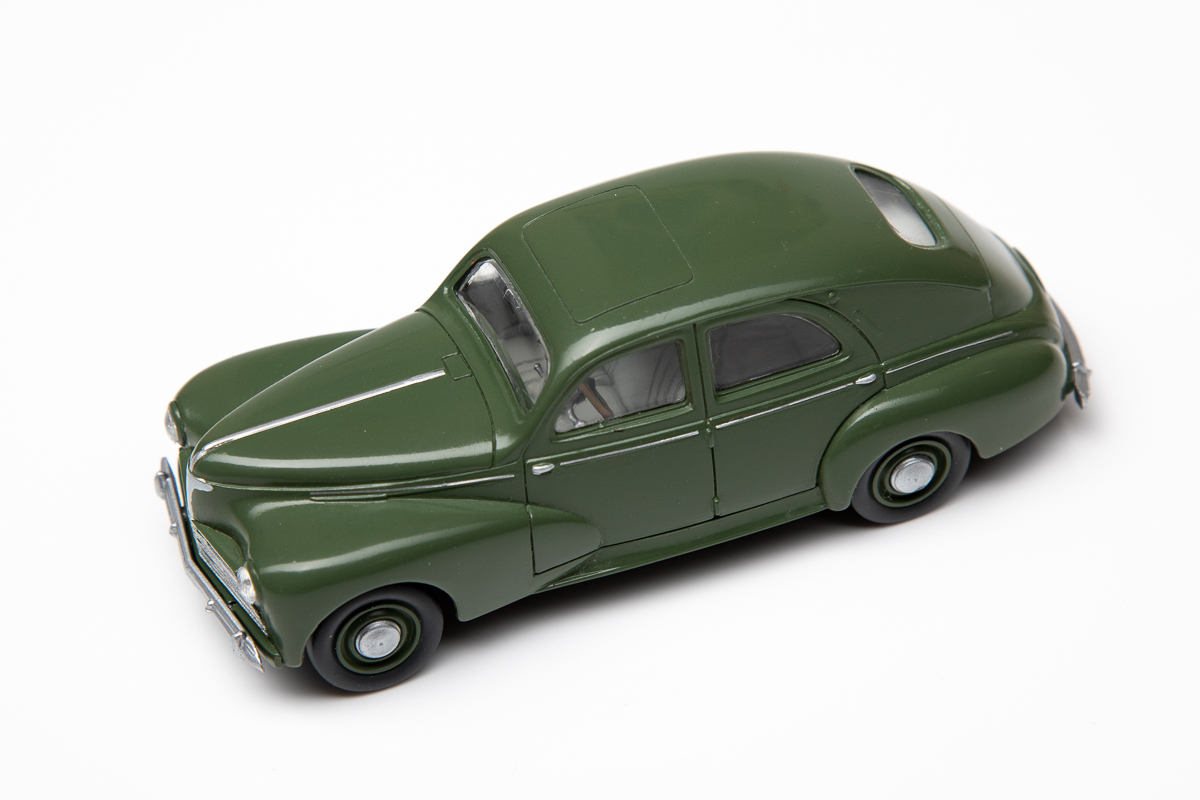 First Skyhawks, then MiG-15s, now comes our third editorial group build (so far at this point we've had three Skyhawks and three MiG-15s build by the three editors, five of those models being mine. Slackers....). This time around we decided to build a car, something I have never done before. The Heller 1/43 Peugeot 203 is a very simple car, but it builds up into a nice looking car, so I decided that, in addition to trying a completely new genre, I would try my hand at scratchbuilding bits and pieces. I ended up scratchbuilding the interior door handles, window cranks, and map pockets, all on inserts that got glued to the inside of the body. And I'm glad I did, too, because once the window glass was in place you can't see any of it. Of course. But, I had fun doing it, and for my first car model, I think it turned out okay. I'll definitely try doing a few more in the future.
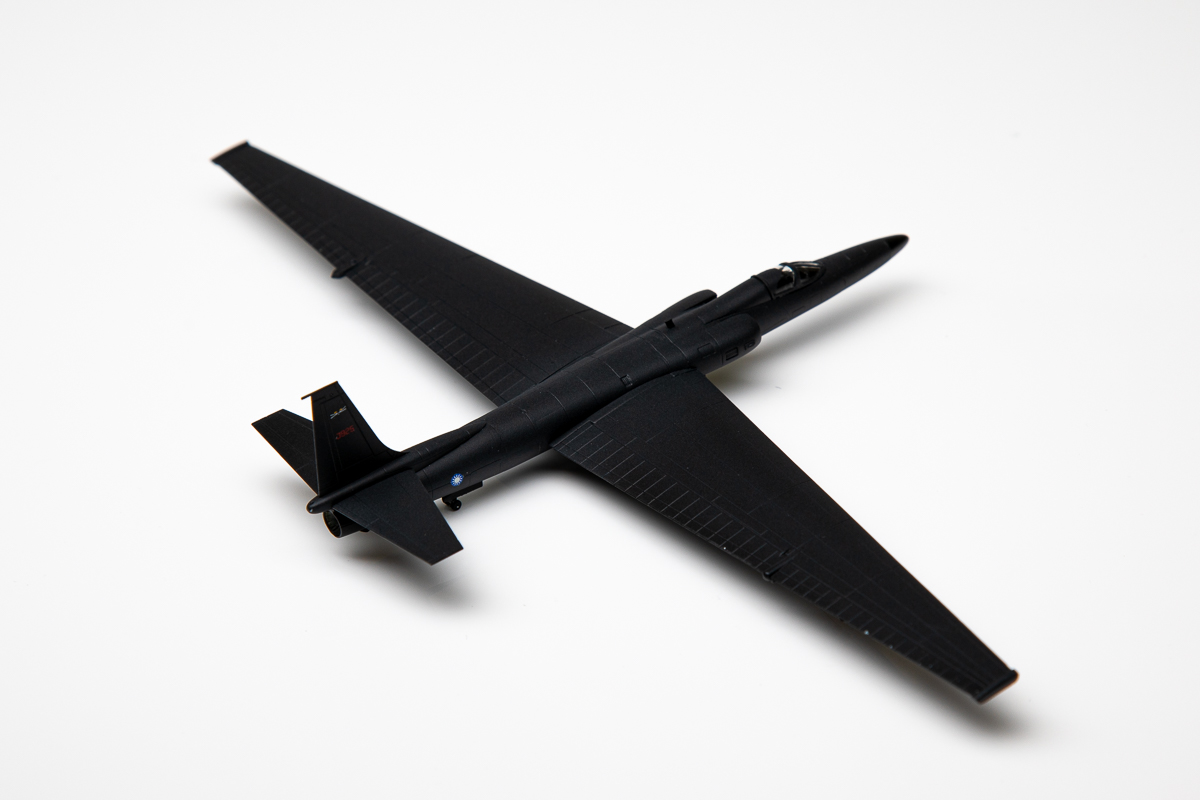
16. Dragon 1/144 U-2R Dragon Lady
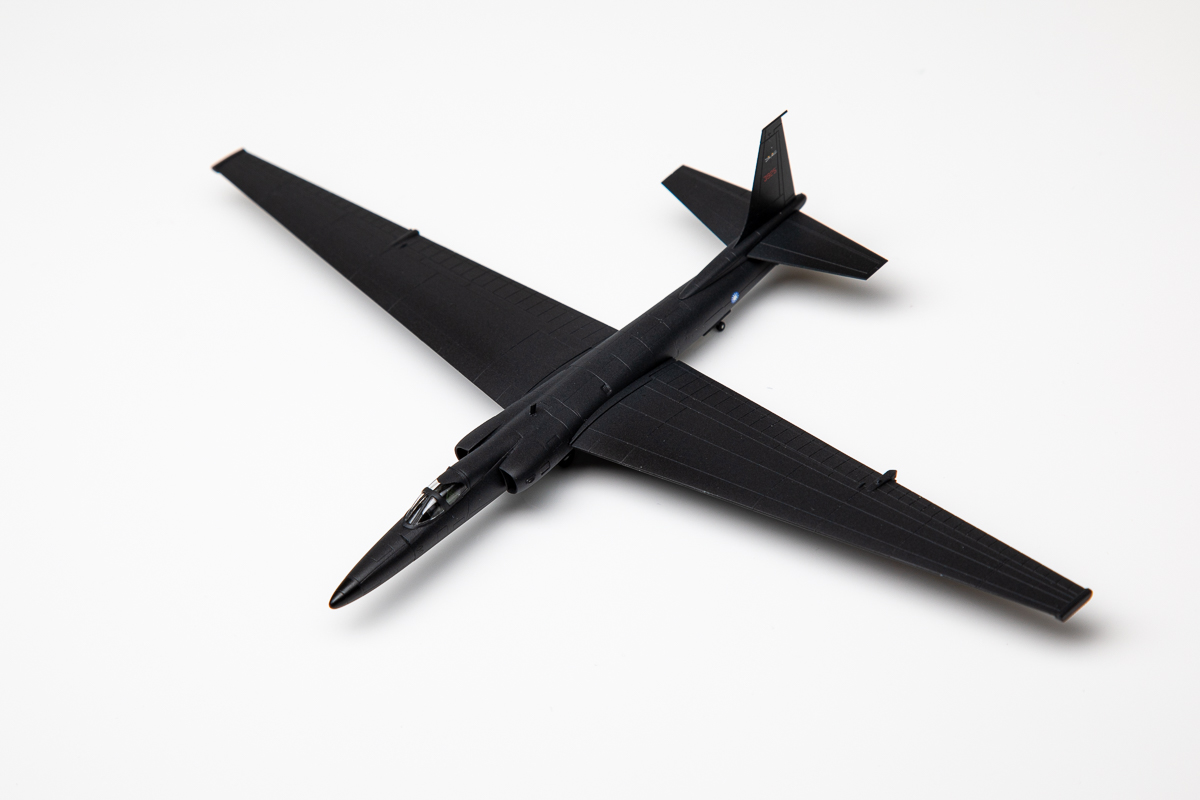 Back to finishing started models, this one wasn't too far along before being tossed back in a bag. Dragon likes to push the envelope of mold technology, and this model reflects that. The fuselage is made up from way too many pieces as a result, so this was an exercise in filler avoidance. I could have glued everything together in a matter of minutes, but I would have had a lot of time spent working with fillers. Instead, I took an inordinate amount of time doing test fits, careful trimming and filing, more test fits, a bit of plastic cart application, and a few more test fits. The end result was only needing filler in one small place, and as a result hardly any surface detail being lost. For markings I stuck with the kit decals and went with a Taiwanese example, just to have a tiny bit of extra color on an otherwise bland finish.
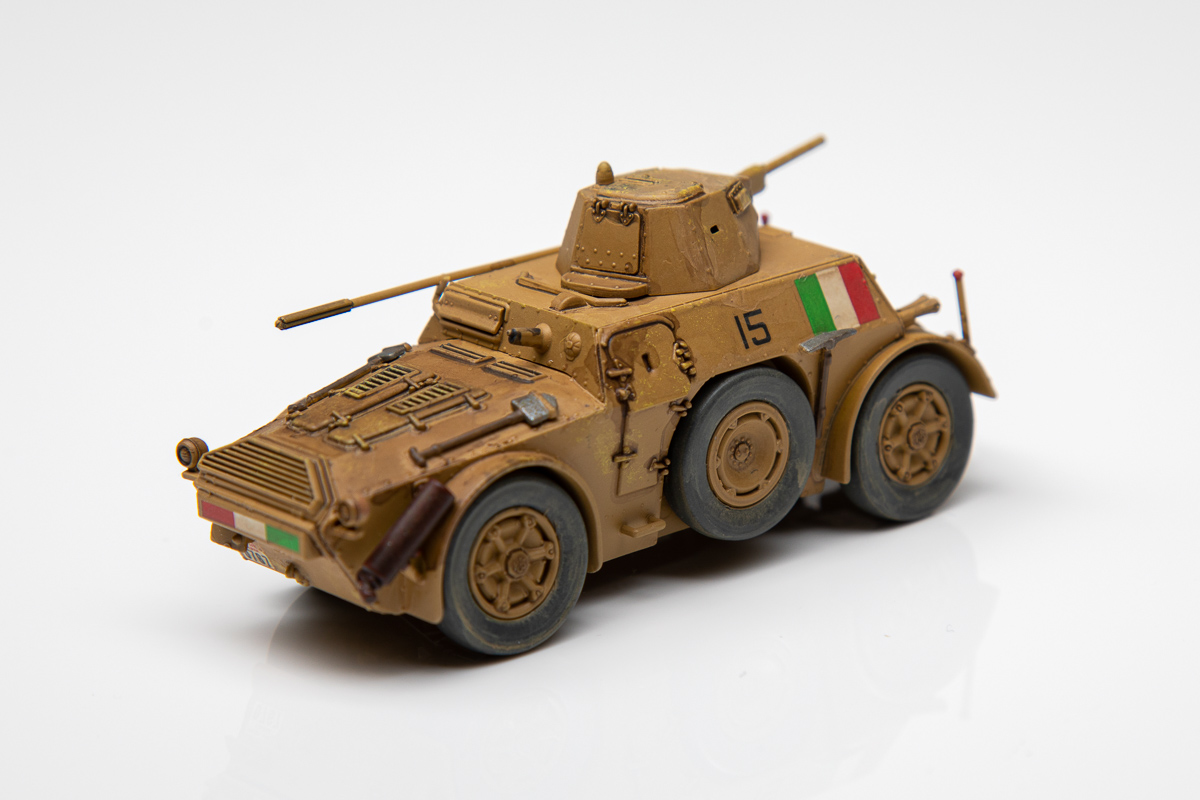
17. Italeri 1/72 Autoblinda AB41
 Another review kit started back in 2018 or thereabouts, and tossed back in the box when I discovered I screwed up the assembly of the chassis. Basically I got the wheel alignment off on one side, and the way the kit goes together there's no easy way to fix that. At least that's what I thought at the time, but come to find out all I needed to do was cut off all the locating pegs for the wheels, glue one in the right position, and align the rest. Painting was very simple, as the vehicle is mostly one color. There's still some small details that needed some painting, though, so I was able to practice my handpainting skills. For this build the main thing I wanted to experiment with was with different weathering techniques. I tried washes, highlights, drybrushing, differential painting, and more. Might be overweathered now, but I learned a lot of different techniques and I'll apply those in the future to a lot of other builds.
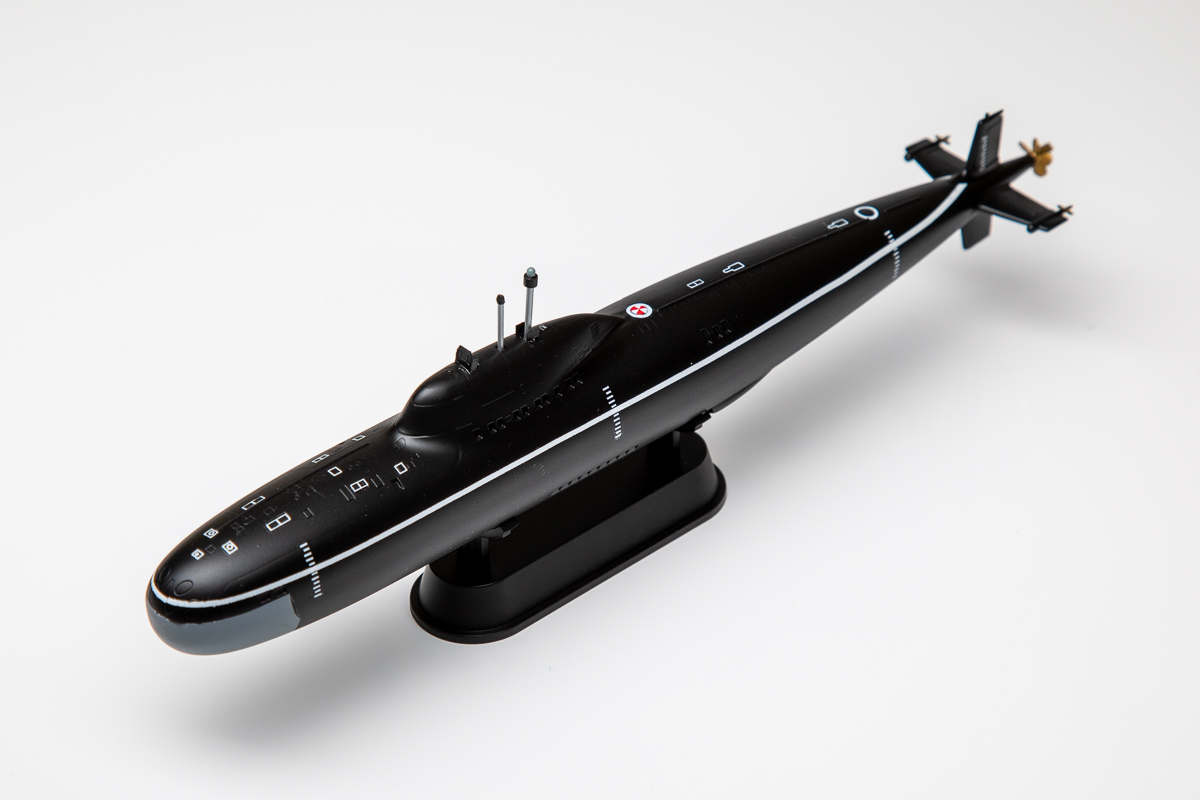
18. Hobby Boss 1/350 Alfa Submarine
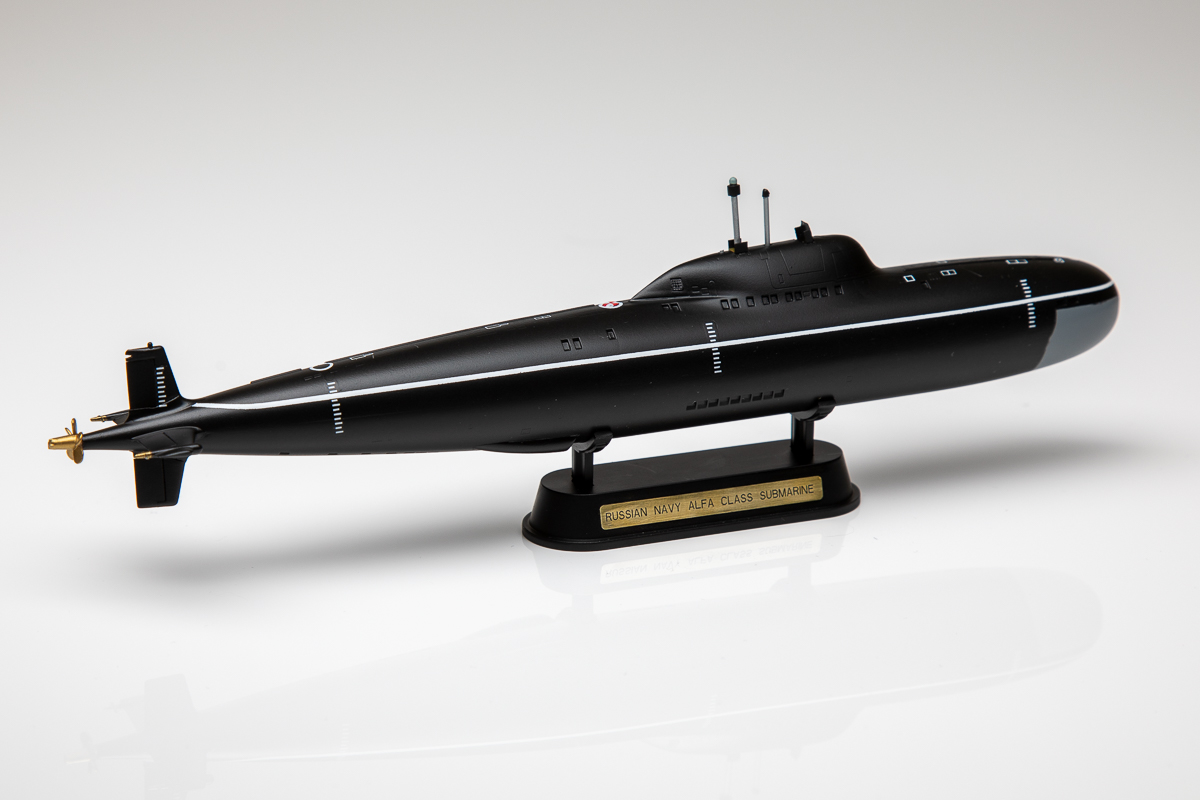 Coming down the home stretch, I looked across what I had finished so far this year and, well, I was impressed. I noticed that I didn't have a ship, though, and luckily, me being me, I had started a bunch of submarine kits over the years. I grabbed the Hobby Boss 1/350 Alfa sub that I had started back in 2012ish and grabbed the sandpaper. The Hobby Boss kits are decent for the most part, but they do need some extra care in getting the long seam down the hull side smoothed out. Painting the Alfa sub is probably one of the easier subs to paint, as it seems most of those are overall black, rather than having a red hull bottom. For some variation I painted the sonar dome in front a gray. No real experiments here, just another started model to finish up, although I was tempted to go all out on the weathering. I decided to save that for my next sub (maybe the Victor III I have started?).
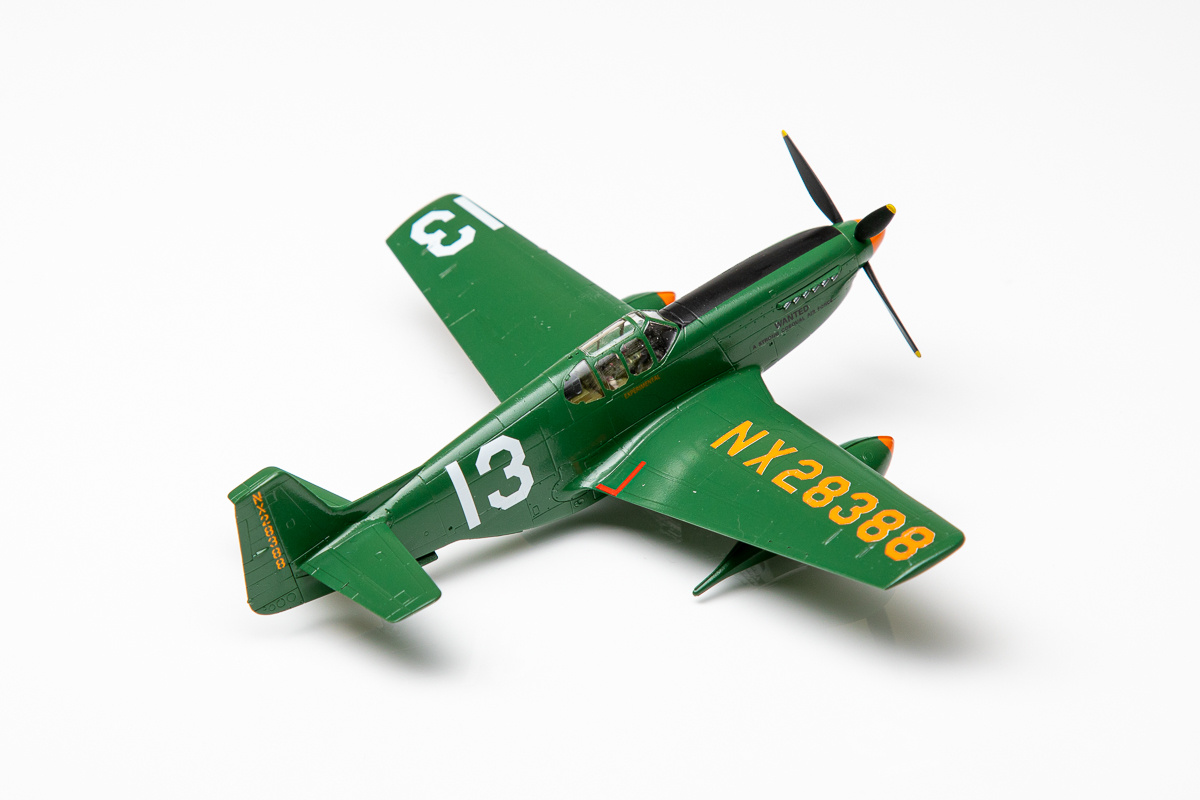
19. Hasegawa 1/72 Racer P-51B
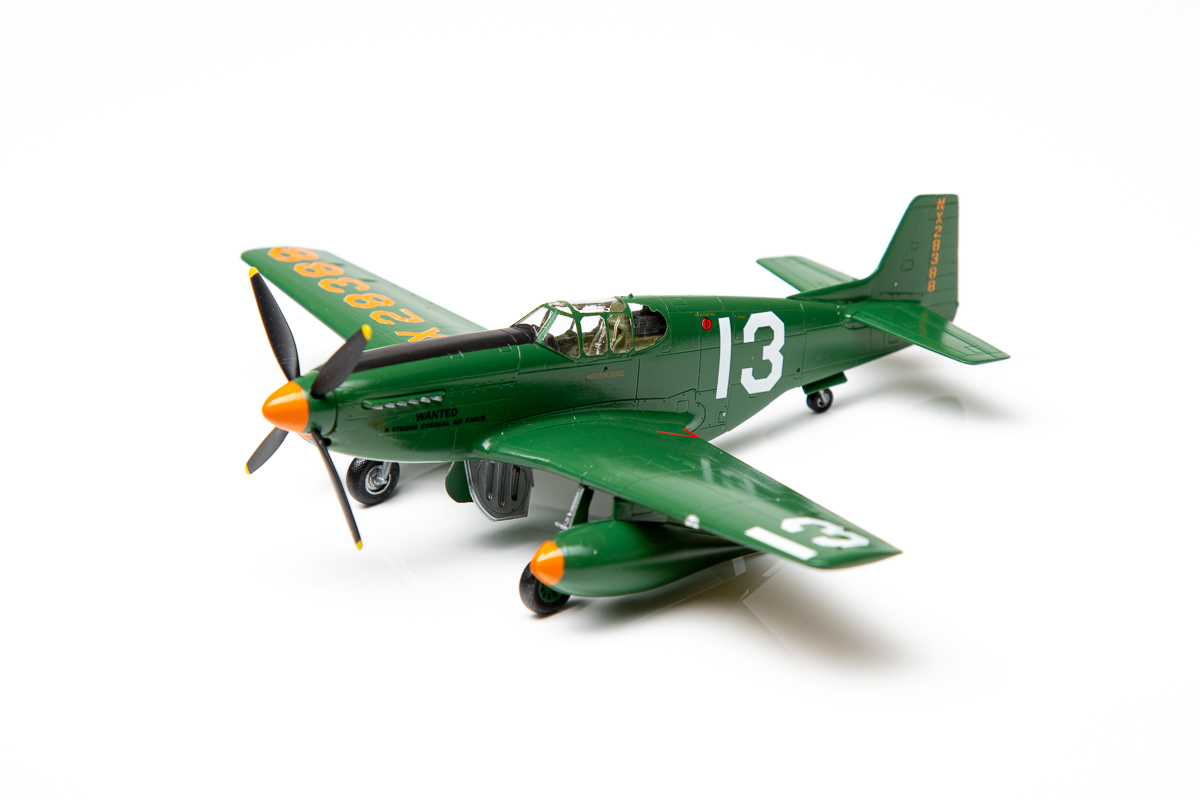 This one was a build done specifically for a Museum of Flight display that is coming up, so it was built to a deadline. Right when I started it, though, Eduard announced that they were coming out with photoetch for the Hasegawa (now recently re-released under the Hobby 2000 name) P-51B. So I picked up a couple PE sets and mask sets, and went at it. I finished Jackie Cochran's green plane first, and added a couple of drop tanks from an Academy P-38 Lightning kit (which I had started but not finished... shocking, I know). I had to create new decals, though, as the nose text had a misspelled word on it. I also had a problem with the big wing registration decal, and had to recreate that. I'll finish up the second one, Thunderbird, in the next month or so and do an article on both of them, detailing the fun of using the Eduard Zoom PE set and all the challenges with the decals.
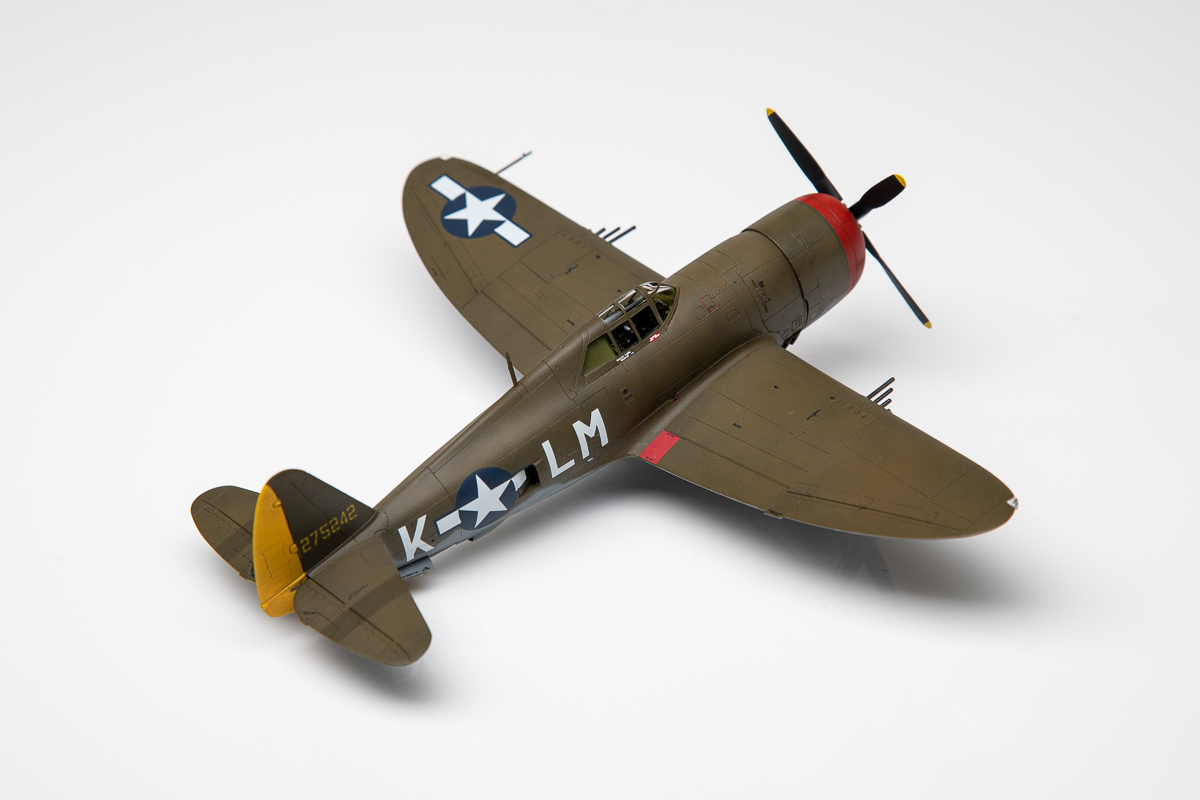
20. Tamiya 1/72 P-47D Thunderbolt
 Finally, we come to a close with my Tamiya P-47D. I don't remember when I had started this, I just know it was quite some time ago. The kit goes together beautifully, I remember that, but where I picked up it was already together, the engine was painted, and it just needed some extra bits and pieces done to the interior and I could paint it up. I decided to try out some airbrushing techniques on this one, so I painted Model Air olive drab as a base coat and then came back with a lighter olive drab (I think it was IJA khaki brown, actually) and a fine tip and did a bunch of stippling and squiggling all over the darker shade. The result really looks good and I'll definitely be doing that in the future for my faded olive drab finish.
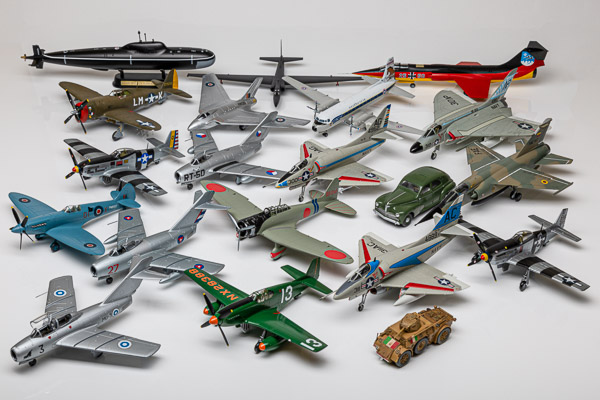
Summing Up The Year
So, there you have it. Twenty finished models in 2020. Out of the twenty, eleven were models I had already started, so I barely squeaked out my 'more starteds than new models' rule. Even more impressive is that I more than doubled my finished model count, accomplishing in nine months what I wasn't able to do in thirty years.
The best part, though, is I'm definitely back into my modeling mojo and looking forward to building more. My plan for 2021 is to continue the trend of finishing stuff I've started, which, if I keep the same pace I've done this year, should keep me busy for about three more years. Unless I discover another box of doom. At any rate, I am ready to say goodbye to 2020, and let's hope 2021 is a better year for all of us!