Overview
 I have always liked the looks of several of the French WW II fighters like the Dewotine D. 520, the earlier D. 510, the Potez 63 series twins and of course the MB-152. It was rather like a French version of a P-47 though not nearly as large nor as asesthetically pleasing. Several French, Polish and Czech pilots became aces flying the MB - 152 during the Battle of France.
I saw an ad for the 1/32nd Azur kit in the Squadron catalog and the following Saturday, lo and behold, there was one on the shelf at my local Mecca, Col Par Hobbies!
I got started on it on 16 October 2008 and finished it on 30 November.
The Kit
The Azur kit consist of 63 plastic parts broken down in the usual manner of fuselage, wings, stabilizers, landing gear well, l/g covers, tires, etc. Thirty-one parts are resin but 16 of these are cylinders for the Gnome-Rhone 14N-49 engine plus two spare cylinders, a fret of 24 photo etched parts, five clear parts for canopy assemblies and navigation lights and a film sheet with a gun sight transparency and landing light covers.
 As one finds with many short run kits, this one does not go together as easily as some. Most major components fit fairly well but there are some considerable gaps to be filled on the leading edges of both wings but these presented little problem. The "biggy" was where the resin cowling mated with the forward fuselage. This required re-shaping with a Dremel tool to make the contour of the forward lower portion of the fuselage match the rear of the cowling. I also found it necessary to laminate two layers of .010 sheet plastic to the lower radiator intake to get it to match the lower joint of the fuselage. Additionally, a 4 mm spacer which required sawing the cowl ring in half had to be inserted in the cowl ring to make it match the cowl and then re-shape it with putty and super glue. None of these is traumatic but an exercise you don't resonalbly expect to have to do.
 The interior is well presented with a very nice resin seat with photo etch braces. I decided to scratch build the instrument panels and add after market dial faces, switches and bezels. Electrical wiring and various hydraulic lines were also added with fine wire and solder to give a little "busier" look to the cockpit area. The resin gunsight is well represented.
I also discarded the the kit armament and scratch built the cannons using stainless and plastic tubing and added hydraulic lines to the wheel wells.
 During the final assembly I found that the crank case cover to the prop extended too far out of the cowling, so it was necessary to shorten it by some 5 mm to get the spinner / prop back to the position that looked correct.
Painting
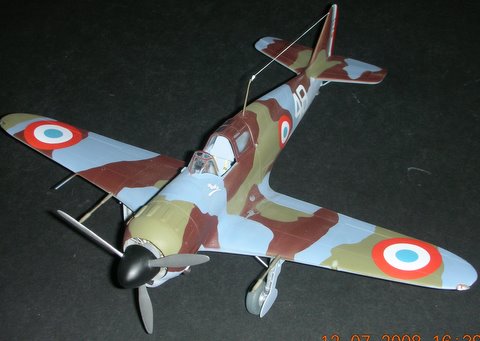
I used Poly Scale Acrylic French light blue for the interior and underside of the model. Wheel wells are Model Master light ghost gray, the engine, Model Master "jet exhaust" with a flat black wash, the engine block and crank cover are Model Master gunship gray. Topside camo is Gunze Mr. Color 23 dark green, the bluish portions are Poly Scale acryl French dark blue grey and the brown is Gunze French chocolate brown (now
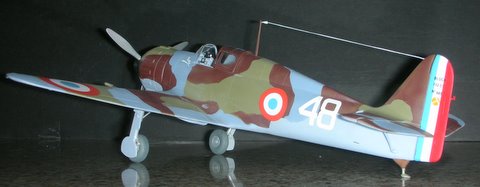
 discontinued), the spinner is Model Master semi-gloss black and the prop blades Model Master non-buffing aluminum metalizer. I also found that Aeromaster U.S. blue grey is a very good match for the Azur decals French insignia blue. Masking except for the canopy was done with "Silly Putty".
The decals went on well but you must be sure to position them where you need them the first time as they are very thin (but opaque) and do not move easily once in place even with liberal amounts of water and decal solution. I found on the decal sheet that the aircraft number for the tail had one of the pair printed in reverse, so it was necessary to use a different a/c number for the aircraft I had portrayed.
Conclusion
 All in all, you'd really want to build this kit in 1/32 to go through all the fiddling and modifications necessary to make it fit correctly, so I really couldn't recommend it unless you are willing to do all the "fixes".