Overview
From time to time, I get the urge to build another Lindberg Stearman. It was the only 1/48 Stearman kit available for the past 50 years or more and isn't a bad kit. It lacks any cockpit detail, but otherwise built up into a respectable Stearman model. I probably built it half a dozen times growing up.
 So when I saw a Revell Stearman on the hobby shop shelf back in April of this year, I wondered if Revell had re-issued the old Lindberg kit. Nothing on the box indicated it was a new tooling, and the price seemed too low for a new tool ($20, with tax, if I remember correctly). I asked the hobby shop guys if it was the old kit, but being a shop that caters more to the RC crowd, they didn't know. So I decided to buy it and put it on the pile of unbuilt kits for a future build.
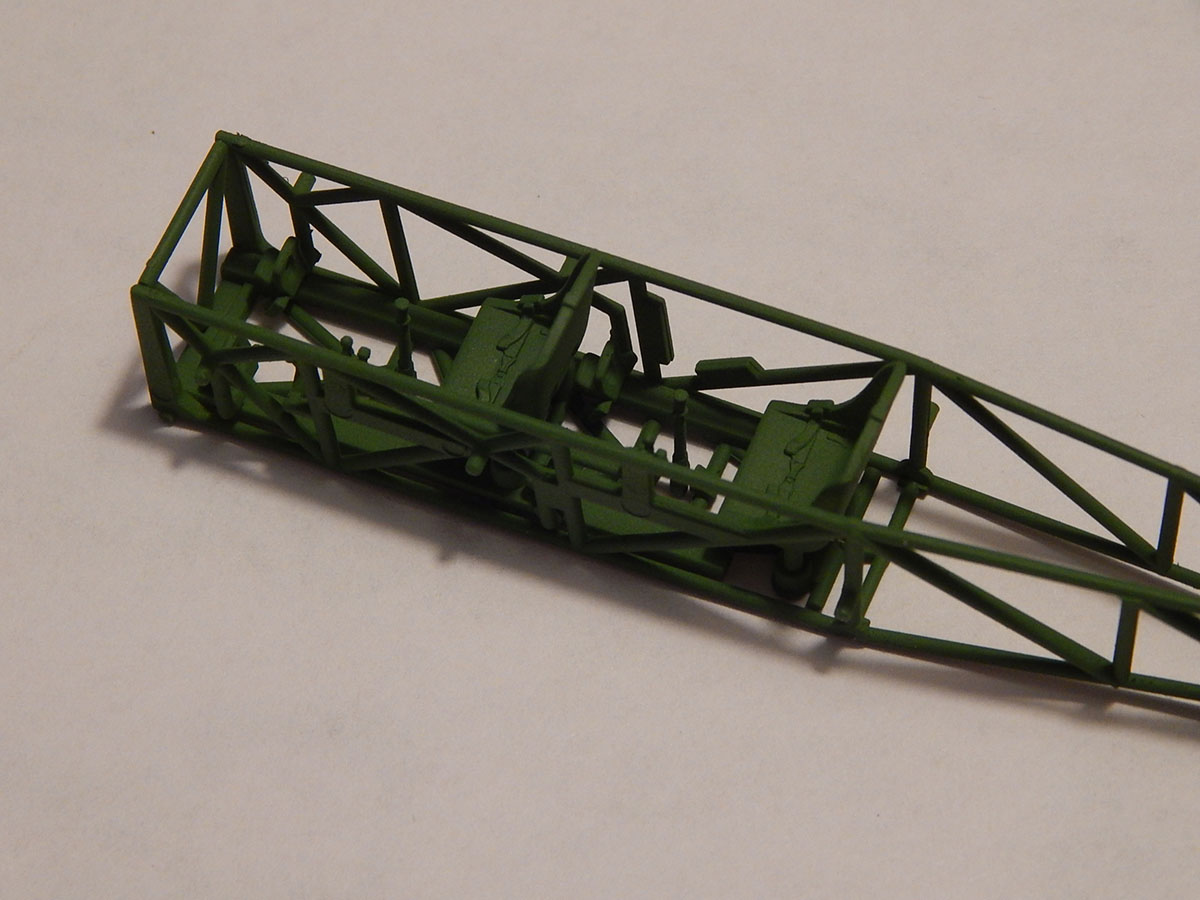
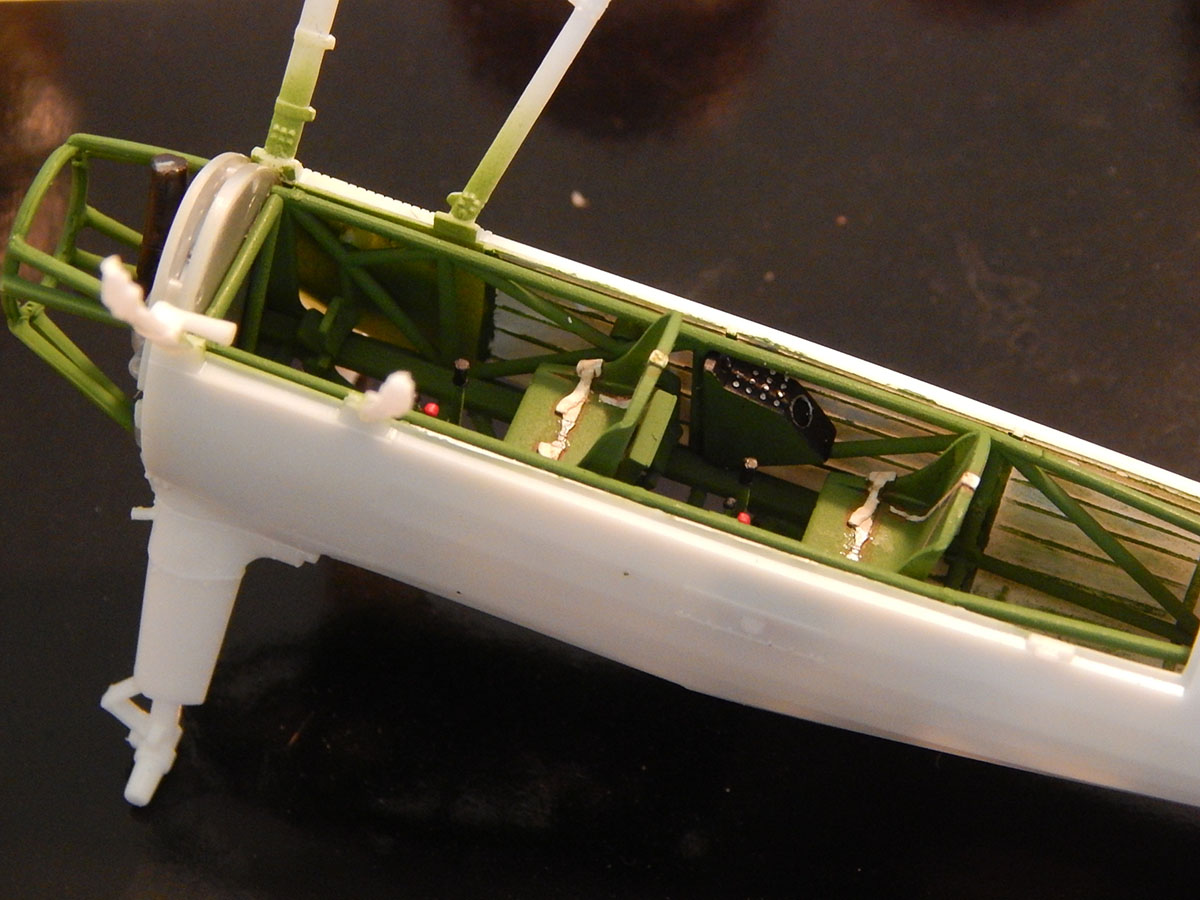
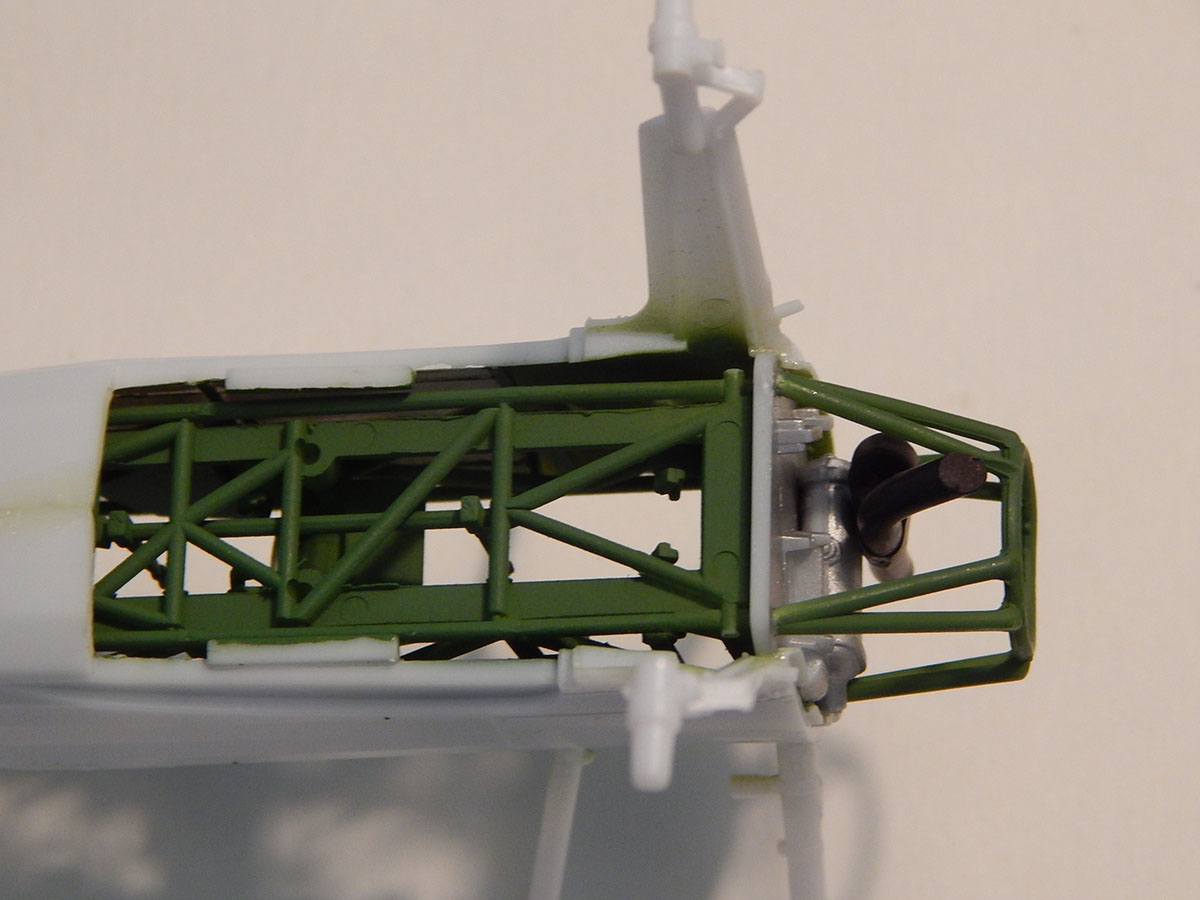
But when I got home and opened the box, my heart leapt. This is not the old Lindberg kit. This is a brand new kit, with a whole bunch of parts, (60, to be exact). The first thing I noticed was full-length fuselage side trusses. A perusal of the instruction sheet showed a complete cockpit, a multi-part radial engine, and a conical engine mount and other details forward of the firewall.
 In addition to all of this nice detail, the kit is well engineered, with landing gear and cabane struts molded integrally with the fuselage, separately molded cowl panels, as well as the sheet metal decking of the top of the fuselage in the cockpit section. In short, the out-of- box builder has everything he needs to build a nice, well detailed model, while the super-detailer has all the main components, and won't have to chop things up to show his work for a 'down for maintenance' diorama.
The Build
There is not a lot to say about the build. Follow the instructions. Everything fits like it's supposed to. There's no bumps to get tripped up on, no challenges, no issues.

|
|
|

|
After the interior of the fuselage halves were painted, I assembled the fuselage. Again, there are no issues or challenges here. I recommend applying the wing-walk decals prior to installing the bottom wing, because the inboard edge of the bottom wing fits under the edge of the fuselage.
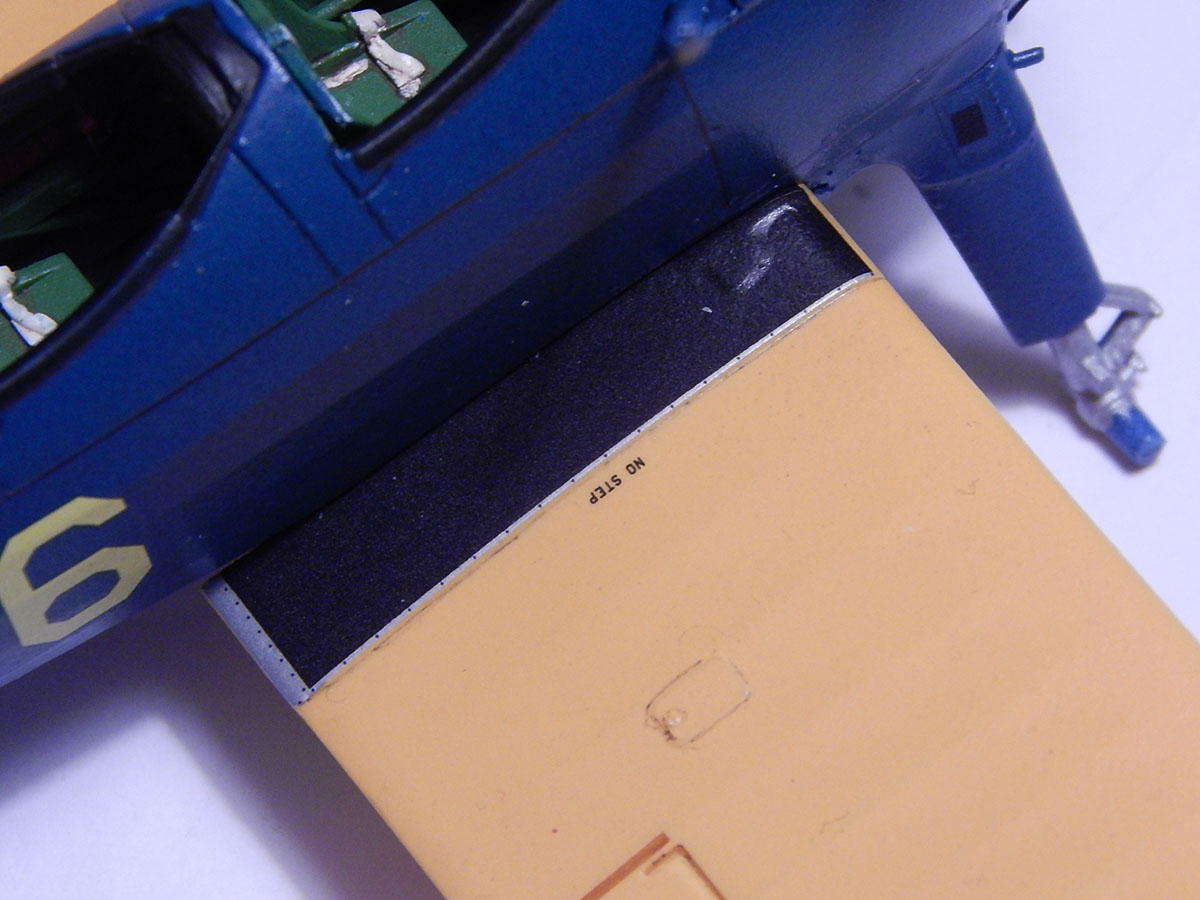 And I would like to mention here that when I first saw the provided wing-walk decals, I smugly rolled my eyes and thought, "I can paint my own wing-walks, thank you very much." But I applied one just to see what it would look like. And it looks terrific. On the sheet, I could clearly see the strip of metal with fasteners on the trailing edge. But on the model, I saw that there is also a very, very narrow strip of metal, with fasteners, along the outboard edge of the decal. It looks better than anything I could paint on my best day.
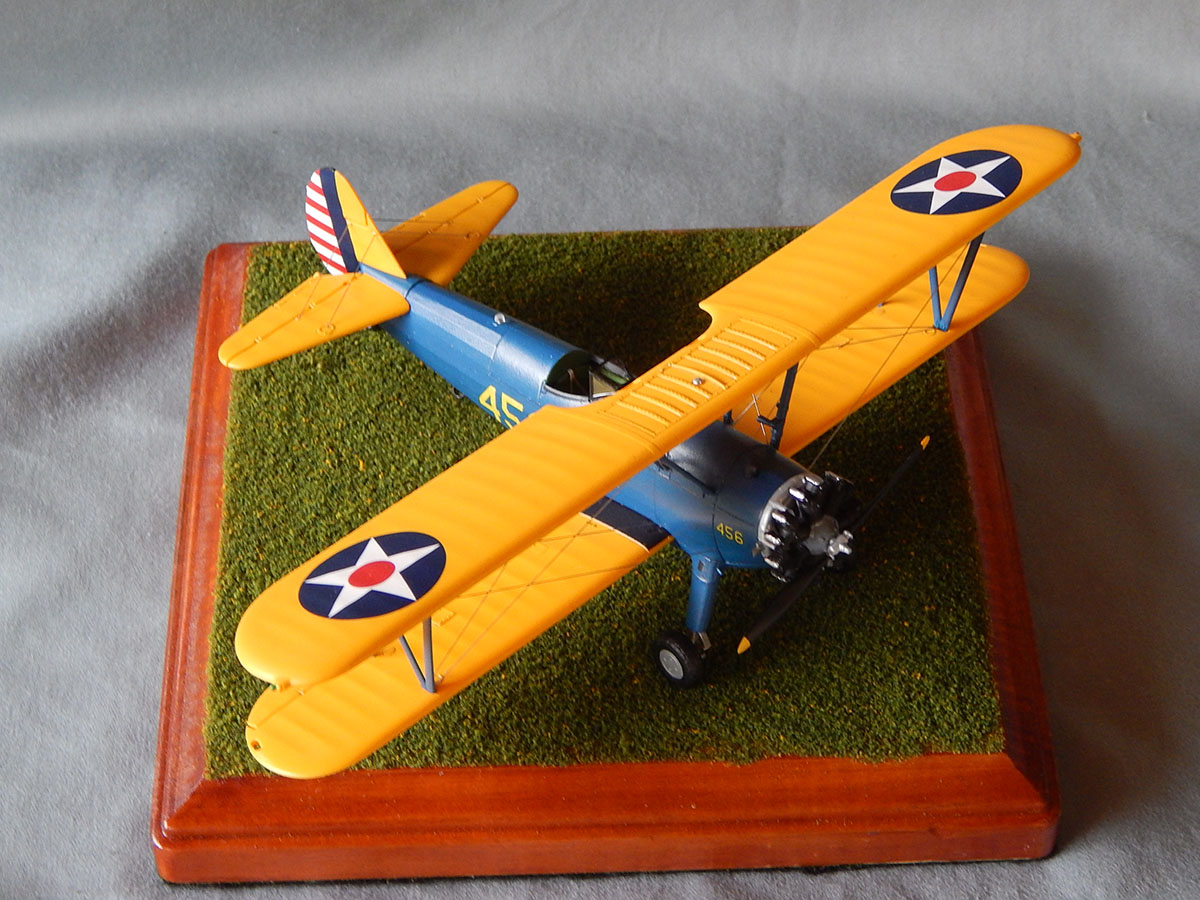
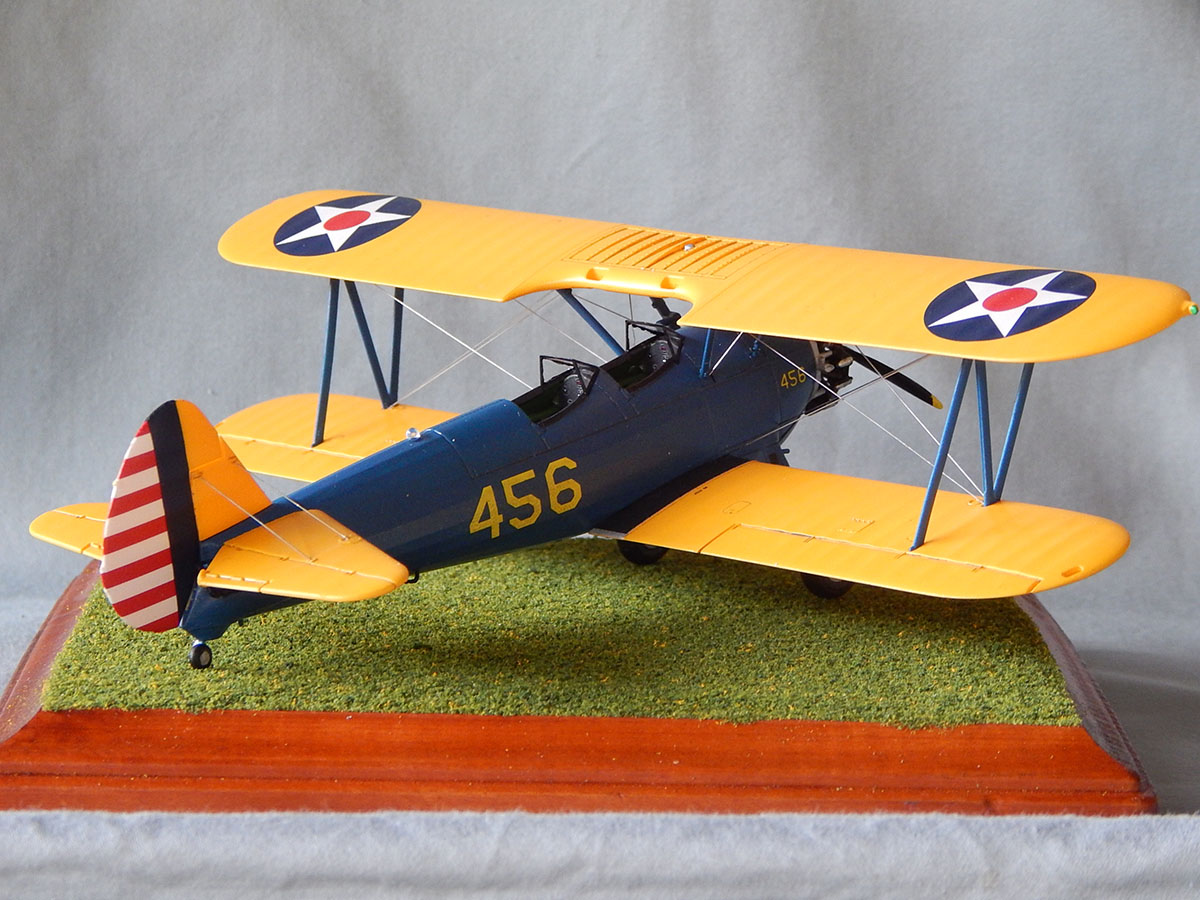
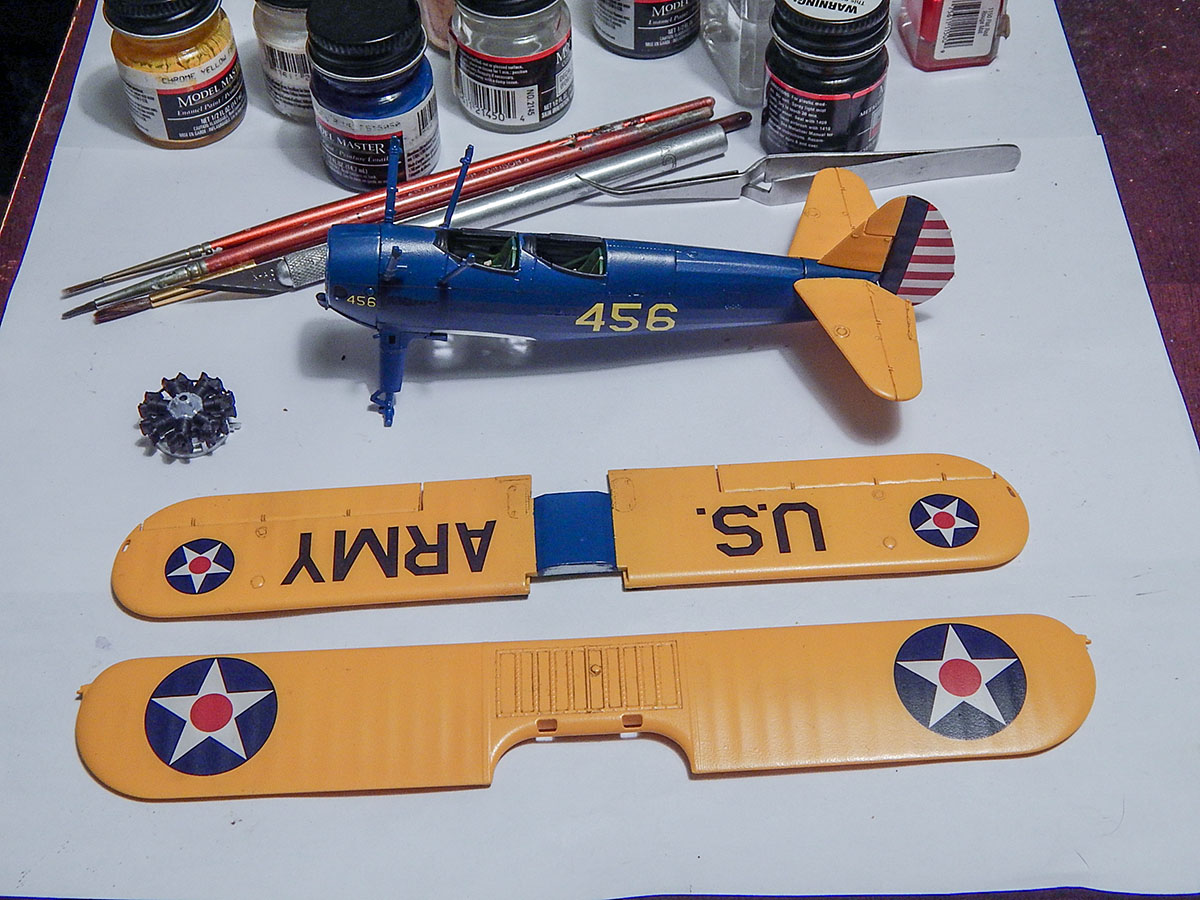
I'll also say here that if you really like the colors on my build, I used Testors Model Master Blue Angel Blue, lightened with a bit of white, on the fuselage, and Testors Chrome Yellow on the flying surfaces, straight out the bottle. The blue is darker than what I see on most of the Stearmans flying today, but I'm happy with it.
 With the fuselage and two-part wings assembled and painted, it's time for the main assembly. Again, everything fits. The integrated cabane struts make setting the top wing a snap, with little to no chance of having a crooked top wing. The interplane (N) struts were snapped into place after the glue dried on the cabanes. Gluing them isn't ever really necessary. They won't go anywhere. Still, I hit each attach point with a drop of liquid cement after the struts were in place. I did get ahead of myself and installed the top wing before I attached the windscreens. I thought this might create a challenge installing the forward screen, but it slipped right in with tweezers. I always use white glue to attach canopies, so even if I did get a glue smudge installing the forward screen, it isn't visible. But when I build this kit again, I'll install the windscreens before the top wing.
 Next I installed the wheels, engine and prop. The prop is held in place by a retainer ring that is located inside of the crank case. So if you want your prop to spin, you'll have to install it before the block and cylinders are attached to the pushrods and exhaust manifold ring. Build as per the instructions, the prop spins freely on a breath with no wobble. The wheels are a 2-part affair with the outer hub molded separately, making it easier to paint.
At this point, there's nothing left but the rigging and a few tiny details. I left the lift handle off until last to avoid breaking them while doing the rigging.
The most challenging part of the entire model was installing the clear dome behind the cockpits for the strobe light. The challenge is that it's a tiny, half-dome that would be very easy to drop, or pwing from the tweezers, and most likely impossible to find if that were to happen. So be careful there.
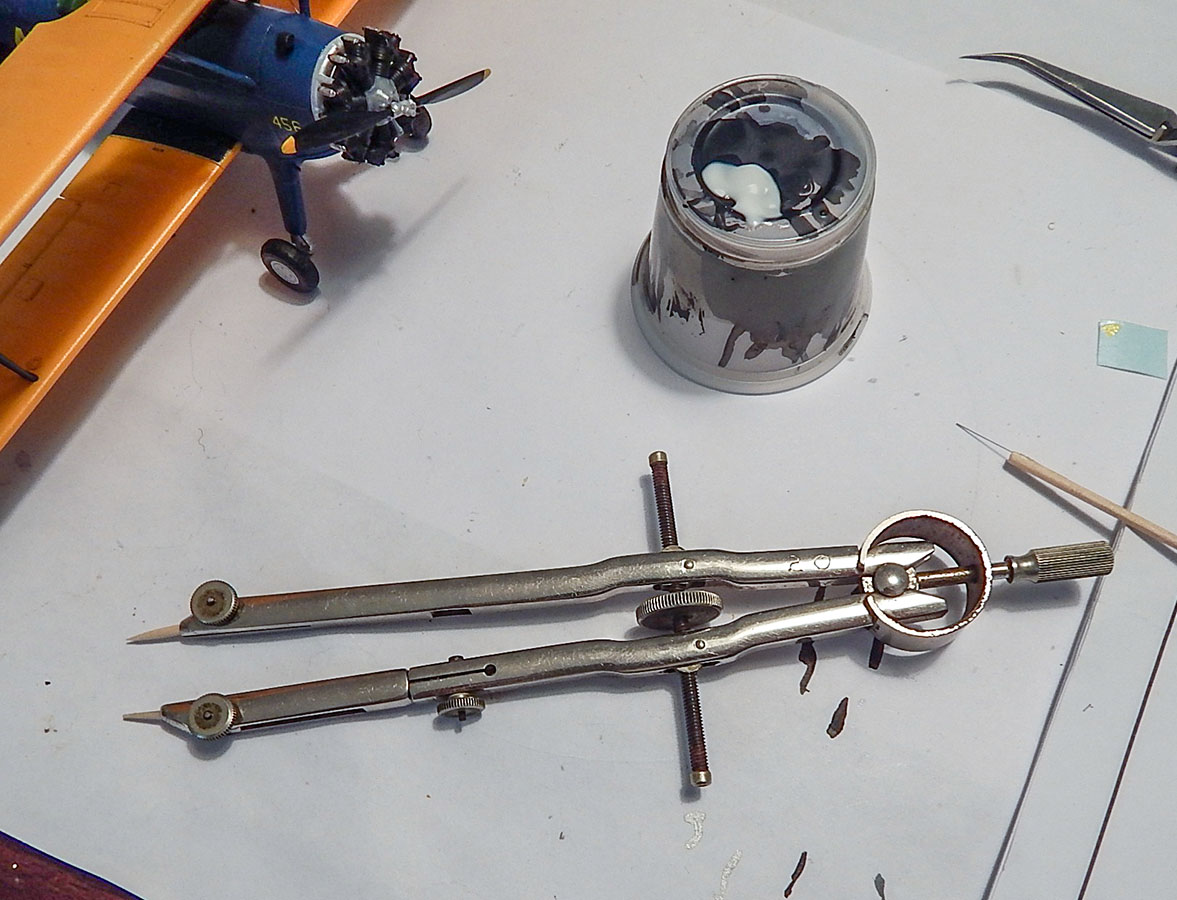
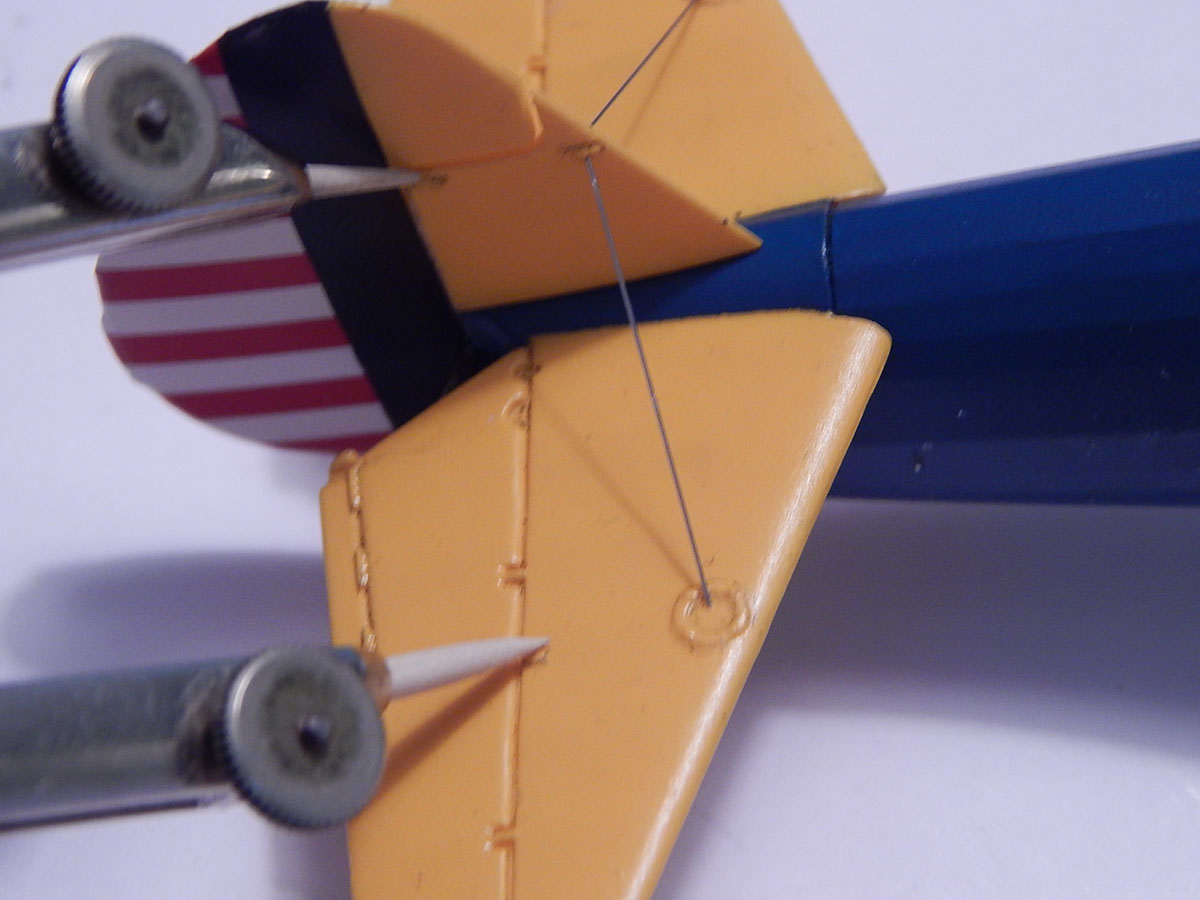
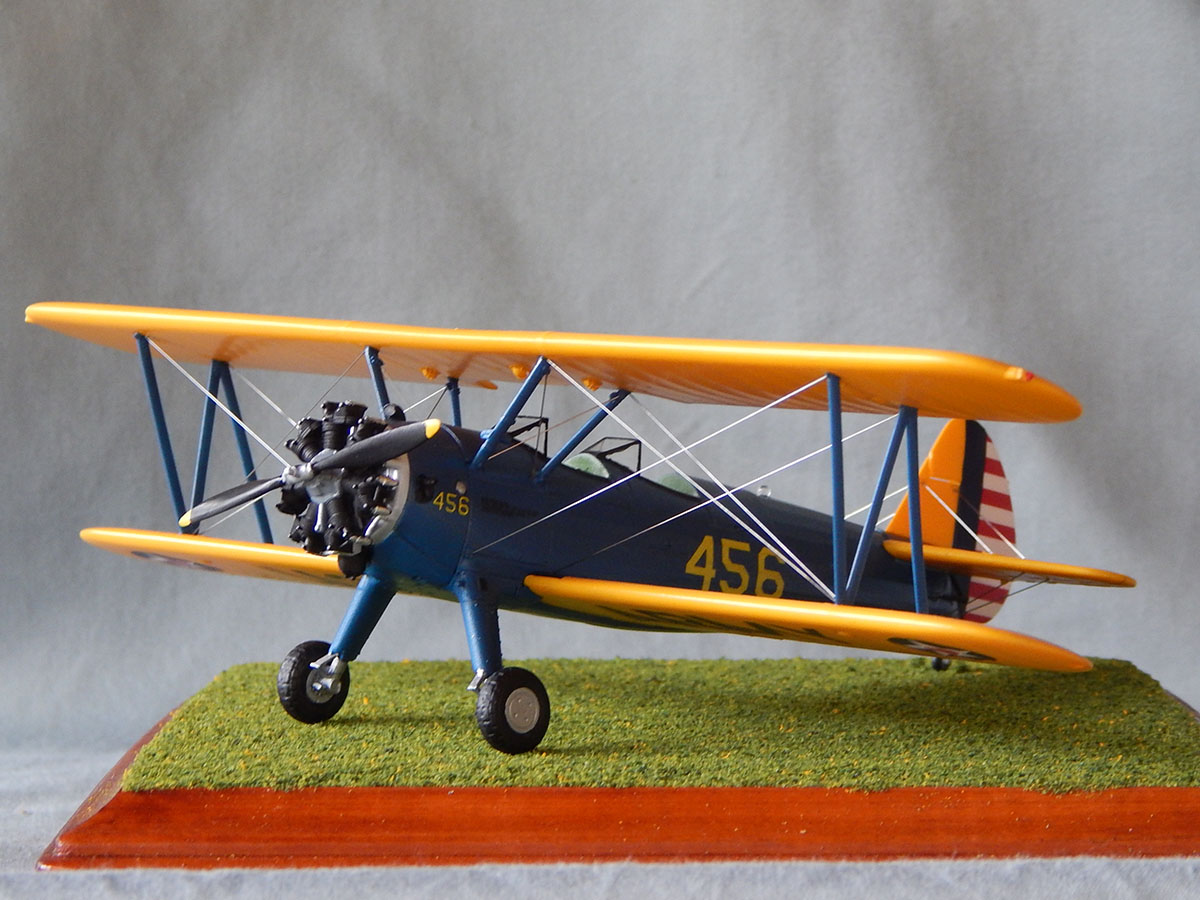 Finally, it's time to rig the model. I used a .008 steel guitar string. The instruction sheet gives lengths for the wires, but the first wires I cut, to the given lengths, for the tail rigging were too short. So I just went back to the old method of measuring with a bow compass, cutting the wire a bit long, and trimming it to size during trial fits. If there's one thing I wish Revell had done differently on this kit, it would be putting tiny holes, or at least dimples for the rigging attach points on the wings.
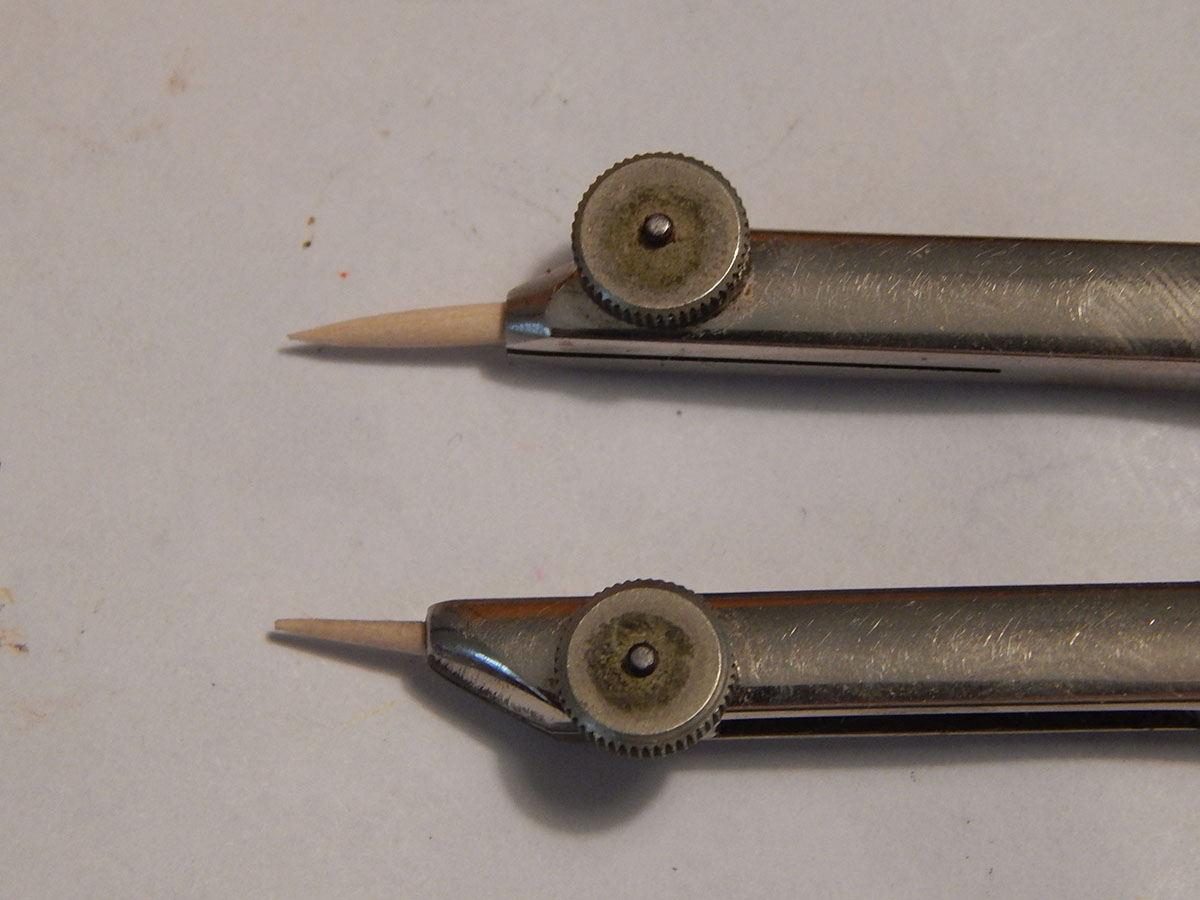 One neat trick I came up with was replacing the steel point and pencil lead in the compass with sharpened toothpicks. This prevented me from scratching and/or gouging my yellow paint. All of my rigging wires are held in place with white glue. Some of you may have noticed I didn't double up the flying wires. I'm a bit out of practice rigging biplanes, so I kept it simple this time around.
|
|
Conclusion
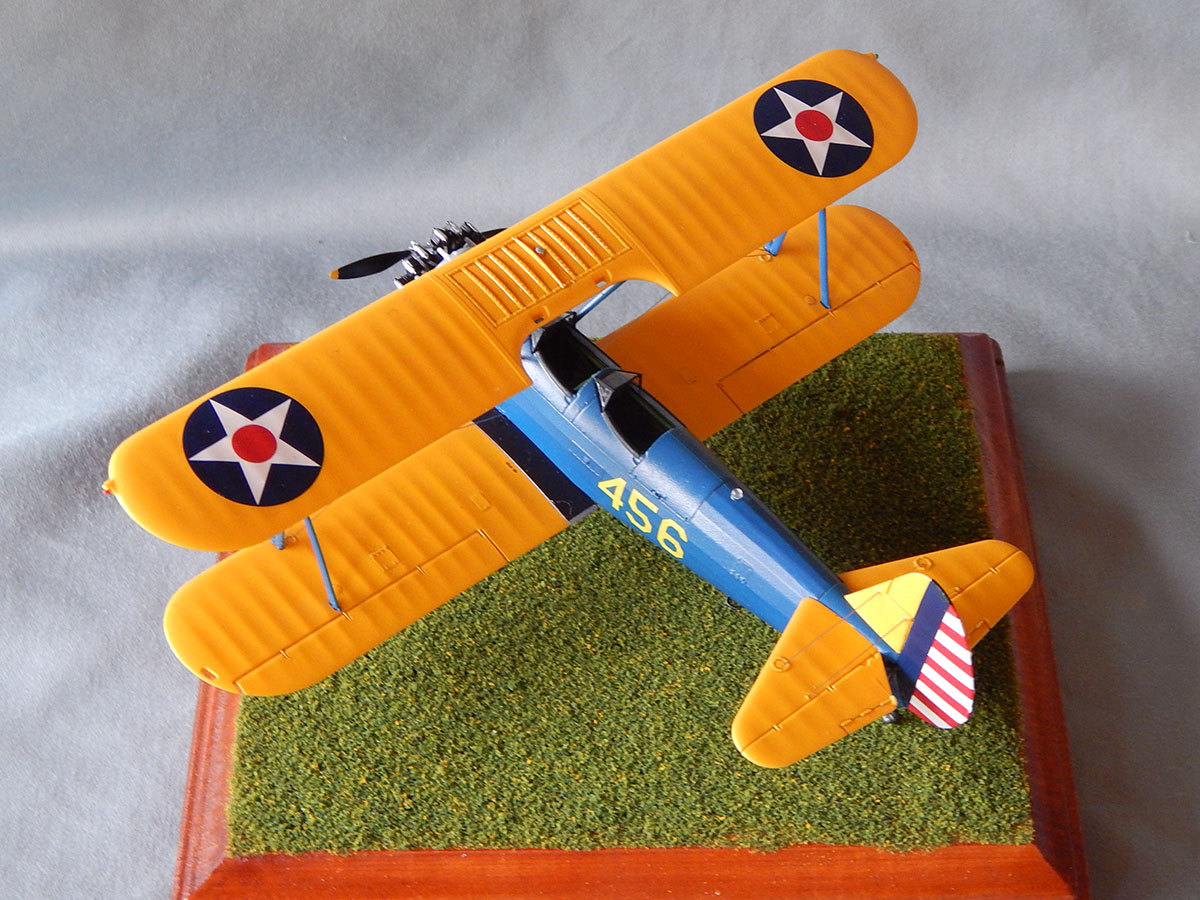 This is a great kit. The super-detailers may go looking for photo-etch sets, or resin aftermarket bits, but I'm very satisfied with what came in the box. The kit supplies decals for two birds; a U.S. Army version and a Navy version, and those went on with no problem. There's also two propellers, one wooden, one a metal constant speed prop. I may be wrong, but it seems to me the throttle quadrants are for the wooden prop, as there are only two levers (throttle and mixture). A constant speed prop would have a third lever on the quadrant. Unless Stearmans just aren't configured that way. If it really matters to you, do some research.
A wish list for this kit would be a civilian airshow version with some stylish decals, and some aftermarket resin, like cowls, spats and a wing-walker brace.