The Sikorsky H-60 is definitely not a new airframe. Much has been written about this helicopter, so I am not about to attempt to review all its history here. But the interesting fact to me is there are so many variations and modifications to the basic airframe to fit various users' needs. That alone is a huge draw.
Modeling wise, the H-60 has done rather well in different scales. Lately, 1/35 is all the rage and that is quite understandable. But for those of us with slightly less display space, or just a love for the smaller scales, things start to tighten up. DML did come to our rescue several years ago with a 1/144th scale version. Since they were packaged 2 to a box, with various types being offered, this was a major plus for the "Smurf Scale" modeler. Ahhhh.... but then reality set in.
This is kit #4600 that came out several years ago. While I did purchase it immediately, I didn't get into the build quickly. To be honest, I saw very few built up and could not understand this. It really seemed like a nice little kit with some attractive decals. But I did keep reading about build problems. Finally I decided it was time to find out for myself. And the judgement is: they were right... it is a pain to build and get looking decent. Definitely not impossible, but be prepared for some work. I did manage to keep notes on my build, which I'll relate to you as we progress. But I do have to say, although problematical it really does build up into a decent H-60. And the really great thing is, DML has produced so many versions with so many extra parts, just about all of the major H-60 versions can be completed in 1/144th. It will all depend on how much the modeler wishes to put into the project
So if you're ready... we're going to roll up our sleeves and get started.
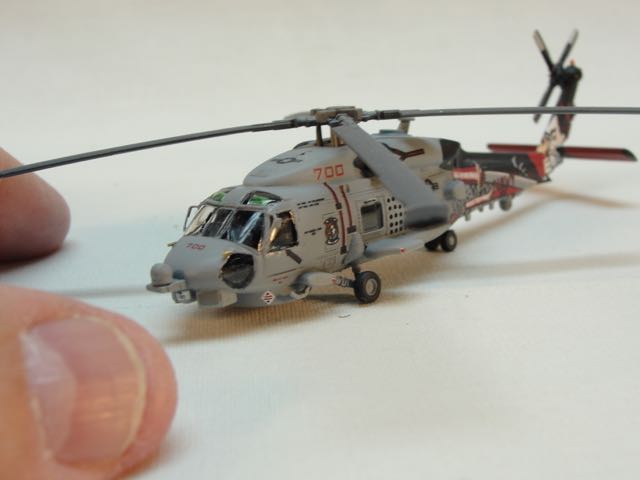
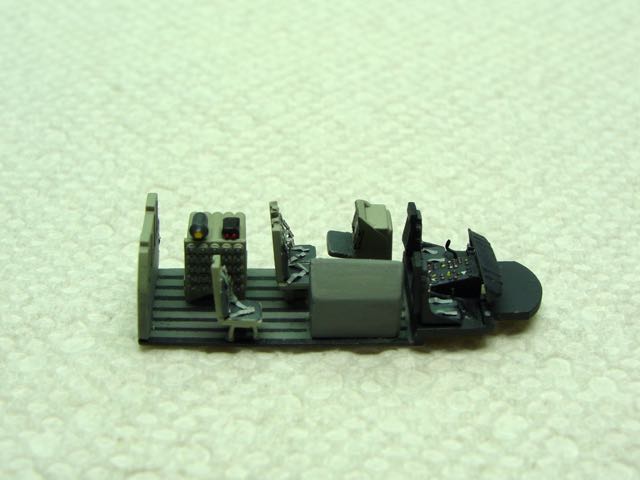
Where I suggest folks start with this one is the cockpit. While most will say that's normal, not this time. The reason I state this is the absolutely poor fit of the cockpit inside the glasswork. Between that and the instrument panel being up in the windshield somewhere,quite a bit of work must be accomplished. I found that sanding down the forward edge of the cockpit flooring was the best answer. Plus the center console was sanded down with a notch cut in to reseat the instrument panel. After all this was accomplished the fit was acceptable. Also DML gives you quite a bit of interior pieces and fittings. I installed the rear seats and operators' consoles, plus the sonobouy ejectors. Real modelers can go hog wild with all this open space.

Another big item in this area, prior to closing up the fuselage, has to be the cockpit glass nose. DML molded this in clear plastic. The item is very thick and also has the hand rails of some versions mounted on. We don't need the rails for this version, and can be very happy the item is so thick. Mainly because we need to do some cosiderable sanding to get a proper fit to the forward fuselage area. I attacked this with rough sandpaper at first, until getting it close to the fit I wanted. Then using higher and higher grades of wet and dry paper to get a smooth semi-clear piece. I normally go down to about 2000 grit with the "glasswork". This was then literally dunked in future and allowed to fully dry overnight.
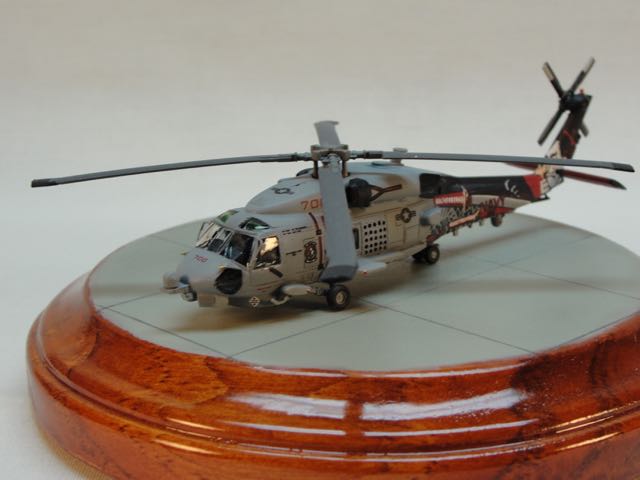
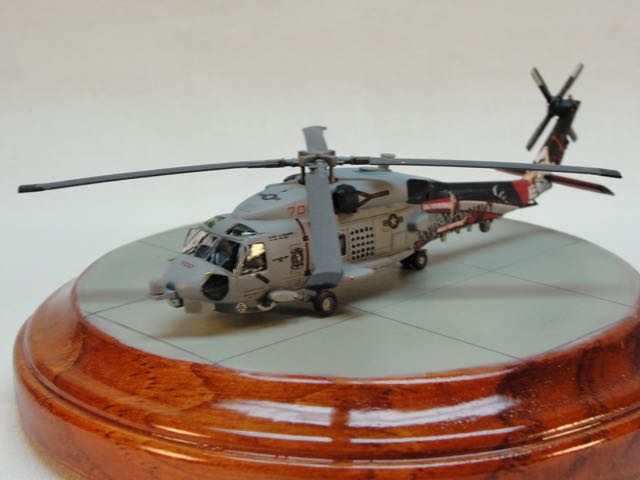
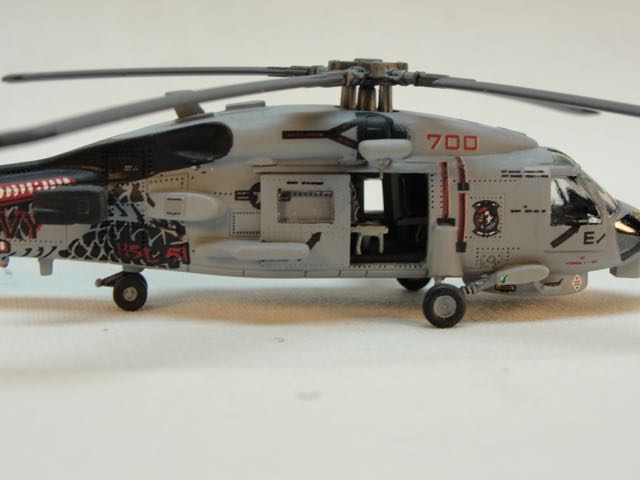
Once the basic fuselage assembly was completed, she was starting to resemble an H-60. The engine intakes will require careful mounting and blending for proper apppearance. Then we came to the landing gear installation. This was another problem. The forward gear sits too high. Perhaps it was molded in flight mode, I'm not certain. But for most of the photos I studied, it was definitely too high. This was actually modified by cutting the oleos where they come out of the upper actuator, then bending the assembly up to remate the two items. It sounds very simple, and it is. I was satisfied with the result. At this time, I also noticed the B model (along with several others utilizing the same basic airframe) have a tail bumper skid that lowers when the weight is on the gear. This was made from several pieces of sheet plastic and attached. Now we come to the last major build problem I encountered...the main rotor height.
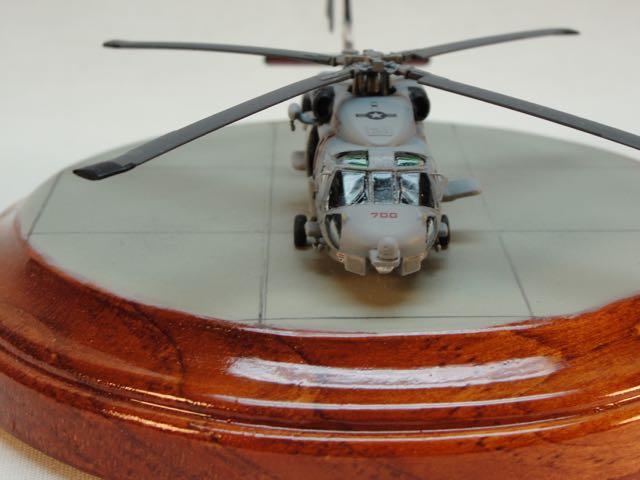
When I had painted and assembled the main rotor and tried the fit, I received a nasty surprise. The main rotor sat way too high. It gave the model a total toy appearance,hardly the look I was aiming for. After studying quite a few photos, I decided the problem was the height of the total assembly itself. My simple solution was to enlarge the mount hole in the roof of the bird itself. There were essentially two levels...the cabin roof,and the outside engine/transmission cover. I enlarged the outside hole enough to drop the entire assembly down to glue to the cabin roof. While I have no doubt this simple fix is not exact, it matched most of the photos I studied. The rotor blades were given a slight droop by using a round piece of stock to gently roll the blades over.
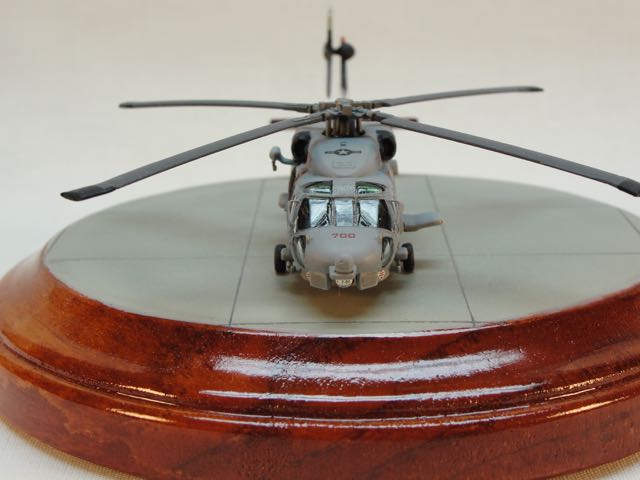
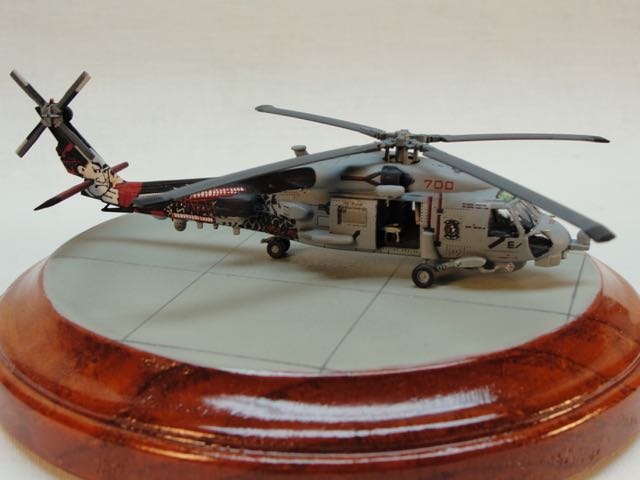
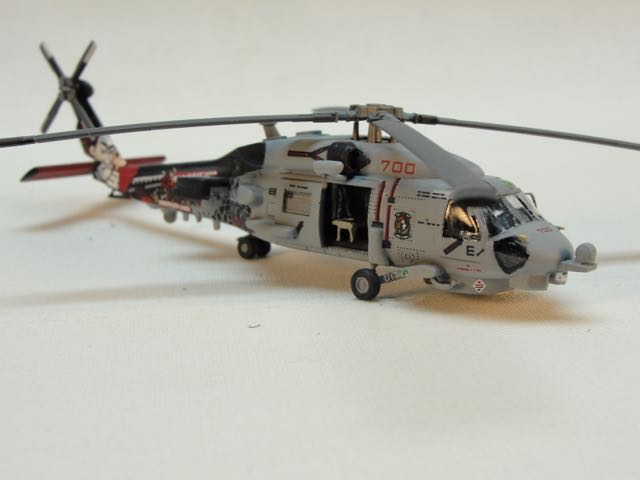
Final assembly and painting were next. The critical thing here was masking. The forward nose glass work had to be carefully masked off..this is a make or break thing here, folks. But taking your time will pay dividends. I also had decided to use MYK decals from Japan for the "Warlords" of HSL-51. (Love the Samurai Warrior painting!) All that was left was minor clean-up and minor additions like the external rear view mirrors for the pilots.
Overall this was an interesting project. It ended up being quite a bit more than I had envisioned, work wise. But it is an interesting piece, and makes a nice little addition to my collection. Will I build another in the future? Probably...but not for a while. Regardless,you readers are the true judges, so let the IM group know how you feel about it. Take care.