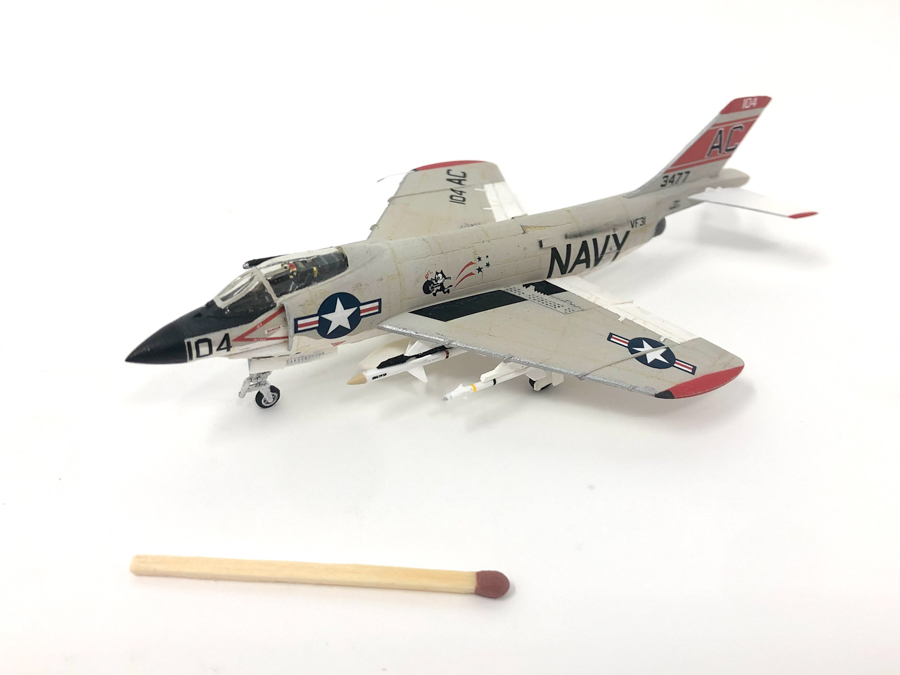
TripleNuts 1/144 McDonnell F3H Demon
By Angus McLaren
The Demon
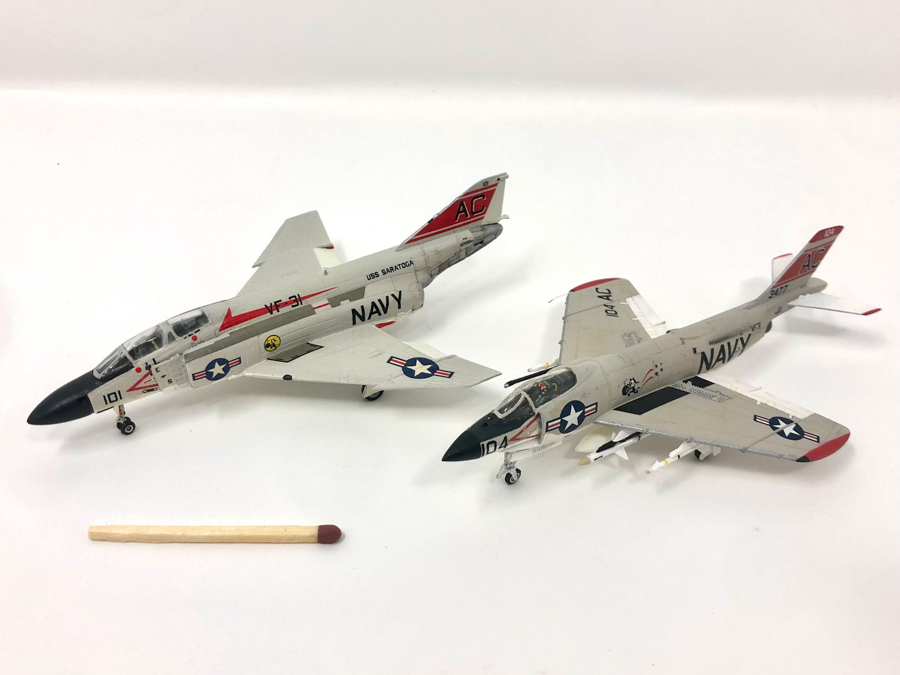
The Demon was McDonnell's replacement for its really pretty successful Banshee. An all weather fighter, it was a distinctly un-loved second generation jet that developed a nasty reputation among the 'Demon Doctors' who flew it (as its pilots were known). But it also showed sufficient promise that McDonnell persisted, ultimately uprating and redesigning it into one of the most recognisable and successful fighter jets of all time - the F-4 Phantom II. The family resemblance is there - it's sort of halfway between the Phantom and the Voodoo to my eye (there's a photo of both side by side at the end).
|
The Demon was actually a pretty early design - from 1949 - but early US powerplant issues meant it wasn't introduced until 1956. McDonnell had planned to use the Westinghouse J40 (under significant Navy lobbying, it must be said). After successive problems and delays which were to lead to the engine's ultimate cancellation, McDonnell took the plunge with Allison's much less powerful J71 (just as Douglas also abandoned the J40 for the less powerful P&W J57 for their Skyray).
|
This left the weighty F3H underpowered, unable to sustain supersonic flight and perilously low energy on takeoff and landing - earning it the unflattering nickname 'Lead Sled'. It also suffered many problems with its ejector seats - not a winning combination with a dicky engine (Martin Baker came to the rescue there in later years). Still it was an important aircraft - the first swept wing fighter McDonnell produced and one of the first to be fully equipped to fight with missiles. Though it never entered combat, it flew operationally over Taiwan and Lebanon and served until 1964, when the last ones were replaced by early-mark Phantoms.
The Kit
There are two kits of the Demon that I'm aware of in this scale - and another rumoured to be in the pipeline. This is the 3D printed TripleNuts (TN) kit - the other kit is a pretty rough Tokiwa Aircraft Create (TAC) resin garage kit from Japan. I did have one of these but I sold it and used the proceeds to buy the TN kit - which is much, much better. There is also rumoured to be a resin Miniwing kit in the pipeline but I haven't heard much about this for a while (and, despite my problems building this, I fear a Miniwing kit will struggle to best this in terms of detail and accuracy...)
|
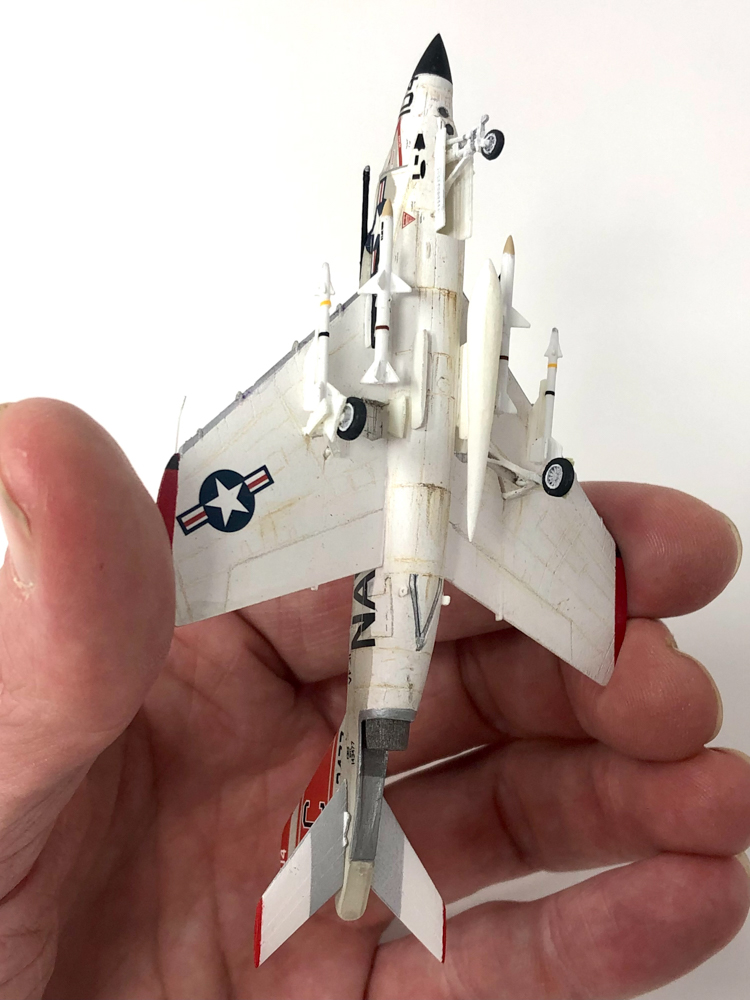
I don't have a parts photo but this comes in a tightly packed 3D printed sprue arrangement. One word of advice - DO NOT THROW ANYTHING AWAY! Study the instructions closely and you'll see that the tiniest nub of material you were about to consign to the bin is actually a very prominent dorsal antenna. I threw out the pitot (it's not a pitot but another sort of pressure meter) on the wing and had to make my own. There are no weapons in this kit - you do get some with other TN kits but strangely not this one. But your choices are really Sidewinders or Sparrows (or practice bombs if you really want - there are photos of these carrying bombs) - all of which can be sourced from the spares box, old LS weapons kit or perhaps even the forthcoming Platz weapons sets.
The Build
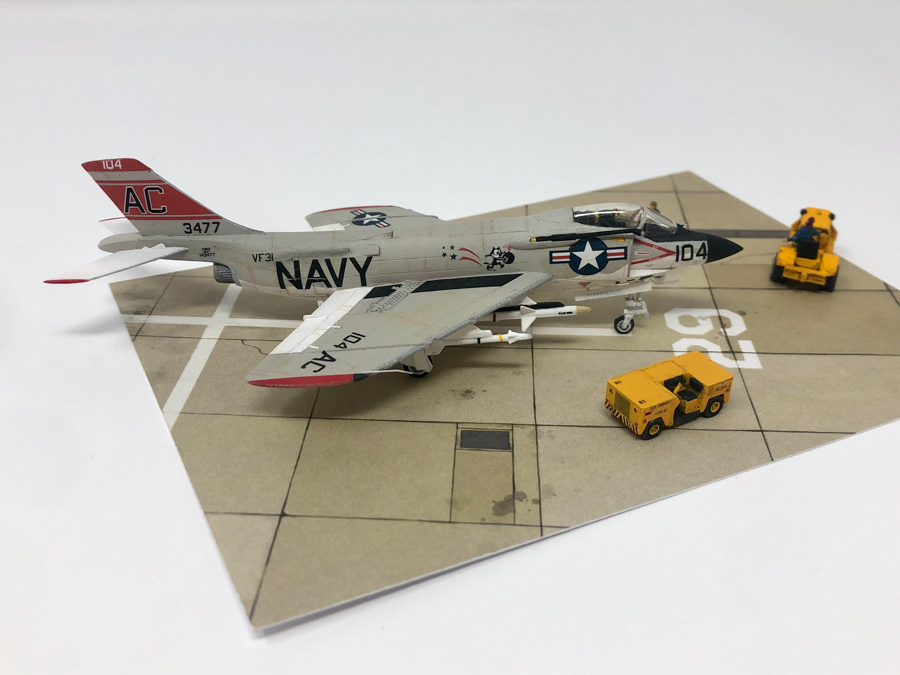
The only problem with this particular kit was that quite a few of the surfaces were warped - chiefly the starboard wing and the tailfin. The wing was the worst, curling upwards like a demonic banana. I don't know why but this was an absolute so-and-so to fix. Hot water, steam etc. all only had temporary effects - you'd leave it for 24 hours after which this would be back in the original shape. As obedient as a toddler at bedtime. Hence this resided on the Shelf of Frustration for some time. I think there must have been a problem in the printing of this example - I've not come across this on any other TN kits I've built. Eventually I solved this by over-correcting small sections of the wing at a time, working my way from the root towards the tip, dunking in fresh very very hot water each time. By going a cm at a time, I managed to get it somewhere decent. But, if I'm honest, it's more of a draw than a victory - there's still an upwards lilt to the wingtip if you look closely. This has developed in the past month and I sincerely hope it stops there...!

|
In terms of other surface cleanup, there was a fair bit. As a 3D print, you have to sand back the layers left in the printing process. There are pros and cons to 3D printed kits which I won't go into now, but in my view the fit of 3D printed kits is usually excellent and what time you spent removing the printing process striations could easily be spent on filling and sanding seams on an injected or resin kit. Anyway - on this example there was more work required than on another more recently-released 3D printed kit I built for instance - the FoxOne T-38. I think this was an earlier TN kit and the material is a bit rougher and stubbornly retains its striations despite sanding. Not as challenging as the TN Javelin (which I also recently finished), but enough work. You can still see a few rough patches that I missed, but again you have to look closely. A bit more patience on my part would have solved that. But overall I'm happy with the surface work. I also managed to 'rescribe' (with a sharp toothpick) the panel lines that got filled with waxy support material (in some areas this was very hard to shift).
|
Fit-wise there are no problems - I didn't even have to use filler on the wings or tail. The drop tanks come in two parts and needed a tiny bit of work on the join, and there was some filling needed around the canopy but that was all. The level of detail (and fidelity to the original) is fantastic - from the cockpit to the undercarriage, and all the access panels. I went quite quickly from frustrated with this kit to really enjoying it. I think my fondness for TN kits (despite their price tag) stems from the fact that you can tell there was a huge amount of time, energy and passion that went into designing a faithful model and thinking through how the kits are engineered. The canopy is fairly thin resin (a bit yellowed but after being dunked in gloss varnish this improved). The view of the cockpit inside is excellent.
|
Corrections or additions I made were:
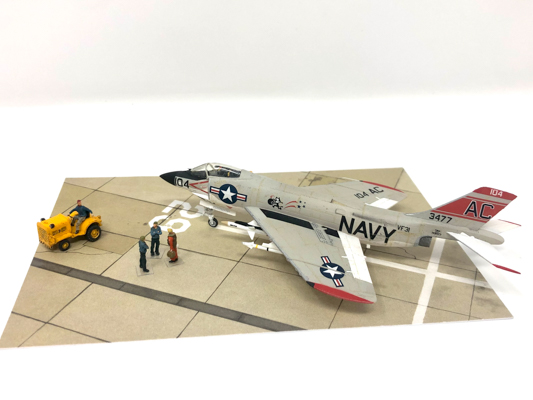
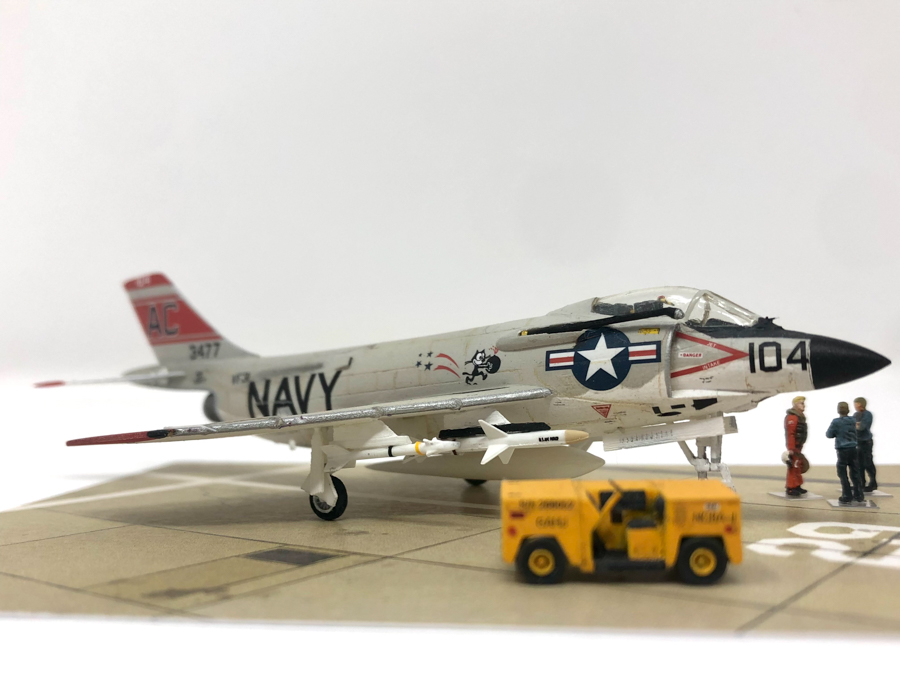
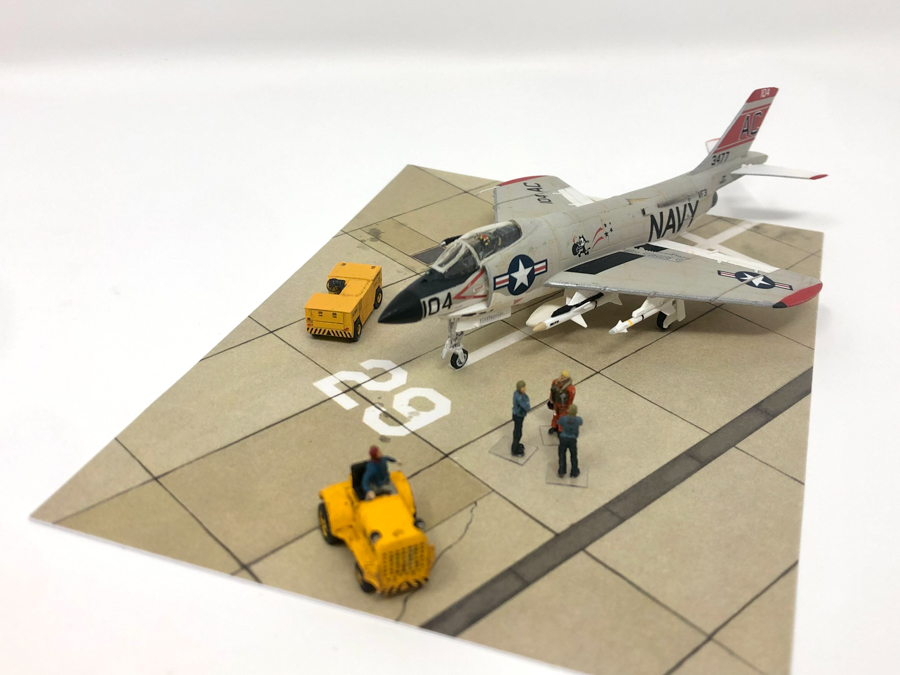
- The kit comes with the earlier, longer tailcone. Later production Demons had a shorter beaver-tail; I was building a late-block VF-31 aircraft which needed this. It's easy to sand the kit part back, though it is hollow so you have to use a bit of filler.
- including a control column and add the ejection handles on the bang seat,
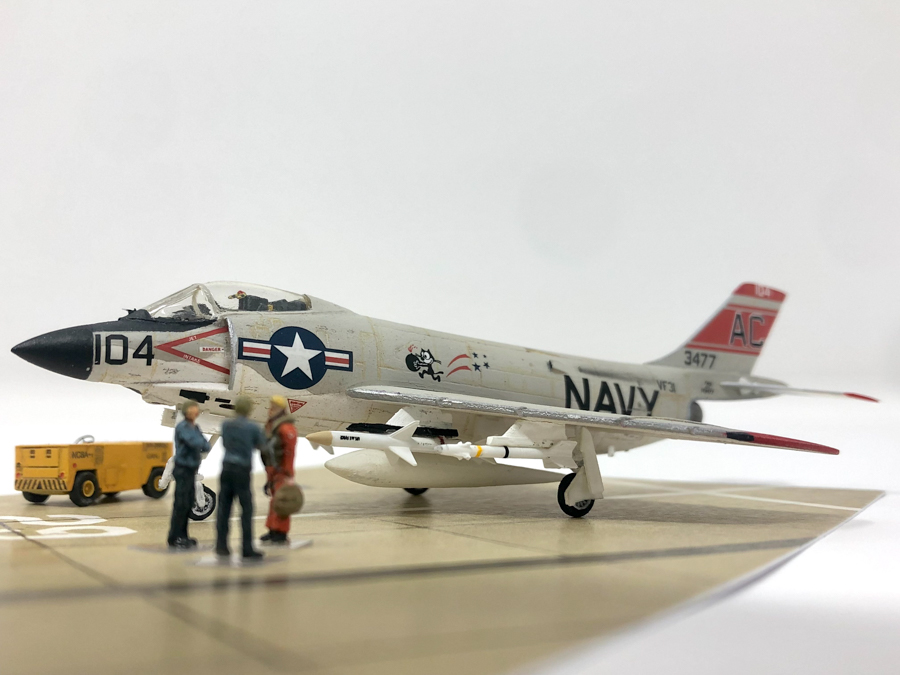
- adding some Sparrow and Sidewinder missiles from the spares box (the kit comes with four Sparrow rails which were different in shape to the Sidewinder rails, so I also corrected these by cutting them shorter and with some sanding)
- replaced the pitot and some aerials with plasticard and rod
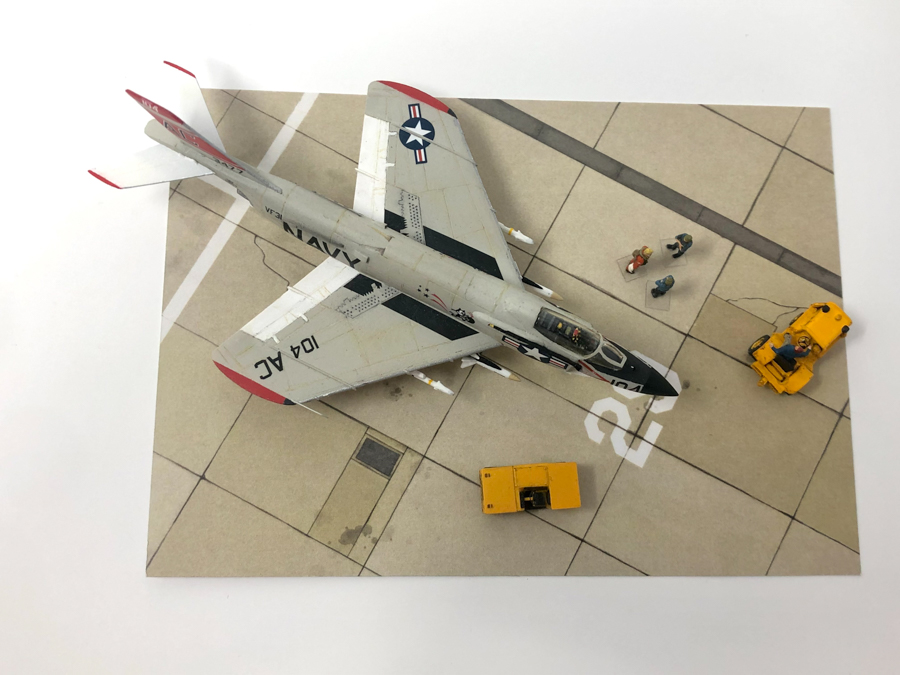
- In an effort to improve its performance, two of the Demon's four cannons were often omitted in its later life. It was also often flown with only one of its two belly tanks to lighten the load. I filled the upper canon ports and separated the starboard drop tank from its pylon (they are handed).
All in all?
|
Good fun. Pretty minor hard work once I got over all that spoon bending at the start. I look forward to the Miniwing kit, but other than the surface cleanup, there's not much to improve on here. I'm really pleased with it - it fills a really important gap in the US Navy lineup I have. And finally, a photo with a younger, larger and more powerful brother...
|
|
|
|