Introduction
A big box full of plastic. Twelve sprues, one a duplicate of the fuselage in clear, a big sheet of photo-etch, and "rubber" tires fills the big kit box I got thrust at me to review.
All kinds of fiddly-bits, major parts covered in details, wow, where to start?
Eleven different sprues, like I said. The fuselage halves and smaller fuselage panels on sprue "A", duplicated in clear plastic for an alternate see-though build, has all kinds of surface and interiour details. And looking at the kit instructions sprue diagrams, it looks like half the other parts in the kit will fill the fuselage up nicely.
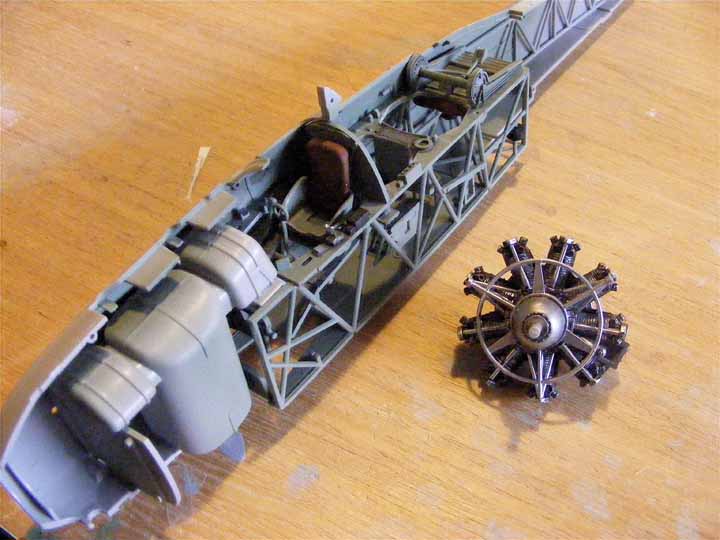 The cockpit is made up at least 37 parts, including all kinds of fuselage structure and a gun and radio for the third seater. There is also a fairly complete looking engine and fuel tank to help fill out the interiour and front end.
The wing center section looks like it can be done as a separate sub-assembly, and the wing outer sections added there after. That ought to make painting all these sections easier. The outer wing sections are Big Slabes of Plastic , and to my taste, have somewhat over-stated rib details. But what do I know?
The kit also provides you with extra parts to allow the wings to be built in the folded position. And decals for two machines, a 1941 "Sink the Bismark!" scheme and a 1942 scheme. Looking good so far. The photo-etched rigging for this biplane looks a bit daunting but with a little luck, shouldn't be too bad.
And a torpedo, don't forget the torpedo! (though to get the kit done in time, I didn't build the weapon, though it does look pretty good.)
However, even though I don't know hardly anything about this machine, I did notice a problem, or rather a lapse, in all the details. The kit has molded in the exit guides for the elevator and rudder control cables in the fuselage sides, and the control horns on the elevator and rudder, but make no mention of adding the control cables themselves. The radio aerial is also not noted, but visible, along with the controls on the box art (unfortunately, part of the aerial run is not shown, and I don't have any references for this machine, so don't know where the line leads). Adding lines with your favorite rigging material is awfully easily done, but it is an odd little missing bit for a kit that otherwise appears to be trying to cover the subject rather completely.
The overall impression is that this will be Some Kit to build.
Building the kit
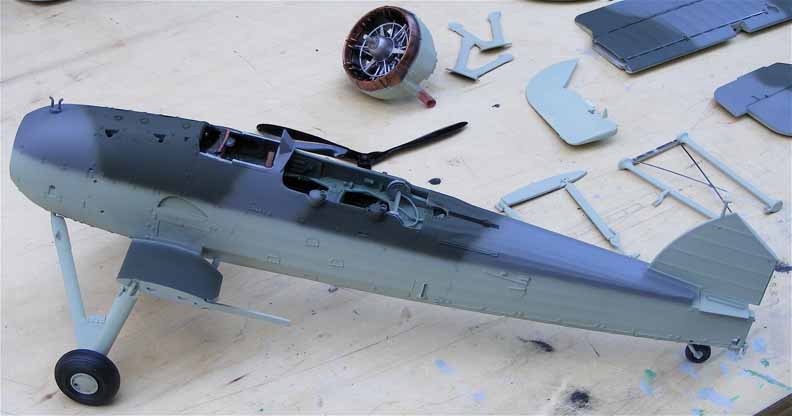
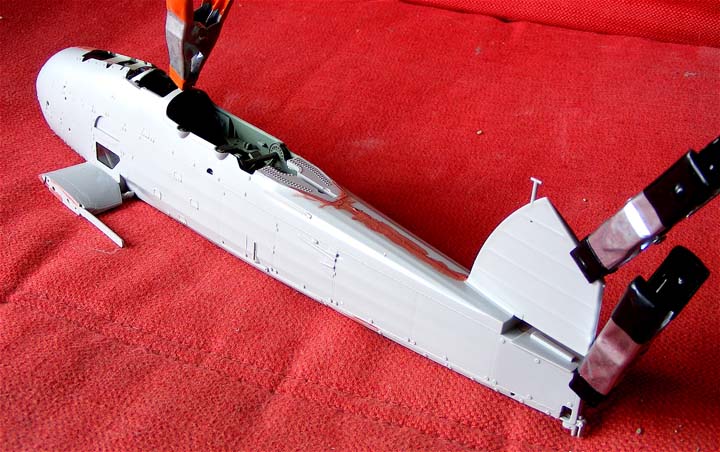 This is, by and large, a simple, "follow the instructions and you'll stay out of trouble" build, due to all the bits in the fuselage. Having review built several Trumpeter kits now, I can say they are getting better with each new release that I've worked on so far. Fit is mostly almost shake and bake easy, flash is limited more to slight mold mis-alignment edges that are easily cleaned off with the draw of a knife. A little filling was needed along the main fuselage joints and wing leading edges, but nothing a little dash of filler couldn't fix.
Tricky bits.
The instrument panel (part K) installation seems incorrect and ought to be fitted further aft, attached to the cockpit front combing, and there is a mystery strut (part E7) in the second crewman's 'pit that starts on the floor and goes - somewhere.
 The struts between the wings simply don't fit very well, the faired ends of the struts don't seat down well into the wings, and while trimming them a bit around the edges will help them get into their location holes, trimming the bases to seat them deeper for a better looking installation will throw off the photo-etch rigging. The only real fix in this case, would be to dry fit and rework the faired ends of the struts to better match up to the the wing surfaces.
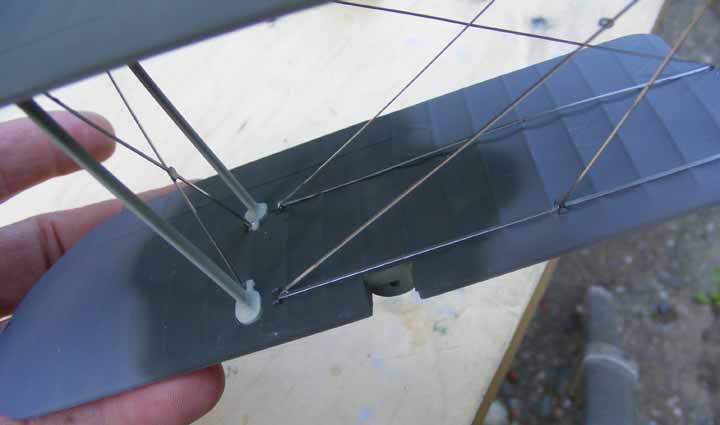
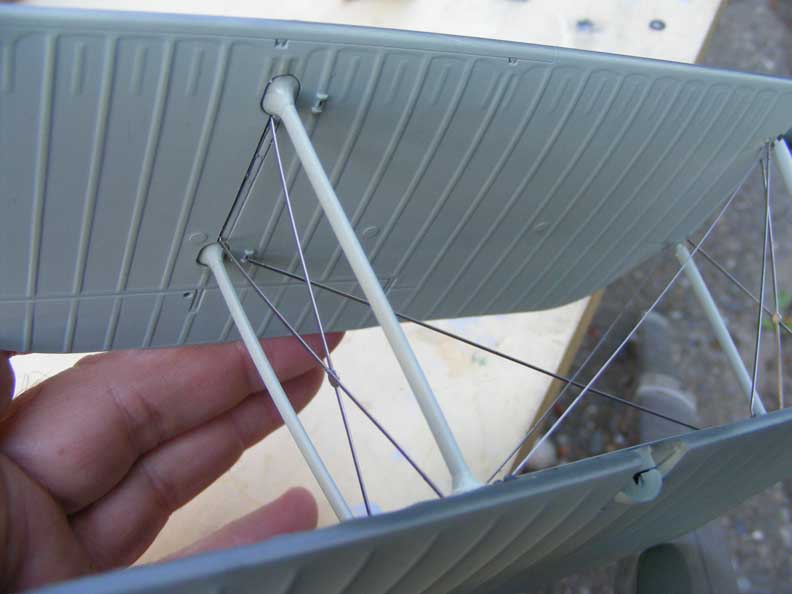 The photo-etch rigging, though a bit heavy and out of scale (?) does stiffen the assembly and can help align everything. But, only if you follow the instructions and don't alter anything. However, if you want to clean up the strut mounts and such, the rigging can be modified for alternate assembly, though expect a lot of test fitting and tweaking. And a little warning, the lower wing has sections of photo-etch along the surface that plug into mounting holes that ALSO have to accomodate the flying and landing wires, so don't be too quick to flood those mount holes. Finally, the photo-etch was hard for my to cut off the sheet, and I had to buzz off the burrs with a Dremel with a fine grinding wheel.
 The wing bays look like they might be sort of iffy in fit for assembly in the extended position, the outer wing sections not matching up well with the center sections. I chose to build the kit with the wings folded in part for that reason. The folded wing assembly was no problem.
Suggestions for alternate assembly.
To accomodate pre-painting all the complicated parts, a few things can be done to make it all easier.
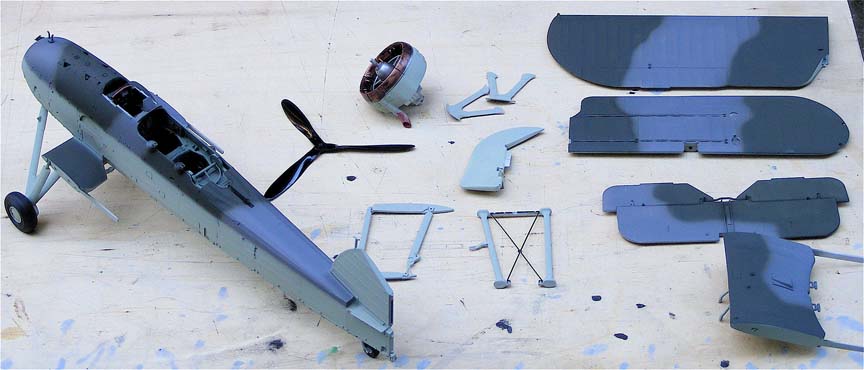 The cabine struts (parts C27,C23) can be modified to not have to sub-assemble into the top-center fuselage section (part A6)and instead attach to the top wing center-section that can all plug together later.
The support struts (parts B15, B17) atop of the lower wing center section can be attached after painting as they fit very well and make it simpler, especially if doing the 1941 scheme.
 The tail plane and rudder can be not attached untill after painting, the lower support stuts (part C22) can be cut off the mounting plate and glued in place easily enough, the rear struts can be threaded through the fuselage, so need not be cut apart from each other.
The engine exhaust collector (L1) can be painted separtely from the rest of the cowl, and for that matter, the whole engine can be kept off and out of the way until final assembly.
Recommendations for improvements.
The upper wing leading edge slats could use additional scribing to enhance their outline.
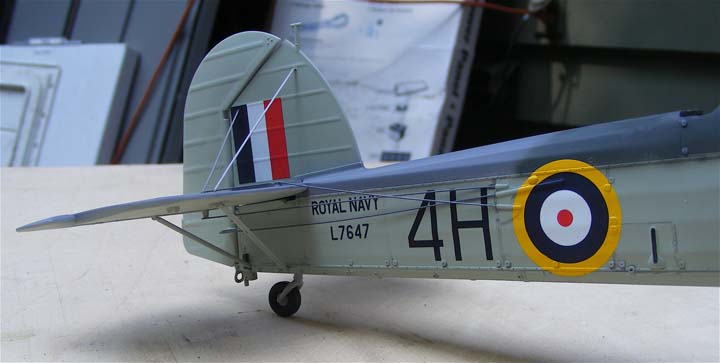
 The tail wheel strut (parts D5, D18)really needs re-enforcement, as this model is a rather heavy bit of plastic. A section of steel wire through the strut should do the trick.
I suspect the connection strut (parts B4, B5) between the upper and lower alerons should actually connect between the alerons (?) and not between the upper aleron and the lower wing surface. The correction is easy enough.
There is a little shackle ring on the tail that can be opened up.
Painting and decals.
The kit instructions do not include any kind of detail painting, the cockpits are simply "interiour green over all, brown seats, black radio and instrument panel" The interior clearly has all kinds of stuff and some creative painting can really enhance the apperence, some referenced details can punch up the 'pits even more.
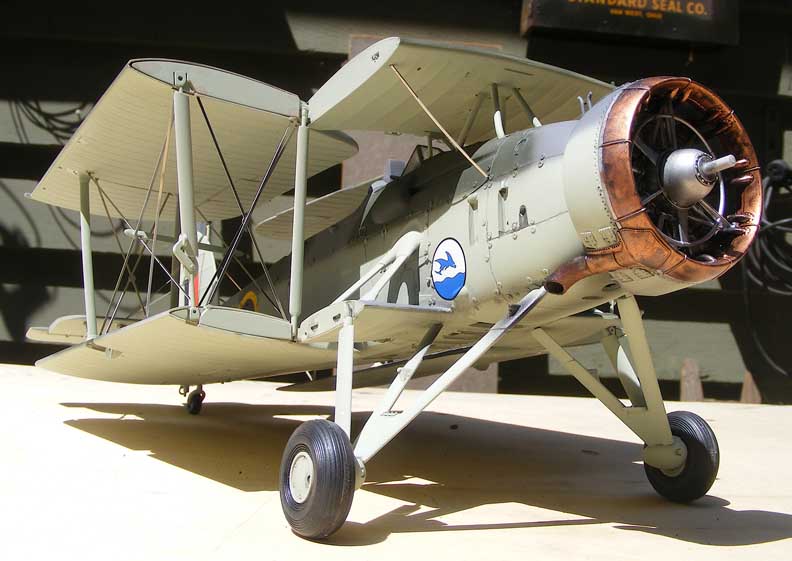
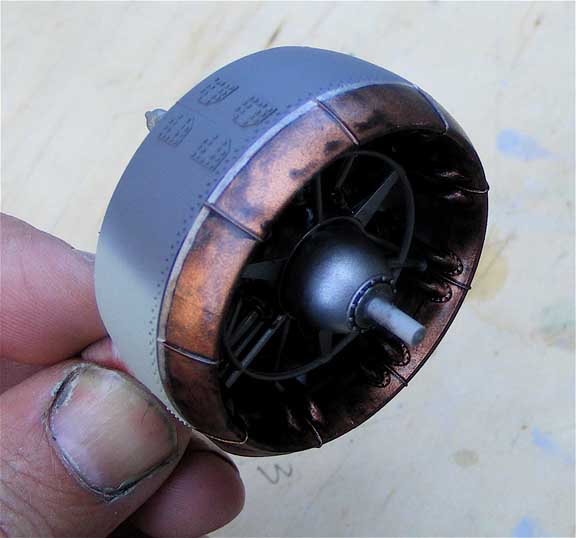 The exhaust collector on my build was simply Testor's smal bottle "copper" with a thin wash of acrylic black and then blue for heat discoloration, the acrylic thinned with clear acrylic medium, though acrylic clear "glue" is about the same and will do.
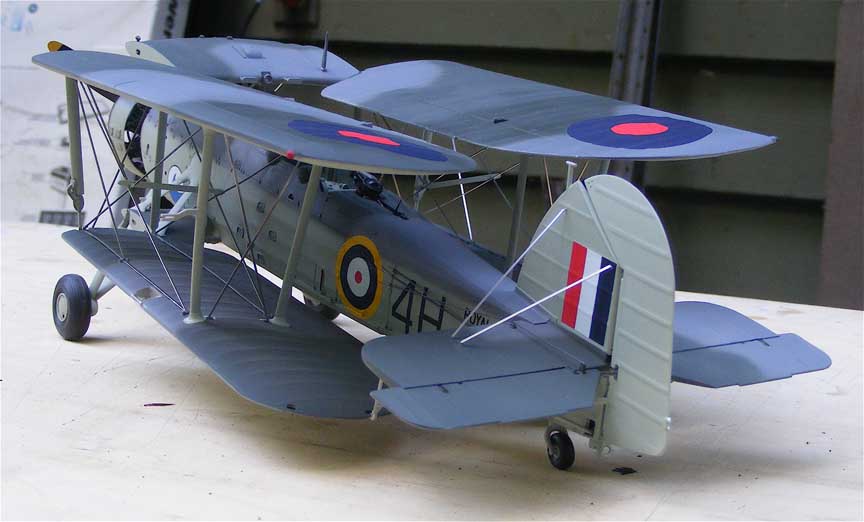
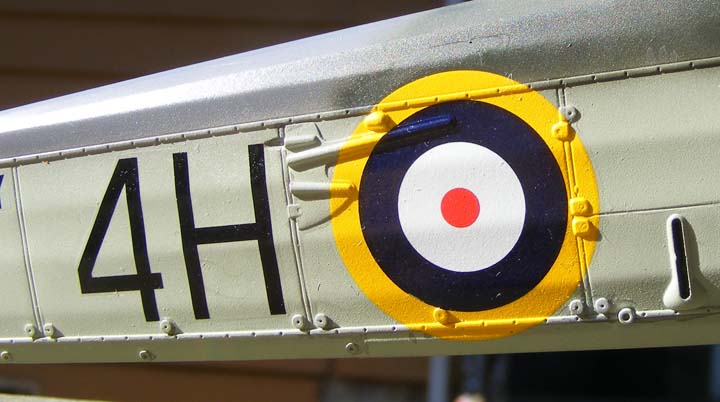
The main colors were Model Master enamals with a coat of clear glosscoat lacquer to put the decals on over. The decals were exceptionally flexible and conformed to the most complicated surfaces with the help of some solveset.
Weathering was minimal, just a little to break up areas and to add a little texture.
 I did a final spray of dullcoat after final assembly to hide glossy spots of glue and tone down the photo-etch rigging and to generally make more uniform the look of the whole model.
I may, or may not have, made a mistake in the paint job, in that I painted the wing struts all in "Sky", while the kit instuctions show them to be in wing camo colors. I don't know which is correct, though I like the look of my version.
Added bits.
 Even though this is an OOB kit review, I did add control cables to the tail surfaces and may actually do some research to find out how to rig the radio aerial. With the large open cockpits all kinds of extras could be done, and I'd assume alternate markings and configurations are possible.
Summary.
While the Swordfish is not a subject I'd chose, the kit was a joy to build, just busy and challenging enough to feel accomplishment and the results, even as a quick build over a couple weeks, off and on, are pretty impressive. How accurate? Dunno, but boy it looks neat!