advanced search

  • Menu
  • Home
  • Columns
    • Industry News
    • Editorials
    • Now & Then
  • Features
    • Aviation
    • Armor
    • Automotive
    • Space/Sci Fi
    • Ships
    • Figures
    • Special Reports
  • How To
    • Construction
    • Detailing
    • Painting
    • Finishing
  • First Looks
    • Aviation
    • Armor
    • Automotive
    • Space/Sci Fi
    • Ships
    • Figures
  • New Releases
    • Aviation
    • Armor
    • Automotive
    • Space/Sci Fi
    • Ships
    • Figures
    • Book Reviews
    • Tools
  • Gallery
    • Aviation
    • Armor
    • Automotive
    • Space/Sci Fi
    • Ships
    • Figures
    • Drawings
    • References
Internet Modeler : How To : Construction RSS News Feed

Making 1/144 Canopies - Updated

By Terry Patrick

Introduction

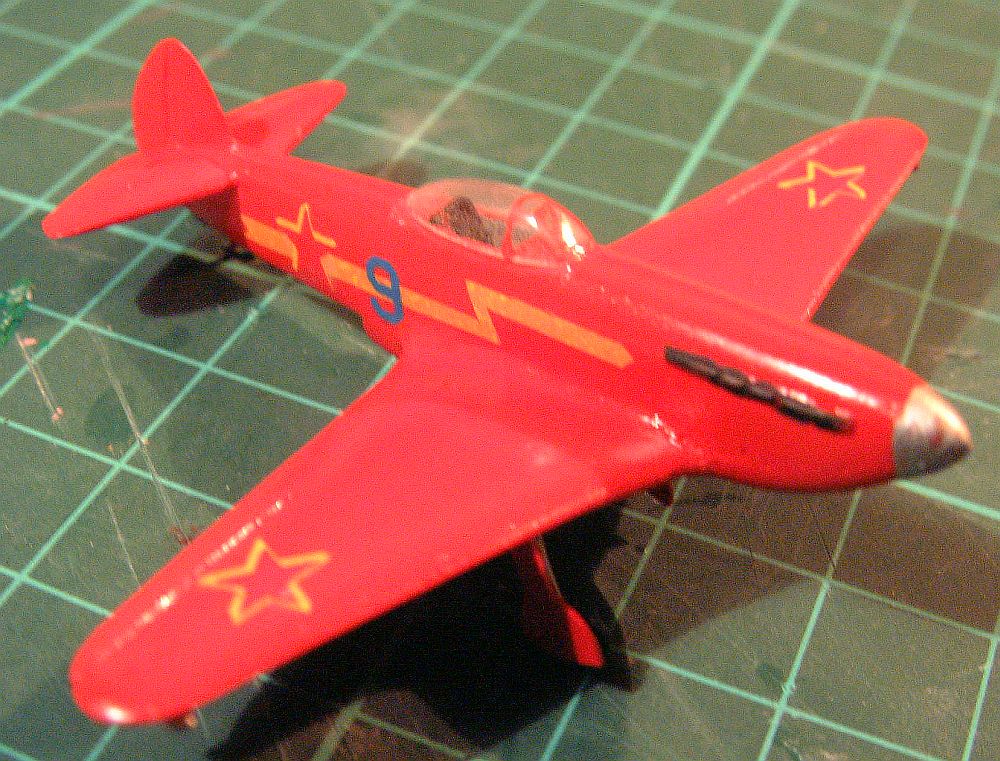
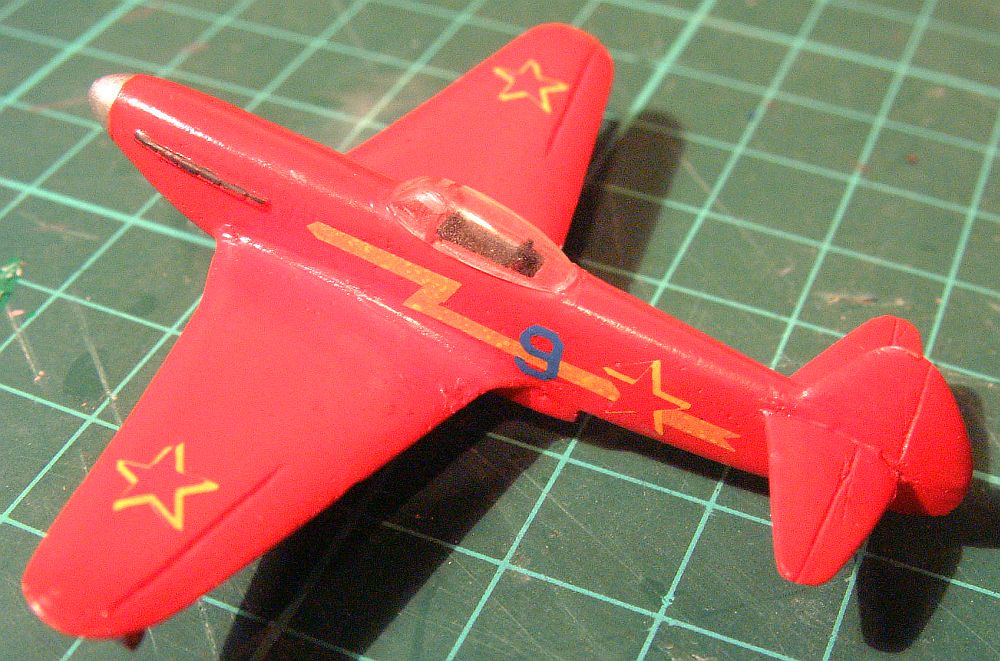
My local model club decided to use the Berlin Airlift as a theme for the Nationals this year, and I was asked if I would produce some Yak9s to overfly the subject. Don Schmenk agreed to make a mould if I made the master and this was done. Consequently I soon had three Yaks to overfly Berlin and three to do what I would with.

My aim has always been to build an interesting collection of models. I only model in 1/144th and the vast majority of my models are original models made in wood, because of the scale I do not go in for super detailing, it seems inappropriate at this scale. I also do not produce transparencies, a transparent canopy means you can see inside, if you can see inside it means you have to detail the inside, and that's not my aim.

But now I found myself with a surplus of Yaks so I decided to go against my better judgement and to attempt to build a model with a transparent canopy, this is how it went. I hope my experiences may help others wishing to mould a canopy.

Making Canopies

canopy_144_01.jpg
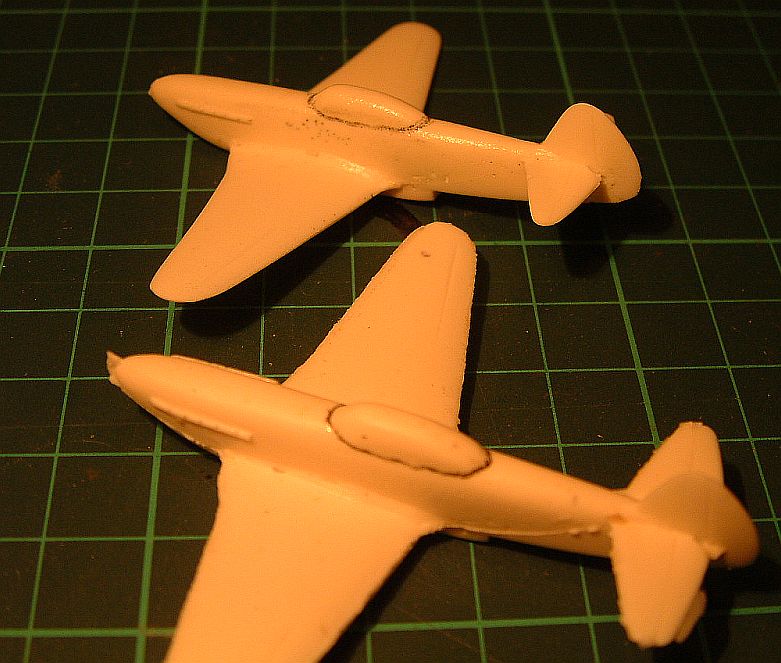
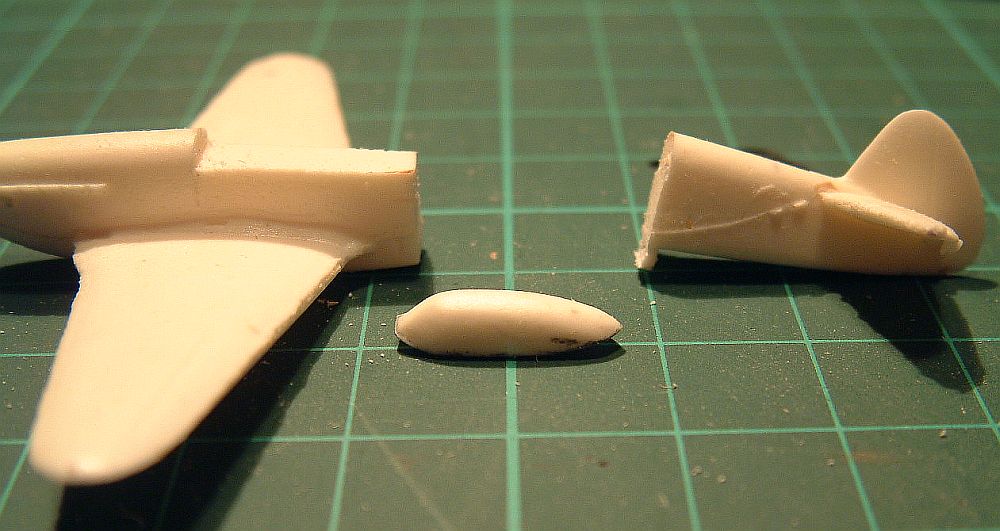
I took two of the Yaks and marked of the amount that I wanted to be transparent.
canopy_144_02.jpg
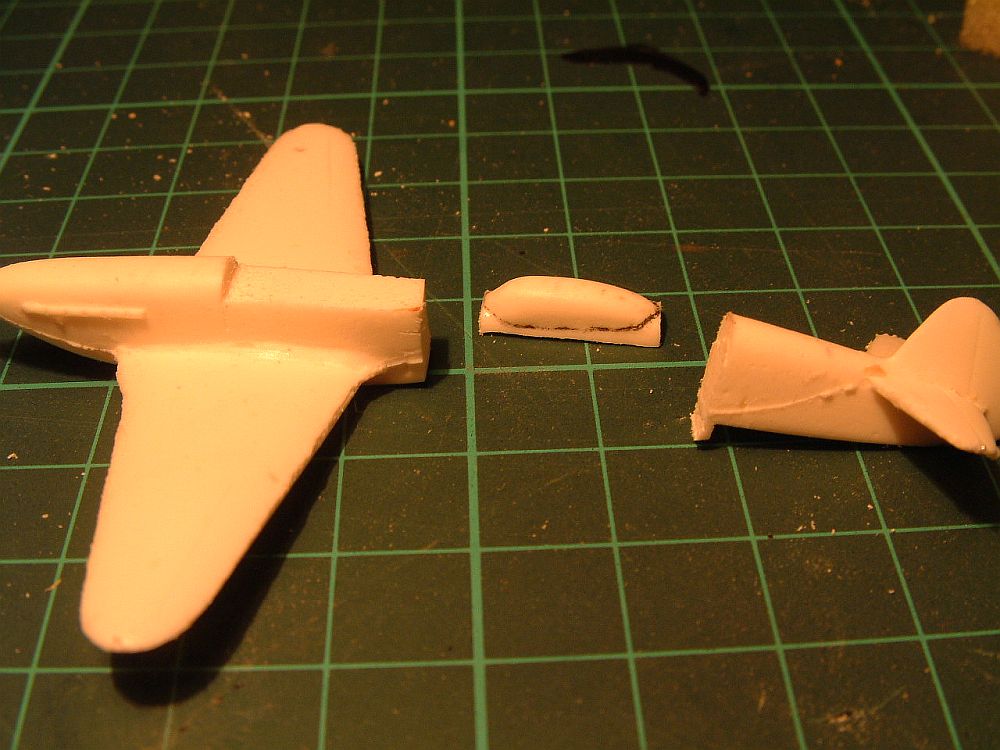
I took one of the models and made three cuts, I cut through the rear fuselage behind the canopy, down in front of the canopy and across underneath the canopy.
canopy_144_03.jpg
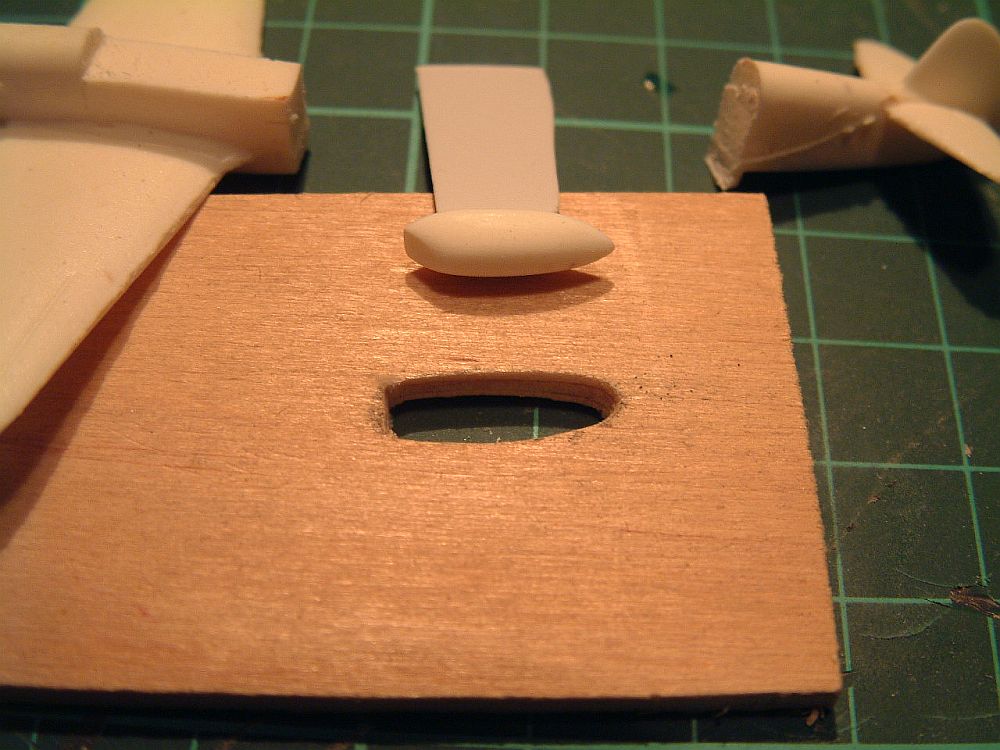
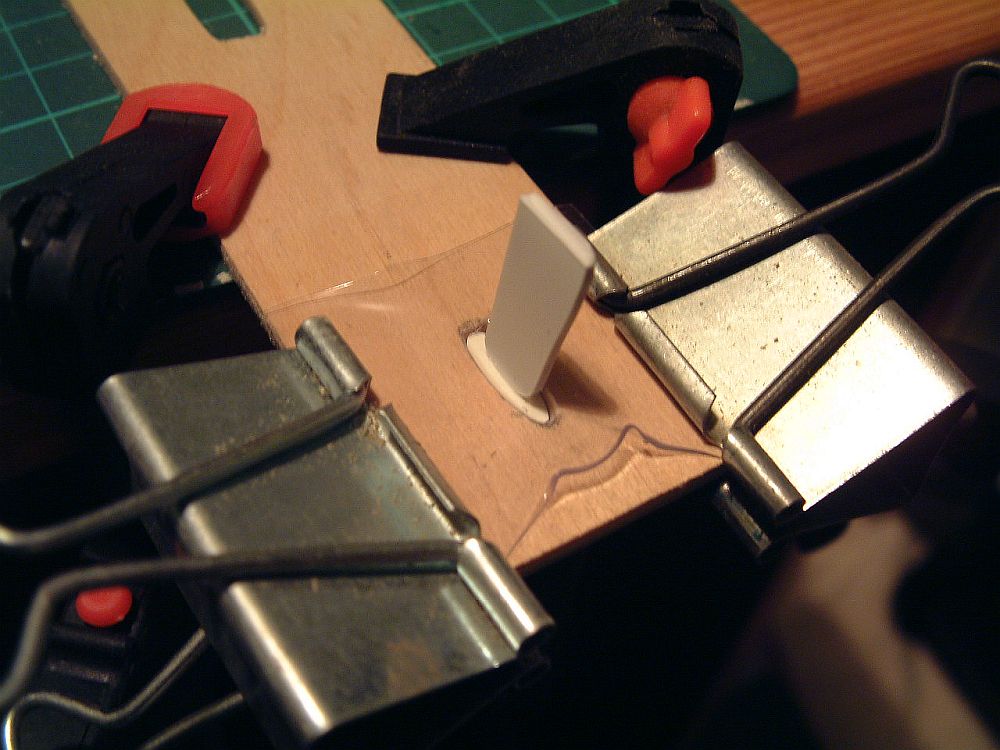
Next remove the surplus material from under the canopy, this is necessary to allow the mail former to be fully inserted into the female former.
canopy_144_04.jpg
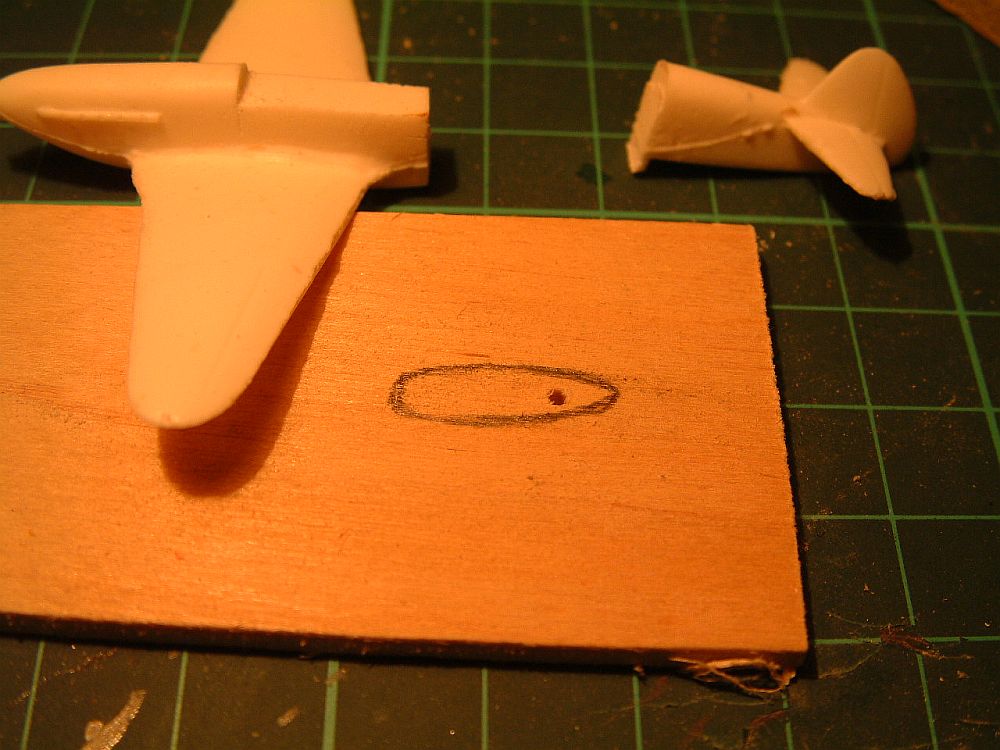
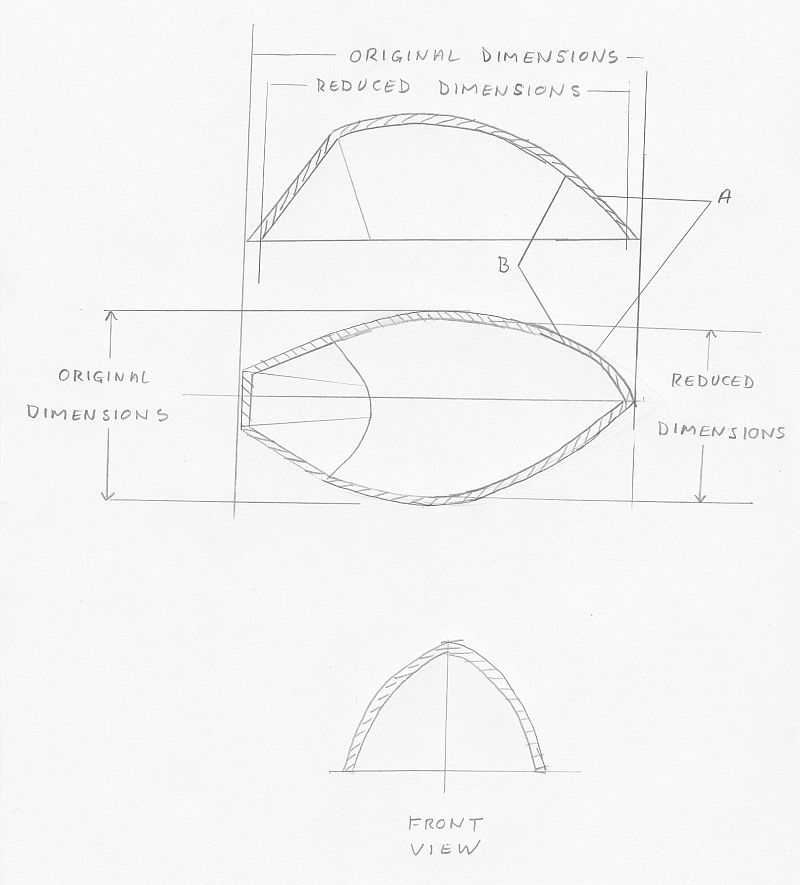
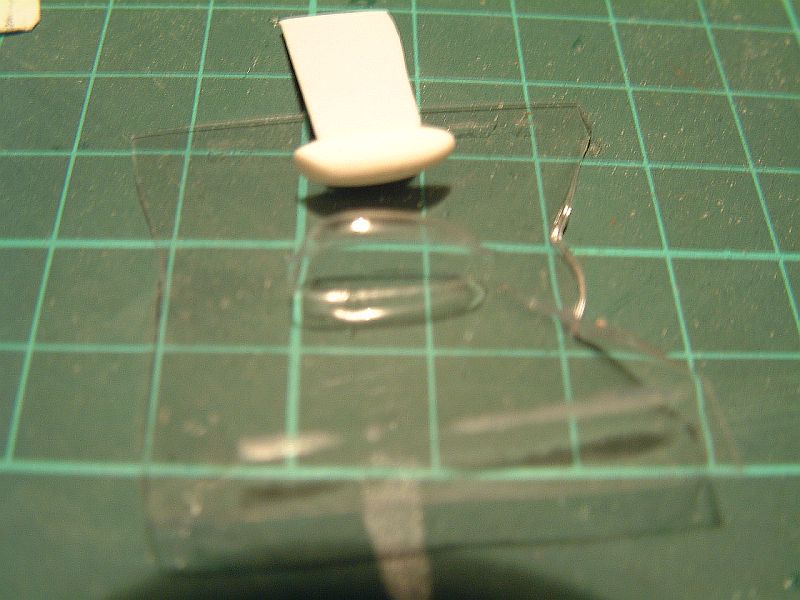
The cleaned up canopy is then used to draw round to give an idea of the size of aperture required.

canopy_144_05.jpg

Next glue a 'handle' to the underside of the canopy, this makes handling easier for shaping and when heat is applied. Cut the required aperture into the plywood or what ever material is selected, stay well within the drawn lines, so that it just allows the male former to pass through it. This should be quite a close fit with as little clearance as possible. Take the canopy (male former) and reduce the outer surface by approximately half a millimetre, this can take a little judgement, but if a too small amount is taken off of the mail former it will not pass through the female when the transparent material is in place. This of course indicating that a little more has to be taken off the male former.

canopy_144_09.jpg

The diagram shows where the male 'plug' should be sanded or filed.   A is the original size of the plug and B is the plug after it has been sanded down, this is necessary or the canopy will be to big, the plug should end up the same size as the inside of the canopy thus allowing for the thickness of the plastic that it is made from. But of course this is not an exact science some trial and error and judgement is required.

canopy_144_06.jpg

Take a piece of 'bubble pack' almost any transparent packing material will do, and tightly clamp it to the female former, picture 07. I have used a hot airgun to apply heat, it allows the heat to be accurately directed and adjusted. Apply the heat to the transparent material and attempt to insert the male former into the female. This may require a little experimentation. The transparent material is surprisingly flexible and it allows several attempts to be made if required. Ensure that the male former goes sufficiently deep so that it provides a little material for trimming. Hold the former in position momentarily after removing the heat so that the material does not shrink back. Finally cut the canopy from the waste material and trim to fit.

canopy_144_10.jpg
canopy_144_07_1.jpg
canopy_144_08.jpg