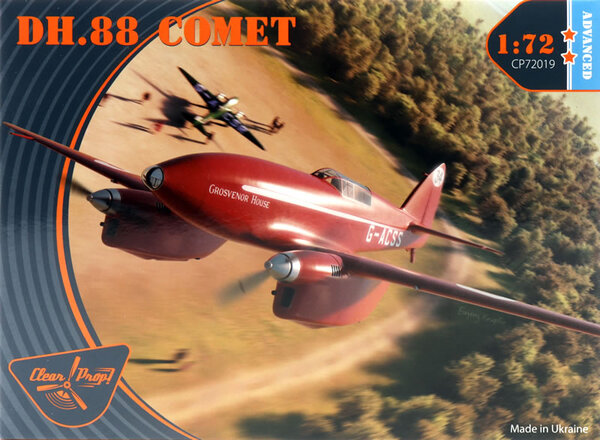
Clear Prop! 1/72 DH.88 Comet Advanced Kit
By Matt Bittner
Overview
According to Wikipedia:
"The de Havilland DH.88 Comet is a British two-seat, twin-engined aircraft built by the de Havilland Aircraft Company. It was developed specifically to participate in the 1934 England-Australia MacRobertson Air Race from the United Kingdom to Australia.
"Development of the Comet was seen as both a prestige project and an entry into the use of modern techniques. It was designed to meet the specific requirements of the race. It was the first British aircraft to incorporate in one airframe all the elements of the modern high speed aircraft - stressed-skin construction, cantilever monoplane flying surfaces, retractable undercarriage, landing flaps, variable-pitch propellers and an enclosed cockpit.
"Three Comets were produced for the race, all for private owners at the discounted price of £5,000 per aircraft. The aircraft underwent a rapid development cycle, performing its maiden flight only six weeks prior to the race. Comet G-ACSS Grosvenor House eventually won the race. Another two Comets were built after the race. The Comet established many aviation records, both during the race and afterwards, and also took part in further races. Three were bought and evaluated by national governments, typically as mail planes. Two Comets, G-ACSS and G-ACSP, survived while a number of full-scale replicas have also been constructed."
This is the first D.88 Comet released by Clear Prop! in 1/72 and no doubt not their last, as they cater to the other aircraft.
The Kit
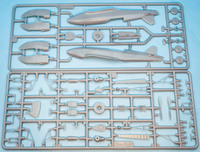
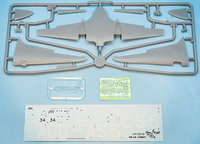
The Clear Prop! 1/72 DH.88 Comet Advanced Kit consists of 78 parts in gray, injected plastic; one clear, injected plastic sprue consisting of two clear parts (the canopy and nose-light cover); and a photoetch fret with 27 pieces. There are markings for only one aircraft, G-ACSS, the all-red aircraft that won the MacRobertson Air Race in 1934. Decals are very well printed and appear to be in register.
Construction starts naturally in the cockpit, and this is where most of the photoetch pieces are added. The instrument panel consists of an injected-plastic back with a decal added to it, then a photoetch panel added over that piece, no doubt giving an excellent represenation of the instrument panel. The same is true of the instrument panel for the back-seater. From there you add photoetch pieces to the control sticks before adding those to the cockpit floor, along with rudder pedals. Add the photoetch seat belts to each seat and then those are added to the floor as well. Finally, the last pieces are added to the cockpit floor prior to gluing the floor to one fuselage half. But before that happens, there are photoetch pieces to add to both sides of the cockpit and then the floor, instrument panels and front and rear bulkheads can be added to one fuselage half before gluing the halves together.

|
Once the fuselage halves are glued together, then the photoetch shoulder belts are glued to the bulkheads behind each seat and then bent in place. The next instruction step has you glue the upper wing parts to the one-piece lower wing before gluing the entire wing assembly to the fuselage.
Now you move into assembling the landing gear, since the gear are encased in their own pods with the engines. There are six pieces to each landing gear side so take your time to assure everything fits together correctly. The wheels/tires are in halves so those are glued together now as well. Even though the instructions show you glue the wheel to the landing gear prior to adding each assembly to the gondolas you glue together, I bet you could get away with putting those on after you're finished with the model. Assembling each landing gear pod consists of gluing the landing gear to one pod-half, gluing the back piece to that same pod-side, then gluing the halves together along with the front gear-door.

|
Turn the model over and glue these landing gear/engine gondolas into place and after you add the radiator to each gondola face, which will be glued on in the next step. That step also has you glue on the horizontal tail pieces along with the separate rudder and ailerons. Then you glue the gondola/engine face to each side before continuing with adding the separate exhausts and tail wheel. Assemble the props prior to gluing those on (again, best left until the end) along with the pitot tube with photoetch front (or single-piece plastic), canopy and clear injected nose.
Conclusion
Clear Prop! has provided an excellent rendition of this iconic aircraft, which exists to this day. It no doubt will build into a fine looking example of G-ACSS and look great adorning your shelves.
Huge thanks to Clear Prop! for supplying the review kit.
