
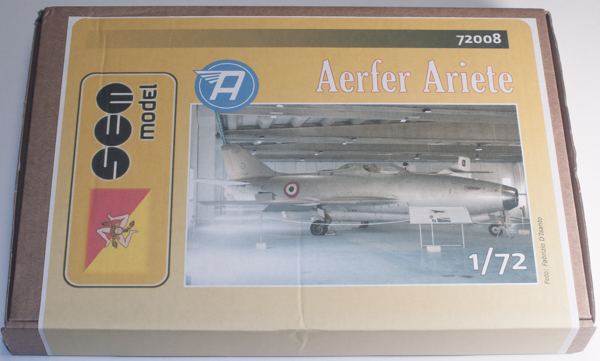
SEM Model 1/72 Aerfer Ariete
By Matt Bittner
Introduction
According to Wikipedia, the Aerfer Ariete was a further design of the Sagittario 2 so it could be mass-produced. Adding a Rolls-Royce Soar RS.2 auxiliary engine – for climbing and sprinting – to the Sagittario's Derwent it was never-the-less not put into production for reasons I'm unsure of. It first flew in March of 1958 and it still exists to this day in Italy, at the Museo Storico Vigna di Valle - Aeronautica Militare Italiana, the Italian Air Force Museum.
The Kit
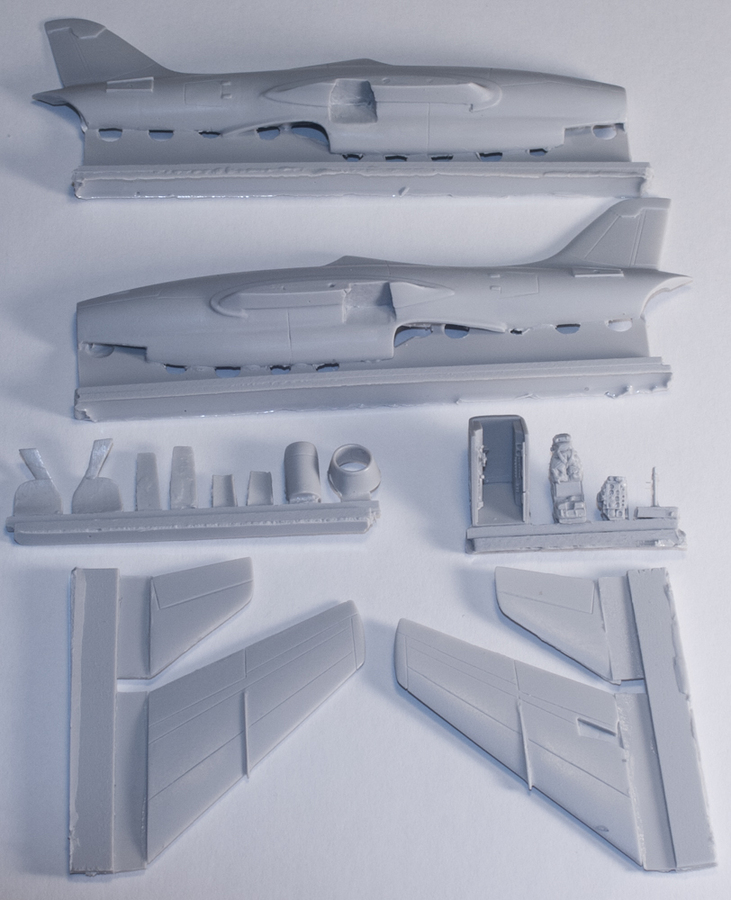
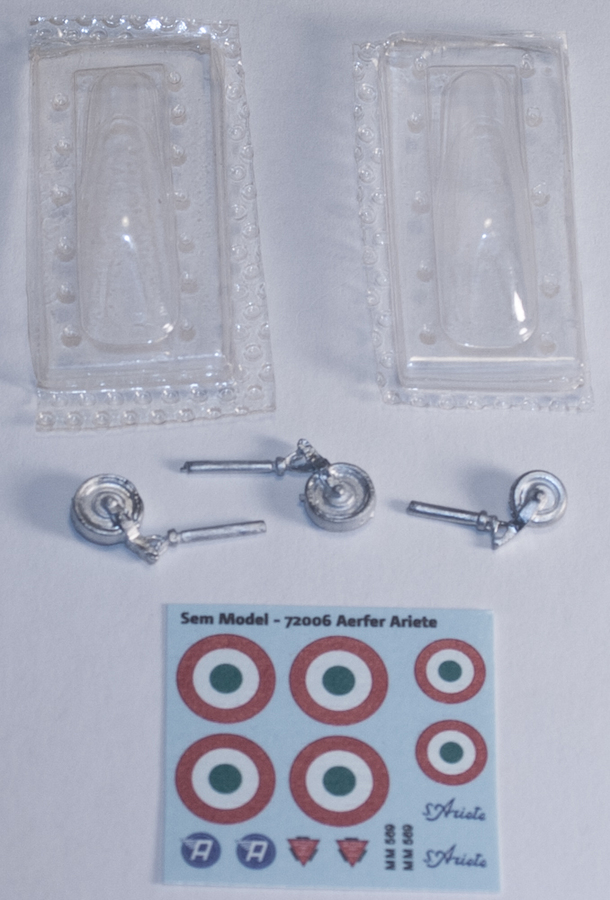
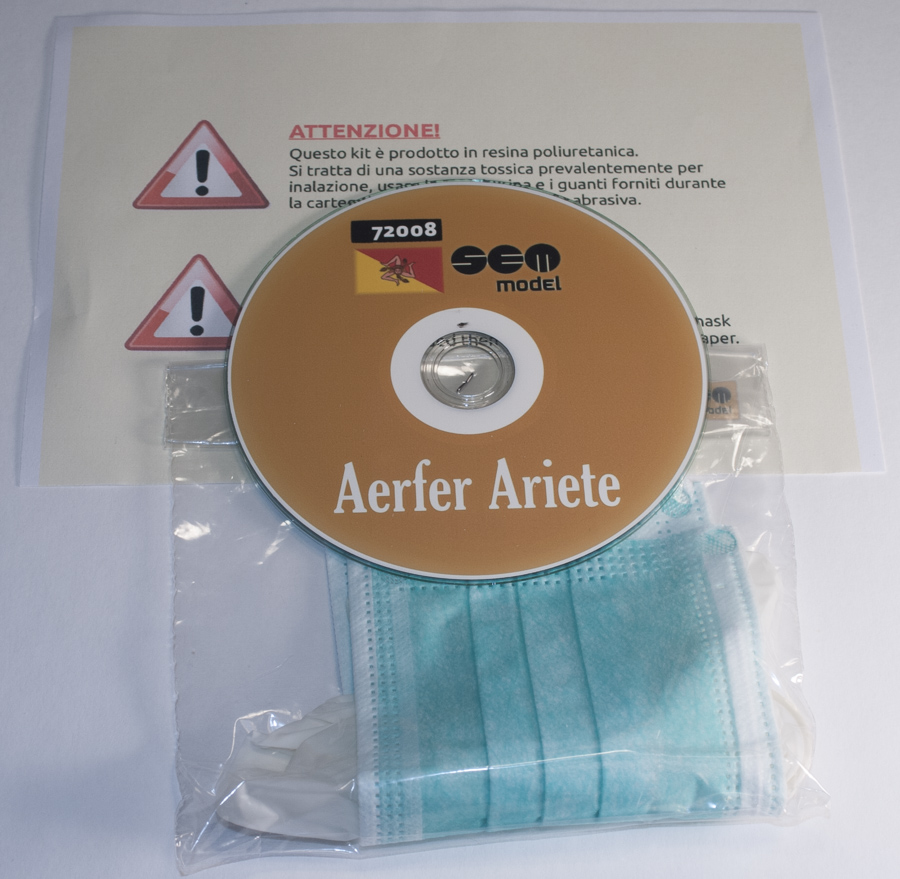
 The SEM Model 1/72 Aerfer Ariete consists of 18 pieces of gray resin, two vac-formed canopies (one a spare) and three white metal landing gear (with wheels molded in-situ). Decals are for the only flying Aerfer Ariete and the only aircraft of this type. The decals appear well formed and in register.
The resin is really well cast and reminds me a lot of the quality product Prop & Jet produces. I would rate SEM at the highest end of resin production. I could only find a couple of air holes and those are mainly where the parts meet the pour blocks. The cockpit is all one piece with a separate, well detailed ejection seat.
 There are a couple of unusual additions to the box. The first is a mask and latex gloves; the mask because you really don't want to breath in resin dust (it does not escape from your lungs) and the gloves to protect your hands from working with the resin. The second addition isn't really unusual, except for the fact most other model manufacturers don't go to this extreme. It's a CD containing almost everything you need to finish the Ariete. Almost everything because it doesn't contain any sort of instruction sheet. However, there are so few parts that construction is pretty obvious. But the other things the CD contains is a 142 megabyte PDF file containing photos of the example that resides in the museum. Every sort of photo you could want. So, if you want to go beyond what the kit provides then you're all set. There are detail photos of practically every area of the jet to help you super detail your model to your heart's content. Unfortunately what isn't covered is the cockpit: it would appear the author of the photos was unable - or not allowed - "into" the cockpit and only took photos of it from the ground.
 For constrcution, I would definitely start with the cockpit. There are just four, highly-detailed parts to the cockpit: a tub, the ejection seat, the instrument panel and a control stick. Unfortunately since there are no instructions there are no color call-outs but the photos provided on the CD show what appears to be a medium green in the wheel wells so you could use that color. Or, what I may do, is use the same green-gray the Italians used during WWII.
You'll need to add both engines' exhausts to a fuselage half before you glue the halves together; however, definitely paint them first and mask. Once those and the cockpit tub is fitted then glue the fuselage halves together and the rest of assembly should not be difficult.
 Thankfully SEM molded a rudimentory peg in the edges of the wing to fit into a corresponding hole on the fuselage wing root. Once those and the horizontal tail surfaces are added then painting can commence.
It appears the Ariete was natural metal so a primer coat should probably be applied. Only the front of the nose appears "shiny" so the rest will best be left a little dull.
Conclusion
This is an excellent rendition of the Ariete by SEM Model. In fact, I would even recommend this model as a first resin build. There isn't a lot to the kit and what's there is extremly nicely done so you'll have a great looking model in no time. Where the extra attention will come into play is with the natural metal finish.
Huge, huge thanks to SEM Model for sending this in to review.