Vickers-Clyno 'Mk' III Part 2 Hun in the Sun
By Karen Rychlewski
 |

|
 I'd like to take you through the mental development of this diorama before looking at the physical building, because a diorama that starts with a finished model is probably doomed to failure. Shep Paine, in his classic "How to Build Dioramas", suggests that the modeler "...try to come up with something that shows your subject 'doing its thing'...". I've seen several photos of machine-gun equipped motorcycles firing up into the sky and thought that would make a good little scene. This was the basic 'snapshot' I envisaged of a moment in time.
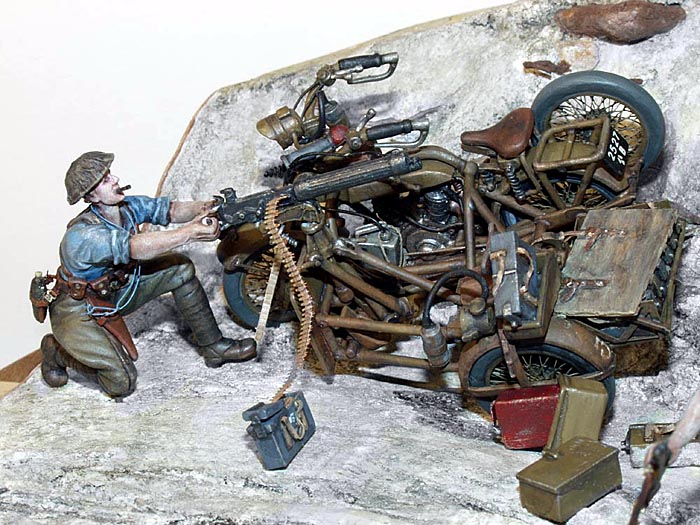
 up the side of an embankment, rather than in a ditch like everyone else does it. Good, good, I thought: this adds some different height levels to the scene, too. So we have the 'past action' of the crash, and the 'present' of the machine gun being fired. But why did the bike run off the road? Obviously trying to get away from something. Aha! The road has just been strafed by that nasty enemy airplane that the gunner is firing at. Great! Imply that by including a few teensy bullet holes in the road.
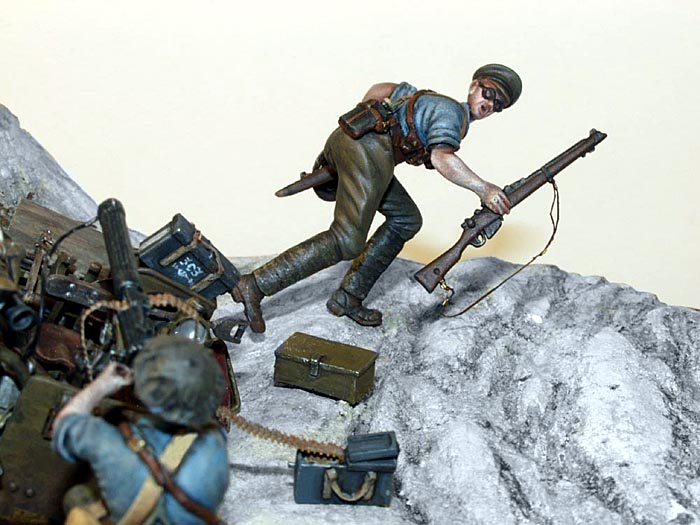
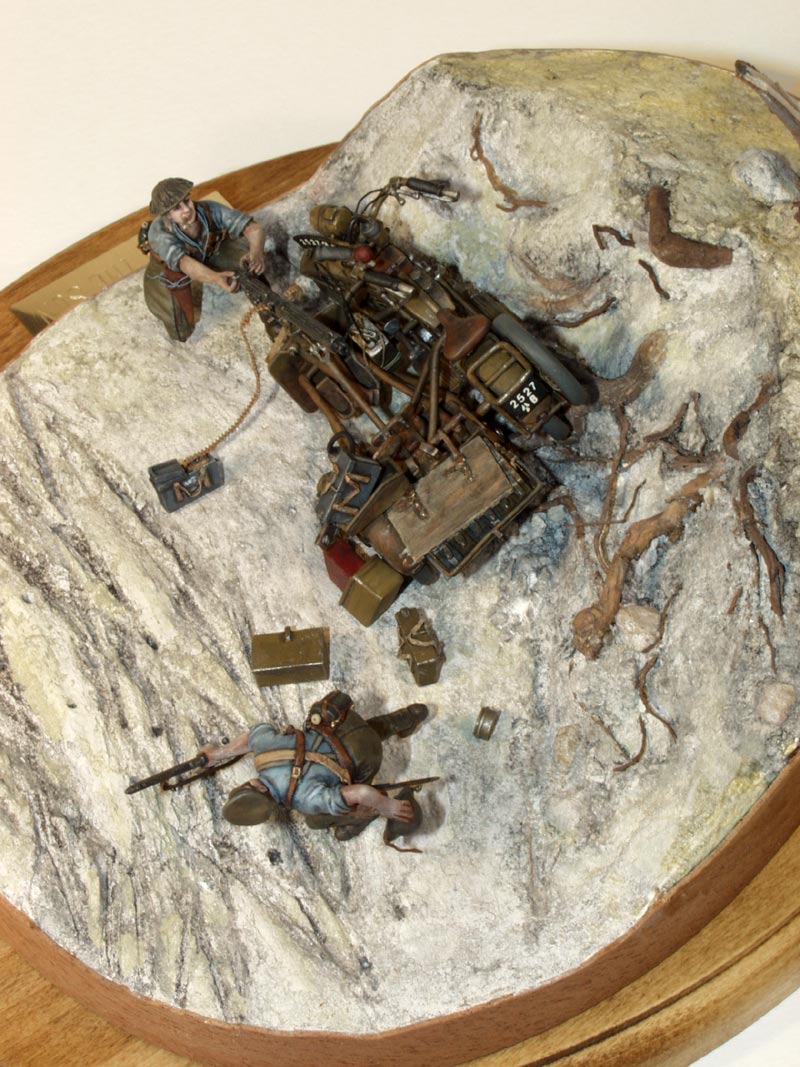 Pretty cool, so far; needs a bit more activity on the part of the two figures. The passenger is now the gunner, firing at the airplane; the driver would ordinarily be feeding the cartridge belt to him. The story idea is nearly complete now; all that's left is to imply the 'future action' of the scene. Although this element is not absolutely necessary for a story-type diorama, it suddenly came together. I had some nice running figures--could I make the driver running? Add a little more movement? But WHY would the driver be running away from his buddy? That's not a very nice thing to do. He must have had a good reason. And the light bulb lit above my head: of course, he's running away: after the crash the...but wait, see if YOU can figure out why the driver is hotfooting it back down the road.
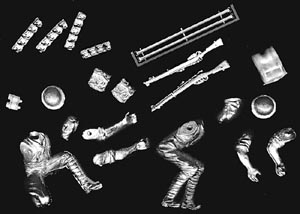 The Figures
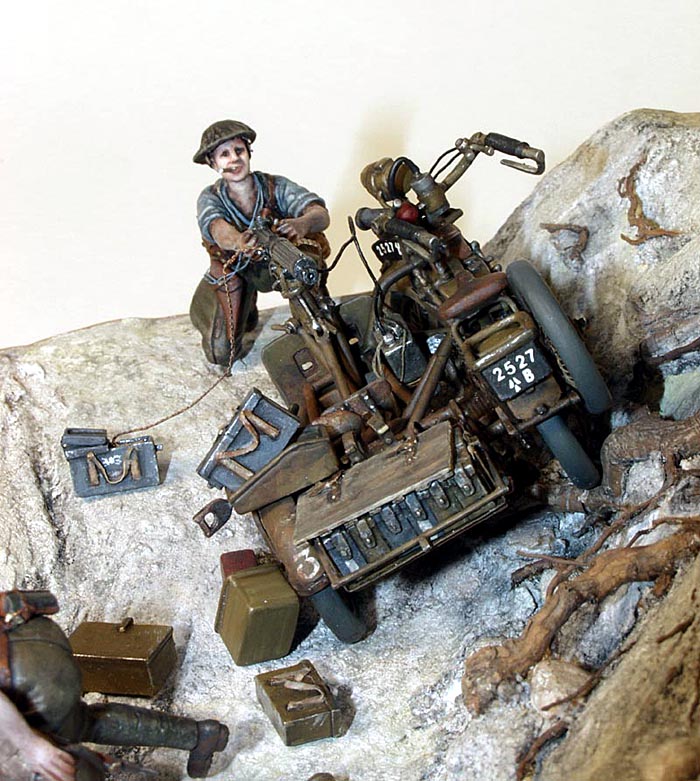 I wanted the appearance of soldiers ready for anything that might come their way, but not carrying all their earthly possessions with them. So both figures wound up wearing Scale Link cartridge belts across their chests and draped with canteens and scratchbuilt small packs. Both figures also have (SL) metal helmets; the gunner's with an added cloth cover and the driver's with complete interior. Additionally, the driver has grabbed his (SL) rifle and wears a (SL) bayonet. The gunner received a (SL) holstered pistol. All the belts and straps were scratched from thin cloth, paper, and masking tape; and the assorted buckles and such are Reheat photo-etched brass accessories. I didn't care for the appearance of the puttees, so I wrapped thin cloth around the lower legs. About half of these items were attached with CA glue before painting . The arms and heads were also attached with CA and the joints were filled with Milliput and sanded to shape. Now we're ready for the painting stage. Finally!
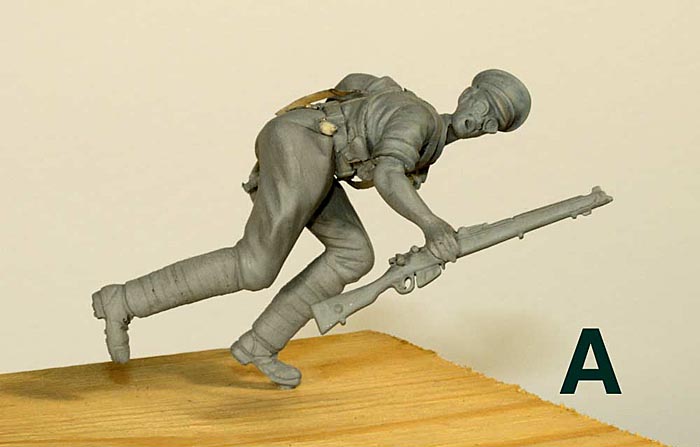 Before the real fun started, the figures were spot primed on the areas which still appeared to be a little rough or scratched. Then a final sanding and polishing of those areas, and we're ready for the final primer. After a good warm bath in plain soap and water, I used Floquil grey primer, a lacquer-based railroad paint which goes on very easily, dries quickly, and provides a dead flat surface. Naturally, two or three more dings and scratches appeared and they were taken care of with Squadron White Putty (see photo A). All the added straps and buckles were also primed, except the ends which would need to be glued later to canteens, etc.
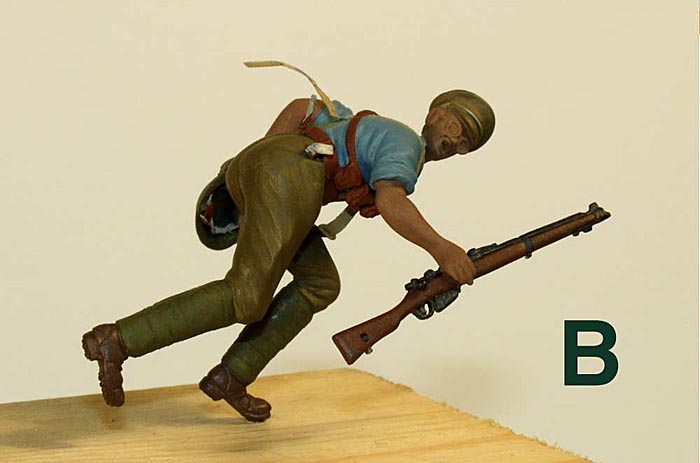 The next step is to apply the base colors; these are applied without blending or shading--just the basic color for each major surface area. I'll usually select a medium dark tone of a hue for the base color because I find it easier to work the shadows and highlights from a middle tone. From this point to completion, all the paints used were Testor's Model Master enamels. The shirts are US Navy Blue Gray, the suspenders (braces) are Faded Olive Drab, and all leather straps and such are Rust. The small pack and strap are Gulf Armor Sand; and the trousers, puttees, hat, and helmets are Dark Earth and various "drab" colors: Olive, Field, and Dark. The wooden parts of the rifle began with Leather and the shoes are Italian Dark Brown. All the skin areas were covered with Burnt Sienna--this looks very dark at first, but it forms a good basic reddish tone for later lightening. The figure now looks kind of cartoonish, but it's starting to take on the appearance of a real person (see photo B).
 After a light coat of Testor's Dullcote, the major work of painting shadowed areas begins with mixing a slightly darker tone of each base color (except the skin) and applying it as a wash. It's really nothing more than dirty thinner--but with a specifically colored dirt. Two or three successively darker tones of each base color are added in this way with light layers of Dullcote in between as needed to 'set' the colors. These washes serve to create shadows in the grooves and folds as well as a weathered effect. Dullcote again, and the highlighting can begin. Two or three mixes of lightened base color are applied, but drybrushed lightly instead of as washes--the lighter tones need to stay on the upper, raised surfaces and washes tend to flow downhill into the valleys. The skin areas are lightened this way as well. This is the step which starts to add life to the figures (see photo C).
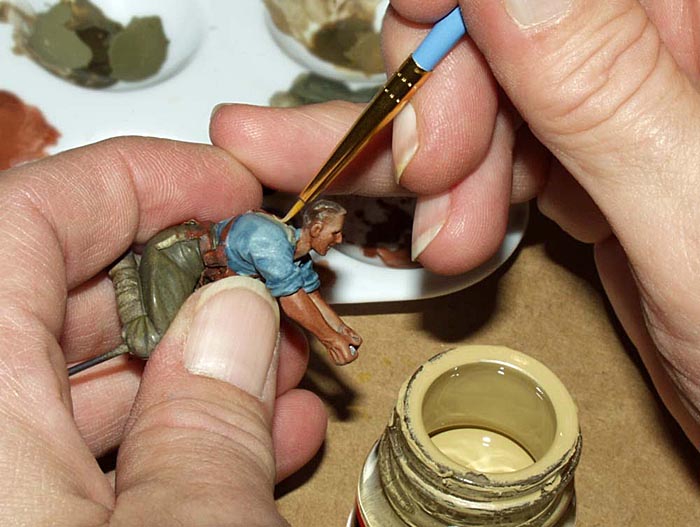 Then the additional separate pieces of equipment were glued in place and individually toned. All that's left to do is the really delicate work of adjusting small areas which need to be lighter or darker, darkening the edges with thinned black (I use Aircraft Interior Black instead of solid Flat Black which I find too dense), and picking out teensy details like eyes, lips, brass buckles and studs, etc. For these very tiny lines and dots, I use a toothpick sharpened to a point instead of a brush. OK, while the paint is drying, let's look at the place where these two figures and the motorcycle will find themselves.
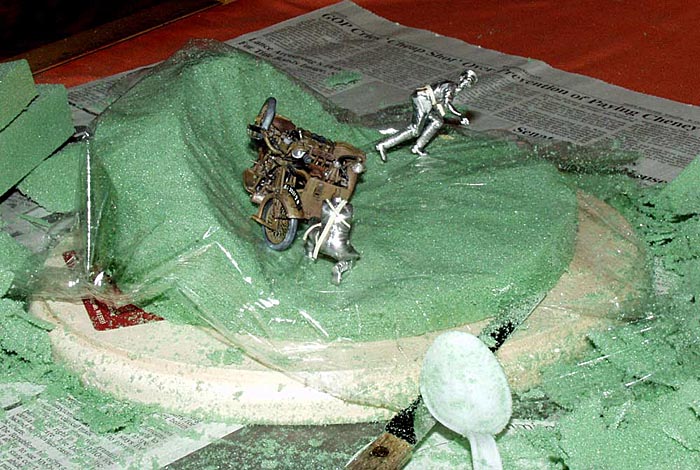 glued two blocks together with white glue and started hacking at it with my knife. I wasn't sure if I wanted a rectangular or oval outline for this diorama, so I carved out a rectangle first, then dry-fitted the figures and the bike--which led me to change it into an oval. Then the shape of the 'embankment' and the rutted surface of the 'road' were roughly carved into the foam. Testing it with the figures and bike is essential to be certain everything fits and looks right for the idea.
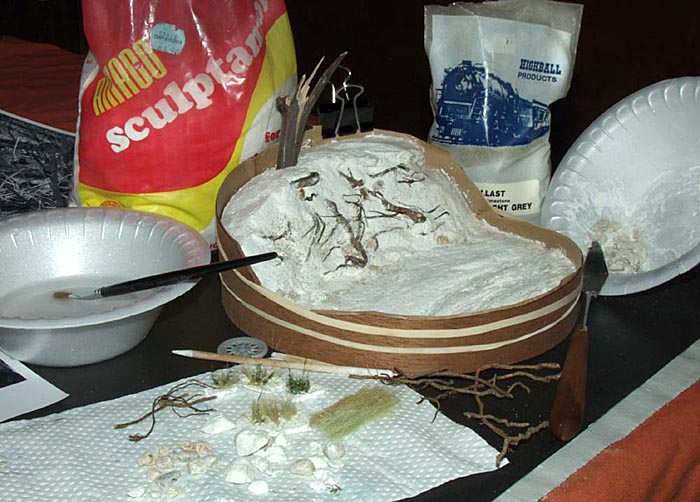 groundwork, and I also sprinkled some railroad model 'ballast' stones on the surface. One doesn't have to spend a fortune at Verlinden to get the right materials.
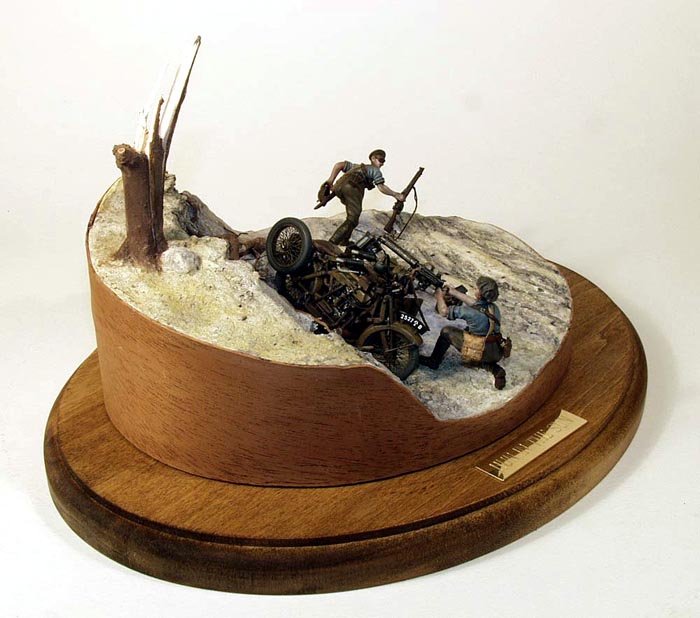 I started to put a little grass and a few plants on the upper surface but then decided it looked more like 1917 if it was bare of life. All the colors of the groundwork were done with acrylic washes. This is a magic part of the process: it's pretty ugly all white; but when a thin dark wash is brushed over it, all the cracks and crevices pop out and it looks like...dirt!