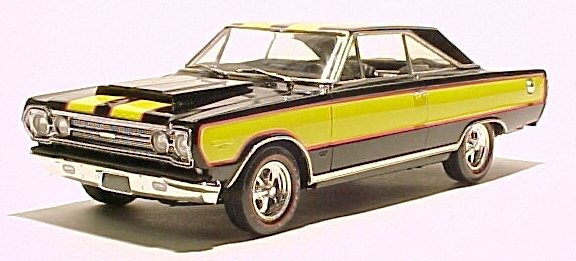
Revell 1/25 scale '67 Plymouth GTXTerry Sumner |
 |
The Kit
An in-box preview of this kit was done in the August
issue.
As Al stated, this kit represents Revell's effort at including parts to make a drag version or a very hot street machine. The only engine option provided is the venerable 426 Hemi. The 440 Commando is not included. Also, the only transmission option is the 4 speed manual. The kit includes 5 parts trees, the body, the chassis, 2 chrome trees, 1 clear red tree, one clear tree, 4 Goodyear Polyglass GT F70-15's, 2 Goodyear Blue Dragon 10.0 X 15 drag slicks and one decal sheet. All parts except the glass are molded in white.
The chassis is very nicely molded with no flash at all on my sample. The gas tank is molded in but the exhaust is not...a definite plus!
The "glass" parts are all in separate pieces.
 The
426 Hemi is a pretty nice little kit in and of itself. It consists of
19 parts. The block and transmission are molded together in the usual
way with the trans and bellhousing already attached. The joint is split
down the middle. The oil pan is separate from this molding. Heads and
intake manifold are separate and molded in white. The valve covers are
chromed and have the factory stock wrinkled finish.
The
426 Hemi is a pretty nice little kit in and of itself. It consists of
19 parts. The block and transmission are molded together in the usual
way with the trans and bellhousing already attached. The joint is split
down the middle. The oil pan is separate from this molding. Heads and
intake manifold are separate and molded in white. The valve covers are
chromed and have the factory stock wrinkled finish.  The
dual 4 barrel carbs are chromed along with one of the 2 provided air cleaners.
The other air cleaner is in white and Revell call this one the "street
version." There are separate radiator hoses, heater hoses, and distributor.
The alternator is chromed and mounts to the belt setup with a separate
alternator bracket.
The
dual 4 barrel carbs are chromed along with one of the 2 provided air cleaners.
The other air cleaner is in white and Revell call this one the "street
version." There are separate radiator hoses, heater hoses, and distributor.
The alternator is chromed and mounts to the belt setup with a separate
alternator bracket.
The engine compartment is fair. The fenderwells are molded with the body while the firewall is a separate molding. The radiator housing is separate from the radiator itself and a shroud is also included separately. Included in this area are a master cylinder, a chromed windshield washer motor, and a well-detailed battery. A cool can, a windshield washer tank and a horn are also included.
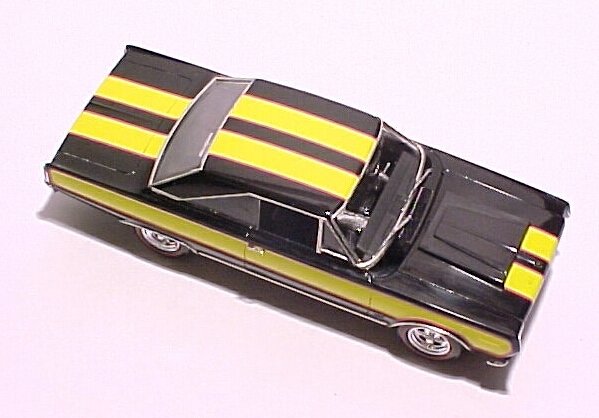
The body itself is crisply molded with no flash. The only detraction is the usual mold separation lines and 4 nasty mold sink marks in the headliner. The identifying emblems are molded on and are nice and crisp. Separate windshield wipers, in chrome, are included along with chromed door handles and gas cap. The front end consists of a chromed main grille/headlight assembly with a separate bumper. To the rear is a one-piece affair for the entire thing. The hood is the stock hood with 2 scoop options. One option is the 2 side-by-side narrow scoops and the other is the wide scoop, ala Ramchargers, albeit smaller.
The interior is the built up variety popular now. The side panels are one piece and glue to the sides of the interior "tub". The dashboard consists of 2 pieces with nicely molded details. Steering wheel is fair as is the console and shifter. The console itself is completely chromed. The pedals are a separate molding and attach to the firewall instead of hanging down from the dash, as they should. There is a chromed dash mounted tachometer included as well as a chromed rear view mirror. The bucket seats are molded in 2 pieces...a front and a back.
The Build
I chose to build my GTX in a street machine version. One could call it
the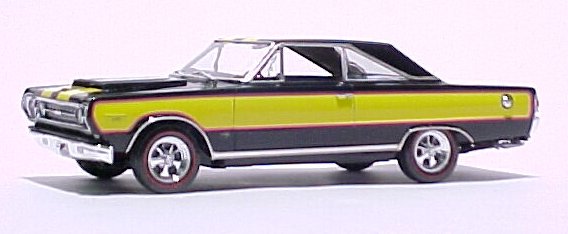 drag version, but I chose to use all 4 of the Polyglass GT's instead of
the slicks. I started out by getting the tires ready. I first removed
the flash on the tires and then dipped the sidewalls in a shallow dish
of Future floor finish. Future is my preferred method of obtaining the
gloss coat needed for decal adhesion. After a few minutes in the dehydrator,
I applied the redline stripes Revell included on the decal sheet. I found
that these decals were just a bit too large in diameter. This made the
stripe run right over the tire lettering when it should have fallen inside
the lettering. Pressing on, I used some decal solvent on them and they
laid down nicely. A coat of Dullcote and they were done. The chrome rims
appeared to me to be the Keystone Kustomags type. Since I always liked
those rims, I used them.
drag version, but I chose to use all 4 of the Polyglass GT's instead of
the slicks. I started out by getting the tires ready. I first removed
the flash on the tires and then dipped the sidewalls in a shallow dish
of Future floor finish. Future is my preferred method of obtaining the
gloss coat needed for decal adhesion. After a few minutes in the dehydrator,
I applied the redline stripes Revell included on the decal sheet. I found
that these decals were just a bit too large in diameter. This made the
stripe run right over the tire lettering when it should have fallen inside
the lettering. Pressing on, I used some decal solvent on them and they
laid down nicely. A coat of Dullcote and they were done. The chrome rims
appeared to me to be the Keystone Kustomags type. Since I always liked
those rims, I used them.
 Next
I prepared the body for painting as well as the chassis and related parts.
I decided that I wanted to use those gaudy yellow stripes on this model,
just to see if I could get them to lie down satisfactorily. So I first
laid down some Variprime on all the parts and then a few coats of Black
Acrylic Lacquer that I had obtained from Leon Tefft's Cobracolors line
before he ceased doing business. 4 coats were laid down in a half-hour!
The parts then went into the dehydrator and after an hour, 4 more coats
of PPG clearcoat were applied. Then came the decals. I was full of trepidation
at first, because of past experiences with kit decals and their refusal
to lie down and respond to decal solvents. However, these decals were
different. They did indeed respond to some SuperSet and after a little
prodding, settled down nicely into all the corners and crevices. After
the decals dried a day or so, I applied a few more coats of clear, then
eventually rubbed the finish out a little.
Next came the Bare Metal Foil for the chrome trim on the car. Lastly was
the installation of the glass. I took the glass and dipped all the pieces
into a jar of clean Future. When these parts were dry, they were like
real glass....very clear. But that's not the reason I dip them. The real
reason is that I like to use superglue to attach the glass parts but this
can cause major fogging or the parts. So to eliminate this fogging, I
first dip all glass parts in Future. Doing this eliminates any fogging
caused by the application of superglue to clear plastic parts.
Next
I prepared the body for painting as well as the chassis and related parts.
I decided that I wanted to use those gaudy yellow stripes on this model,
just to see if I could get them to lie down satisfactorily. So I first
laid down some Variprime on all the parts and then a few coats of Black
Acrylic Lacquer that I had obtained from Leon Tefft's Cobracolors line
before he ceased doing business. 4 coats were laid down in a half-hour!
The parts then went into the dehydrator and after an hour, 4 more coats
of PPG clearcoat were applied. Then came the decals. I was full of trepidation
at first, because of past experiences with kit decals and their refusal
to lie down and respond to decal solvents. However, these decals were
different. They did indeed respond to some SuperSet and after a little
prodding, settled down nicely into all the corners and crevices. After
the decals dried a day or so, I applied a few more coats of clear, then
eventually rubbed the finish out a little.
Next came the Bare Metal Foil for the chrome trim on the car. Lastly was
the installation of the glass. I took the glass and dipped all the pieces
into a jar of clean Future. When these parts were dry, they were like
real glass....very clear. But that's not the reason I dip them. The real
reason is that I like to use superglue to attach the glass parts but this
can cause major fogging or the parts. So to eliminate this fogging, I
first dip all glass parts in Future. Doing this eliminates any fogging
caused by the application of superglue to clear plastic parts.
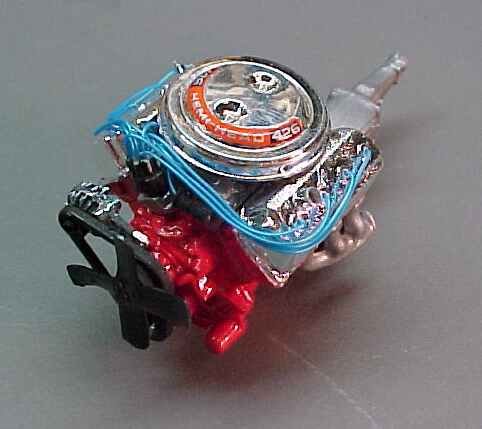
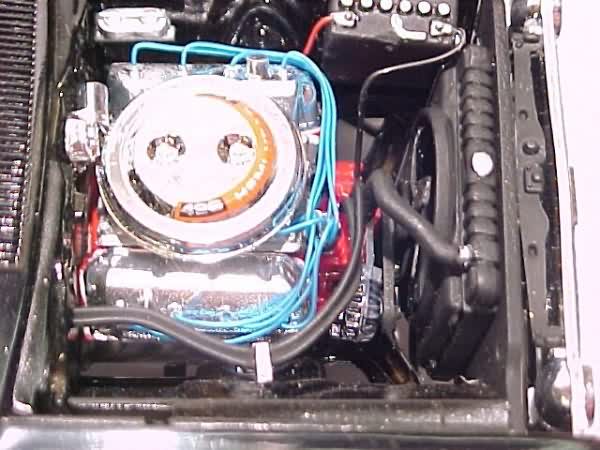
The engine was assembled in the normal manner. First the halves followed
by the heads and water pump piece. I hand painted Testor's Chrylser Engine
Red
to the block and used Testor's Metalizer to the trans. I also metalized
the intake manifold, headers, exhaust system and master cylinder and set
them aside. I chose to leave the rocker covers chromed because this was
a street machine and many such cars had chromed covers. But these covers
would look great if stripped and painted factory flat black. Even though
this was supposed to be a quick build, I couldn't resist at least adding
the spark plug wires. So I broke out the Radio Shack blue wire, drilled
some holes in the valve covers and distributor, along with the coil, and
inserted the wires. Looks a lot better than without!
The interior was next and was painted in flat black enamel.  In
order to impart a nice semigloss sheen, I simply rubbed a little skin
oil onto the surfaces. The details in the dashboard were picked out with
an artist's silver pencil and some silver paint. The interior also gets
adorned with the chrome nameplate that rests high in the middle of the
rear seat. The side panels were detailed in the same manner and then the
whole thing was assembled to wait for final assembly. Make sure you paint
the underside of the interior tub, as part of this piece will show from
the bottom.
In
order to impart a nice semigloss sheen, I simply rubbed a little skin
oil onto the surfaces. The details in the dashboard were picked out with
an artist's silver pencil and some silver paint. The interior also gets
adorned with the chrome nameplate that rests high in the middle of the
rear seat. The side panels were detailed in the same manner and then the
whole thing was assembled to wait for final assembly. Make sure you paint
the underside of the interior tub, as part of this piece will show from
the bottom.
Next was the chassis. All the parts were assembled per the kit instructions.
This built up into a very detailed chassis. Just remember to place the
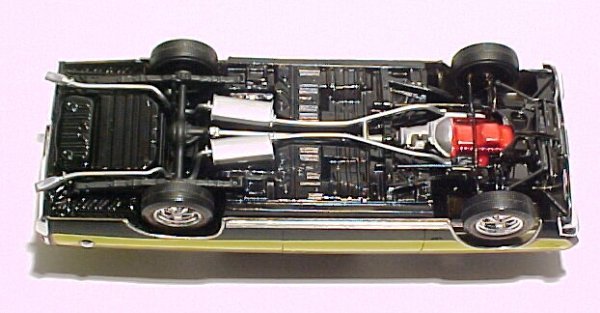 exhaust
system in first because if you forget, you won't be able to get the rearend
assembly in place. Luckily, I did it right this time. (unlike another
time where I boo-boo'ed this part!)
exhaust
system in first because if you forget, you won't be able to get the rearend
assembly in place. Luckily, I did it right this time. (unlike another
time where I boo-boo'ed this part!)
Final Assembly
Final assembly fell along the lines of normality. No major surprises, but there were a few minor details to work out. Installing the engine in the chassis revealed that the driveshaft was just a tad too short. The forward yoke BARELY makes it into the transmission tailshaft. Also, the exhaust is just a bit too long where the 2 pipes attach to the exhaust manifolds. A little judicious trimming took care of that.
 I
also found that after gluing in the radiator support structure, the hood
would no longer fit. It seems that gluing that structure in place draws
the nose of the body inward a bit. I though maybe I had attached the support
structure in the wrong place so I removed it and rechecked it. It had
been in the correct location, so back in it went. I then sanded the edges
of the hood a bit and ended up with a nice tight fit. The rest of the
assembly went normally. I used some Black-it-Out from The Detailer line
to accentuate the front grille. I added the chrome items on the car including
the door handles, windshield wipers and gas cap. The last item was the
front bumper for the exterior. I then finished the engine compartment
by adding the radiator hoses and heater hoses. Then it was time for the
battery. I couldn't resist adding the battery cables to the battery so
out came the Radio Shack detail wire again. Then I went to place the
I
also found that after gluing in the radiator support structure, the hood
would no longer fit. It seems that gluing that structure in place draws
the nose of the body inward a bit. I though maybe I had attached the support
structure in the wrong place so I removed it and rechecked it. It had
been in the correct location, so back in it went. I then sanded the edges
of the hood a bit and ended up with a nice tight fit. The rest of the
assembly went normally. I used some Black-it-Out from The Detailer line
to accentuate the front grille. I added the chrome items on the car including
the door handles, windshield wipers and gas cap. The last item was the
front bumper for the exterior. I then finished the engine compartment
by adding the radiator hoses and heater hoses. Then it was time for the
battery. I couldn't resist adding the battery cables to the battery so
out came the Radio Shack detail wire again. Then I went to place the 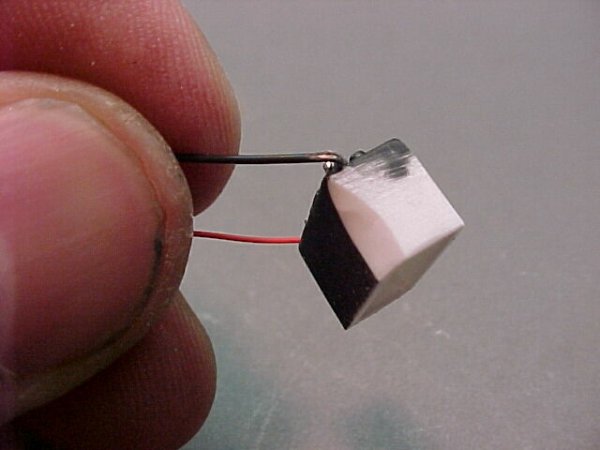 battery
in it's place, and what's this??? It would not fit! It was quite a bit
too large to fit in the space provided. Out came the X-Acto knife for
some more trimming. I included a photo to show just how much trimming
I had to do to get it to fit in.
battery
in it's place, and what's this??? It would not fit! It was quite a bit
too large to fit in the space provided. Out came the X-Acto knife for
some more trimming. I included a photo to show just how much trimming
I had to do to get it to fit in.
Conclusion
Overall, I really like this car model kit. I didn't do any measuring,
but it builds into a model that looks faithful to the GTX's that I remember that
were running around my home area in the late 60's. I don't know of any
Hemi powered GTX's back then, but the 440 ? Yep, there were a few! One
of 'em even tried to run down my 427 powered 66 Chevelle. To no avail
I might add! (chuckle)
builds into a model that looks faithful to the GTX's that I remember that
were running around my home area in the late 60's. I don't know of any
Hemi powered GTX's back then, but the 440 ? Yep, there were a few! One
of 'em even tried to run down my 427 powered 66 Chevelle. To no avail
I might add! (chuckle)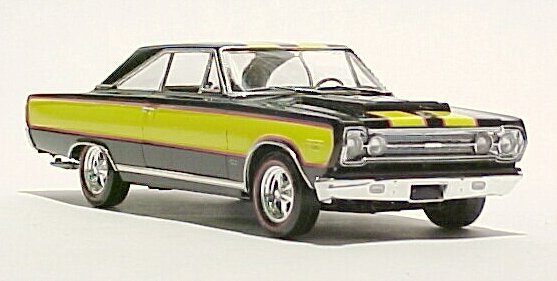

![]()


