
Miniwing 1/144 McDonnell F2H-2 Banshee
By Matt Bittner
Introduction
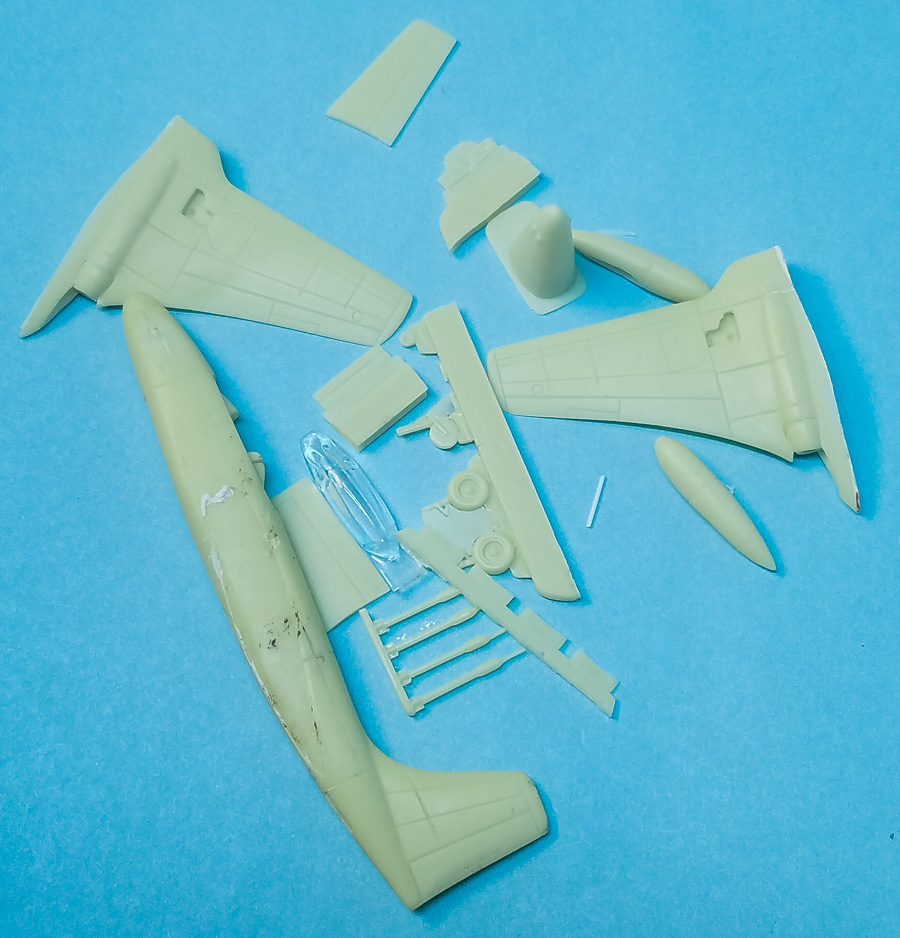
Back in 2011 I wrote the First Look on the Miniwing 1/144 F2H-2 Banshee. It's high time I finally finished it, but it wasn't without its pratfalls. First, one of the wings was warped so I used the hot water trick to fix it prior to the start of construction. Or so I thought. After I had the kit all together I noticed there was still a warp to the wing, so I tried to fix it again with hot water, but it was with the kit completely together. Well - yes, you guessed it - I dropped the model during the unwarping and all the parts glued on came off, thankfully at the seams. Because of that I stopped working on the model.
Then a few years ago I move back to Ohio first with my mom, then on my own and during that last move somehow the kit ended up in the driveway. Thankfully, it was just the fuselage and it actually ended up in a crack in the driveway, so the only damage was some tar on one side of the fuselage, along with a few scratches and one gouge. Easily taken care of. So, I decided to get back to the build and finish it.
|
Construction
Because it's been so long, there are some build items that are pretty sketchy. I know I had to deal with the wing-to-fuselage seams, mainly on the underside. Then when doing so, I uncovered a lot of pinholes in the fuselage. A lot. Some of them had to be drilled out and plastic rod inserted to close them up. Then it seamed that (see what I did there?) everytime I would handle the model, one of the horizontal tail pieces would come off. I'm not exactly sure how many times each side was glued back on, but it was a few for each.
|
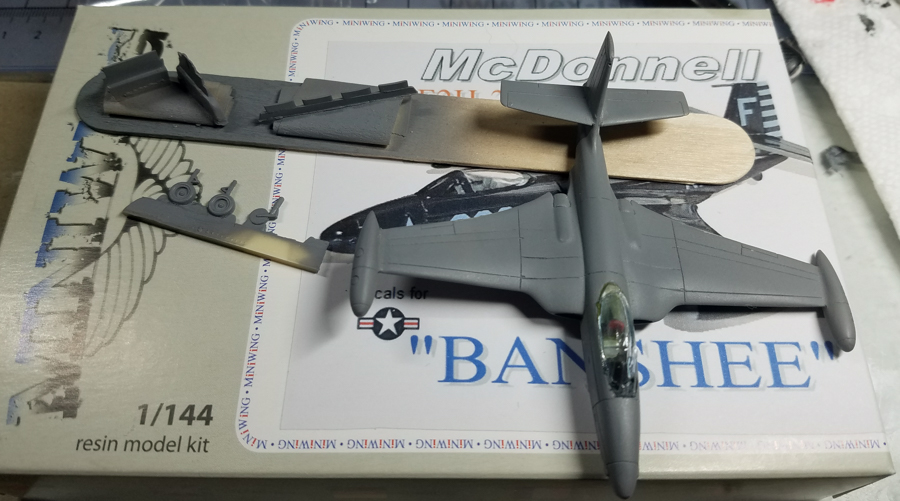
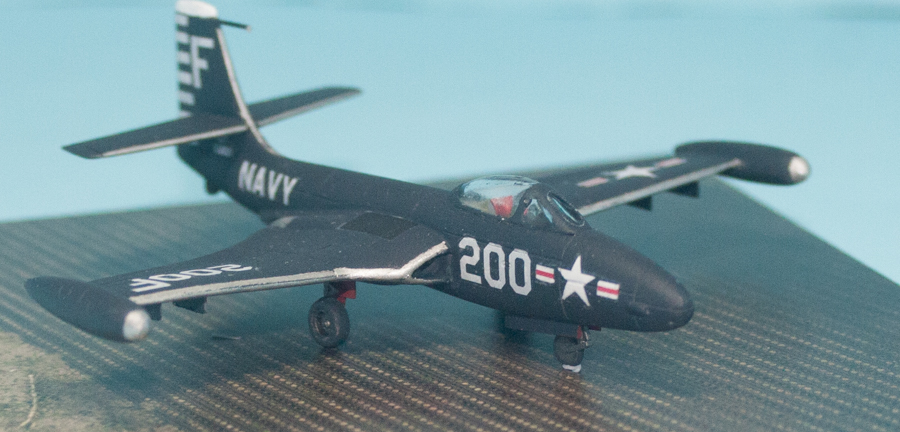
I decided to add everything to the cockpit prior to priming since the interior was "gray", and me not caring about what actual gray it was. I did add a plastic rod control stick but that was it, everything else (seat cushions/belts and instrument panel) were handled by decals. I then glued the canopy - and masked it - prior to priming.
|
I decided to try a new-to-me-primer this time, the gray Stynylrez from Badger. It worked really well and while it came out a little grainy in some spots, it was easy to sand that away. In fact, this primer sands better than any of the other acrylic primers I've used in the past. Badger has this primer in gray, white and black.
|
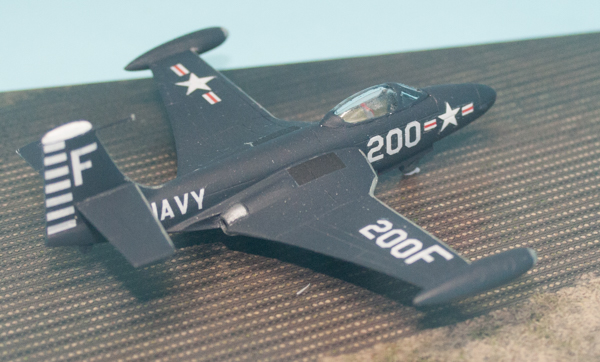
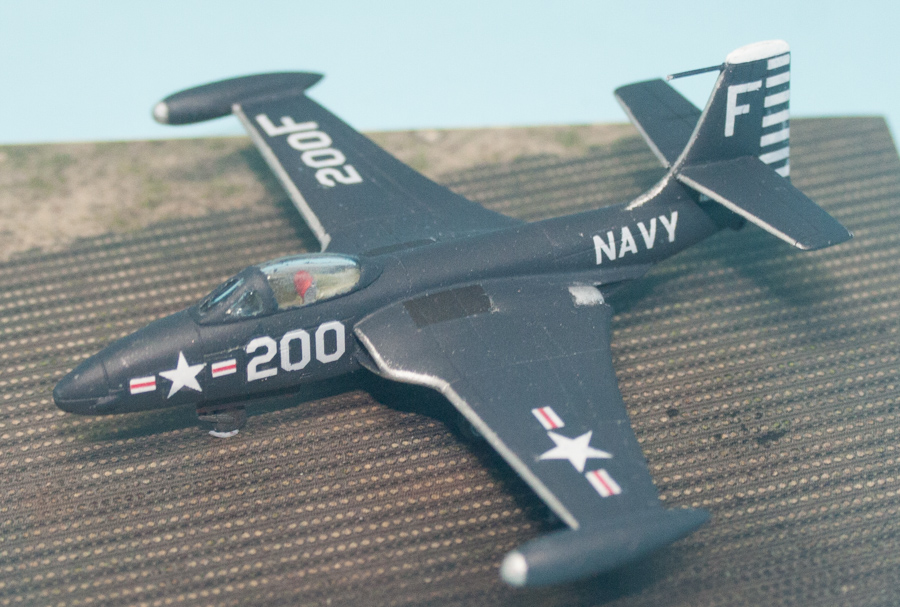
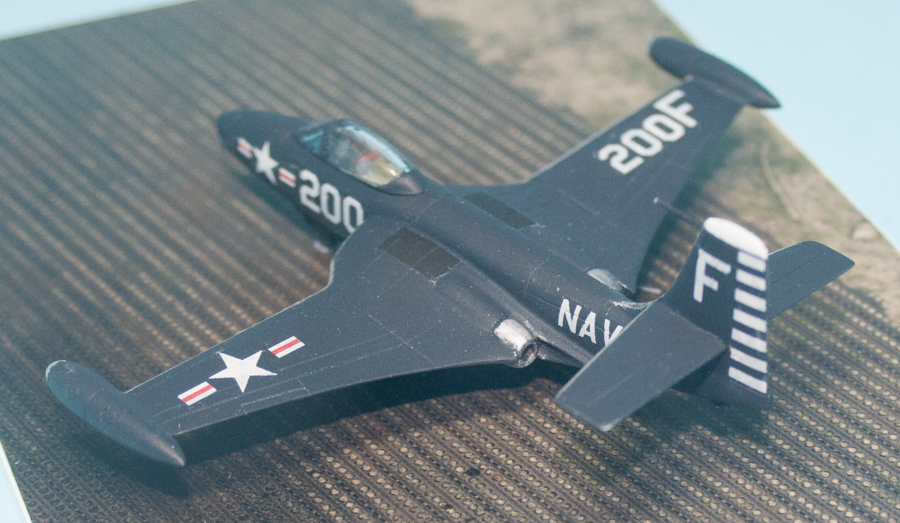
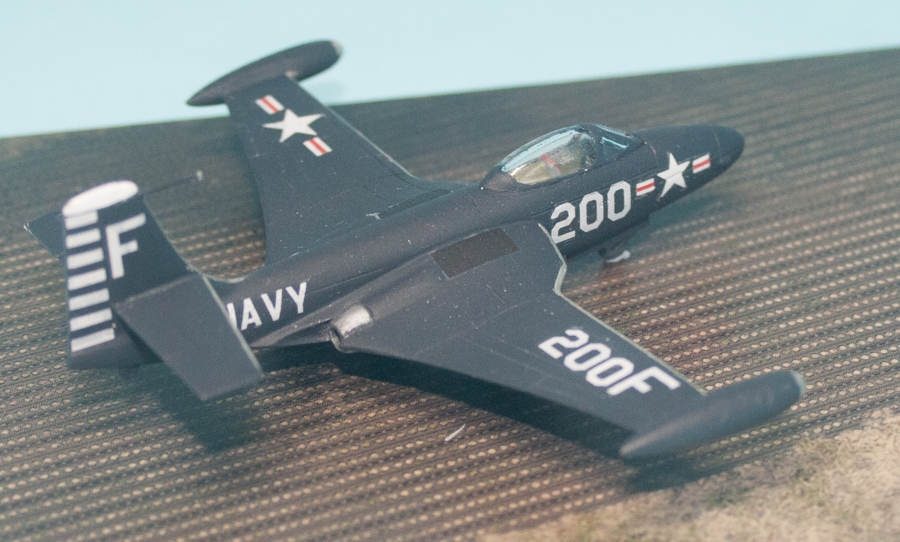
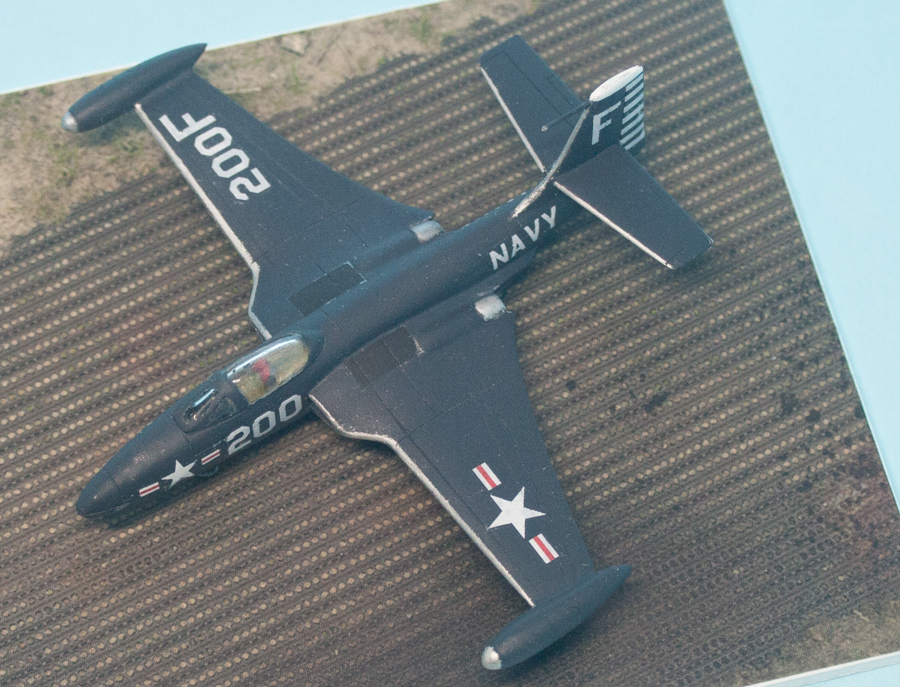
Once the primer had dried I used Hataka's Dark Sea Blue (red line) thinned further with a little of their thinner as well as Future. Even so, once that had cured I still sprayed Future over the entire model. When all of that was cured I masked the flying surface's leading edges then using a foam paint brush, applied AK Interactive True Metal wax, Aluminum to the leading edges, and Steel around the exhausts. The interior of the wheel wells were finished in "interior green" and the insides of the landing gear doors were painted red.
|
The decals are ALPS-generated so care must be taken. Even so I messed up a couple but thanks to Miniwing's generosity, I had extra decals I could add over the messed up ones. I decided to not do any weathering so once the decals were on, then a Vallejo Satin was sprayed over the entire model. Masks were removed and the Banshee was finally complete.
|
Because of it being a full-resin fuselage, there isn't anywhere to add nose weight and not an easy way to remove weight from the tail, so this kit is a tail-sitter. I decided to place the model on a Coastal Kit's base by using a small spot of Blu Tack under the nose wheel. I haven't decided if I'm using this base permanently with the Banshee or not.
Conclusion
I'm not 100% satisifed with my build, but it has nothing to do with the kit. The Miniwing Banshee is a really nice model and when finished well, it really looks like a Banshee. Now to build the F2H-2N, albeit better than this one.
|
I definitely send "thanks" to Miniwing not only for their kit, but also for the generous supply of the extra decals. In addition, I thank Coastal Kits for their PSP/Marsend Matting base.