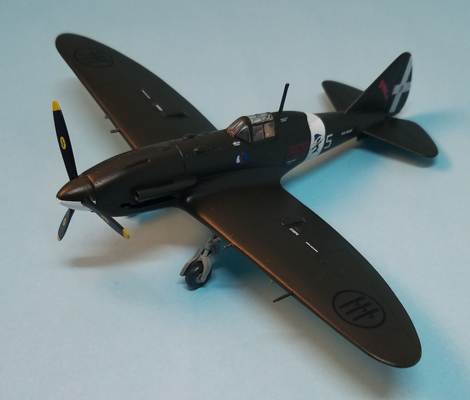
RS Models 1/72 Reggiane Re 2005
By Matt Bittner
Introduction
There comes a time where you really just need to clear the "in progress" pile, some call the "shelf of doom". Well, in my case it's actually the boxes - or totes - of doom. Yes, I have so many in progress kits that they reside in either printer-paper boxes or large, Rubbermaid-type totes. Thankfully I haven't gone through and counted them all because that would probably be depressing. But in the end, most things "in progress" I truly mean to finish.
Since some are further along than others, we (the editors of Internet Modeler) decided to look through our "in progress" stash and start clearing that out. The first for me (but I haven't provided an article on) was an Academy P-39N. This was actually started by another modeler (mostly just pre-painted) I thought would be a good model to work on during the pandemic, being away from most of my modeling tools and paint. Then it was the Miniwing 1/144 Global Hawk, the Hasegawa 1/72 Spitfire Mk.VIII and the Hobby Boss 1/72 F4F-4 Wildcat. Finally it was time to tackle the RS Models 1/72 Reggiane Re.2005.
Turns out I had started this - I think - sometime not long after publishing the First Look, sometime in 2012. Not exactly sure why I put it away but I do know I had a couple of issues with it, mostly self-generated. But, now it's near-complete and can sit on my shelf. Near-complete because I'm still missing the exhausts but wanted to put this in the "finished" category, even missing the exhausts.
Construction
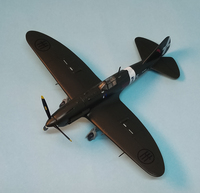
Naturally, when a model sits for quite a number of years you forget exactly what you did to said model. I remember one of the upper wing pieces was short-shot, which meant that area needed to be filled with putty. I also remember the leading edges of the wings needing more attention than most, which is why the lights aren't on my model: I removed them because of the sanding and just didn't add them back. It was also this reason why I decided to replace the guns and pitot tube with metal tubing replacements, Albion in the case of the pitot.
|
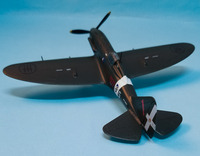
The cockpit is nice out-of-the-box, the only thing I added were tape seat belts. I don't know why but Italian aircraft in general - and the Re.2005 especially - have very little if any aftermarket for them. The Supermodel and Sword Re.2005 has replacement wheels made for it, Brengun has a photoetch set for this RS Models kit, but that's it. No masks, no replacement exhausts. Nothing I truly needed. Yes, have a model sit long enough and you're bound to lose parts. When I pulled the kit out of the box last year, it was missing the canopy, control stick and gun sight, and later on I discovered the exhausts were missing as well. Thankfully RS Models provided replacements (thank you!) for the interior pieces and canopy, but I didn't realize at the time I asked for said parts I was missing the exhausts. So those are still "not there".
|
I can't remember what paint I used to paint the interior pieces, but it was really close to the Vallejo match for the underside color, Grigio Azzurro Chiaro 1, Vallejo M485 Light Gray 71.298 with a dab of white. For the upper color Verde Oliva Scuro 2 I used Vallejo Yellow Olive 71.013.
The area of the fuselage that needed the most attention was between the cockpit and the tail as putty needed to be applied there. There were other small spots on other parts of the fuselage, but this was the one area needing the most attention.
While the wing needed putty to the fuselage, it wasn't a lot and it blended very well. The horizontal tail pieces only needed a little bit of Perfect Plastic Putty to look correct.
|
I'm not very good at cutting my own masks for canopies - which I tried on this one - and it shows, unfortunately. Next time I'll just use pieces of tape.
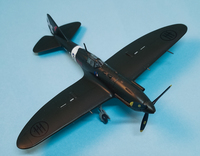
After everything was painted was when more went a little south. You're supposed to add the main landing gear at the end of construction, which means bending the landing gear to fit. One side worked perfectly, the other popped open the wing seam on the leading edge. Just a little more attention, some re-spraying and it was right as rain.
|
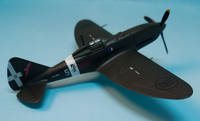
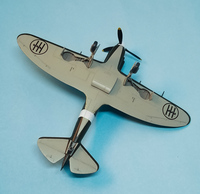
After a coat of Future I applied the decals and in general they are great to work with. Unfortunately while adding solution over top of one of the wing roundels the brush pulled up the decal and it was a huge mess. Thankfully a good friend sent replacements, albeit a little bigger than the kit roundels but I used the kit's for the top, and the replacements for the underside.
Conclusion
Even waiting many years between start and finish, the RS Models Re.2005 is a very nice kit. Yes, I had some issues with it and apart from the molding flaw in the one wing, feel that most were my own doing. It truly is a very sleek fighter and looks great on the shelf, even without exhausts. I'm glad I finally finished it.
|
Huge thanks - and apologies for taking so long - to RS Models for the review kit.
