
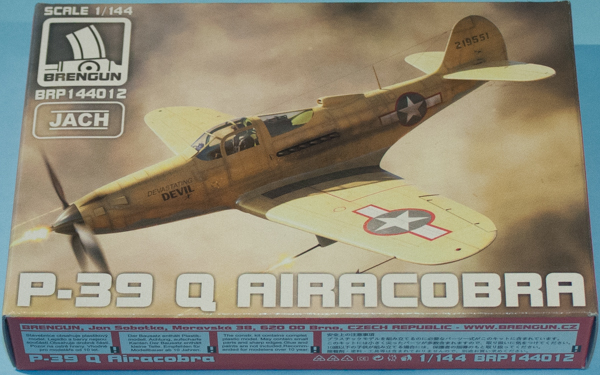
Brengun 1/144 P-39Q Airacobra
By Matt Bittner
Introduction
The P-39Q was a later version of the Bell P-39 that was first introduced with the in-wing 30 cal guns removed which were replaced with 50 cal guns slung under the wings in gun pods. There were also some sub-versions of the P-39Q that had reduced armor, fuel capacity increased and the Type A-1 bombsight adaptors added (P-39Q-5); some were modified to carry cameras for reconnaisance (P-39-Q-6); increased armor, increased fuel capacity, Automatic Boost controls added, winterization of oil systems and rubber engine mounts (P-39Q-10); etc. It was definitely a more robust version of the P-39 and used extensively by the VVS.
The Kit
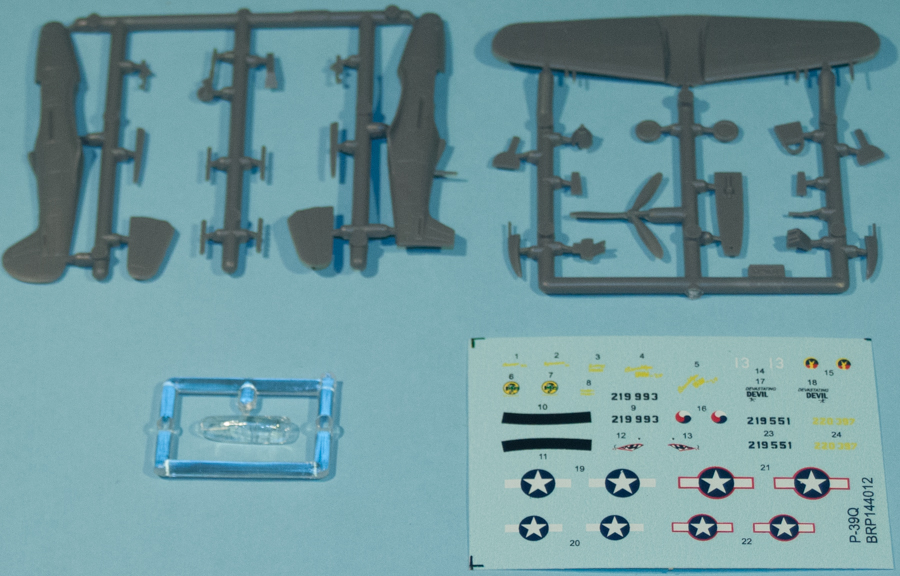
The Brengun 1/144 P-39Q consists of 30 picees of tan, injected plastic and one injected, clear canopy (one-piece). Decals are for 3 P-39Qs:
- The 82nd TRS/71st TRG, Spring 1944 (finished in Olive Drab over Neutral Gray with a yellow spinner, and an all-white tail and wing leading edges)
- The 46th FS/16th FG, Canton Island, 1943 (finished in Desert Yellow over Light Blue)
- The 51st FS/32nd FG, Panama 1943 (finished in Olive Drab over Neutral Gray)
Construction naturally starts with the cockpit. There are three pieces to it but I think there may be a fourth. Part number 11 is listed on the parts drawing at the beginning of the instructions but not mentioned at all in the construction sequence. There is no control stick shown on the instructions, so I wonder if Part #11 is actually the control stick. If not, it's not difficult to make one yourself.
|
Once the cockpit is finished (there are no belts nor anything for the interior; however, Brengun has released a photoetch set for the kit) then it's added to one fuselage half and construction continues. Brengun shows weight needed to be added to the nose prior to closing the fuselage halves, but doesn't mention how much. Once the weight is added and the fuselage halves glued together the horizontal tail pieces can be added. In this section of the instructions the spinner is glued to the propeller but I would wait until painting both, separately.
Now the fuselage is assembled and the stabs glued on, it's time to add the one-piece wing. After you have a complete airframe now Brengun has you clip off the wing leading edge guns prior to adding the underwing gun pods. It is in this step you add the canopy and the exhaust stacks but at least for the exhausts, I would leave those off until the end and after painting.
The last two steps on the instructions have you add everything to the underside of the model. Most should be left off until after adding the decals and final painting.
Conclusion
The Brengun 1/144 P-39Q is an excellent kit of the Airacobra in 1/144. It will look great once finished and if you want to take it to the next level, by all means pick up Brengun's own aftermarket for the kit.
My thanks go to Brengun for sending this to review.