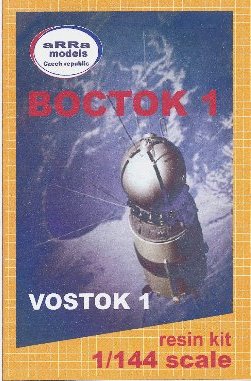
advanced search

  • Menu
  • Home
  • Columns
    • Industry News
    • Editorials
    • Now & Then
  • Features
    • Aviation
    • Armor
    • Automotive
    • Space/Sci Fi
    • Ships
    • Figures
    • Special Reports
  • How To
    • Construction
    • Detailing
    • Painting
    • Finishing
  • First Looks
    • Aviation
    • Armor
    • Automotive
    • Space/Sci Fi
    • Ships
    • Figures
  • New Releases
    • Aviation
    • Armor
    • Automotive
    • Space/Sci Fi
    • Ships
    • Figures
    • Book Reviews
    • Tools
  • Gallery
    • Aviation
    • Armor
    • Automotive
    • Space/Sci Fi
    • Ships
    • Figures
    • Drawings
    • References
Internet Modeler : Features : Space/Sci Fi RSS News Feed

aRRa 1/144 Vostok

By Don Joy

Background

aRRa 1/144th Vostok Parts

Kit parts
The Vostok 3KA was the spacecraft used for the first human spaceflights. They were launched from Baikonur Cosmodrome using Vostok 8K72K launch vehicles. The first flight of a Vostok 3KA occurred on March 9, 1961. The first flight with a crew -- Vostok 1 carrying Yuri Gagarin—took place on April 12, 1961. The last flight -- Vostok 6 carrying the first woman in space, Valentina Tereshkova—took place on June 16, 1963.

A total of 8 Vostok 3KA spacecraft were flown, 6 of them with a human crew.

Wikipedia entry for the Vostok spacecraft

Building

aRRa 1/144th Vostok Molding

3rd Stage showing molding flaw to repair
With only 10 major pieces, this build is pretty straight forward. I assembled the 3rd stage then added the "Service" module (to use the American term) and the capsule. The third stage pieces have what would normally be alignment pin and receivers on the inside. The upper pin/receiver bump was in the way of seating the service module, so that had to be ground out.

aRRa 1/144th Vostok Alignment

Right side - showing alignment
One problem I encountered at this point is that the capsule, service module and 3rd stage all need to be aligned. The instructions should be better about this. I dug around on the internet and found pictures to use.  The umbilical shroud on the outside of the capsule aligns with a stud of the shroud on the service module.  A bit of detailing I will do on the Voskhod will be to connect the two parts of the shroud on the side of the spacecraft.

aRRa 1/144th Vostok Assembly 3

Inside of third stage showing alignment pin "bumps" that interfere with assembly
Seams and flaws were filled and sanded. Mr. Surfacer 500 was used to fill pinholes and minor flaws.

aRRa 1/144th Vostok Assembly 1

Basic assembly and filling completed.
As I said in my First Look, a string of beads is provided for the spherical tanks at the top of the service module. They seem irregularly shaped to me and all have seams, so they were candidates for replacement. I found straight push pins with round heads the right size – or so I thought.  It turns out there was variation between the heads of the different pins, so I had to select carefully to make sure all the "tanks" were the same size. That turned into a plus as the last "tank" is slightly smaller than the rest and I was able to find a pin head the right size to show that. With the crew module at the top of the model, the first tank goes to the right of the umbilical.

aRRa 1/144th Vostok Pins and Beads

Pins compared to the original beads
At this point, I attached the 4 small ullage rockets to the base, filled remaining flaws and painted overall in white Mr. Surfacer 1000. I drilled a hole for the stand so I could touch up and manipulate the small model without touching it whenever possible.

Painting & Final Construction

aRRa 1/144th Vostok Left Side

Left side
I masked off the white sections, then painted the silver using lacquer paint.  Once it was dry, I hand painted the service module, tanks and details.

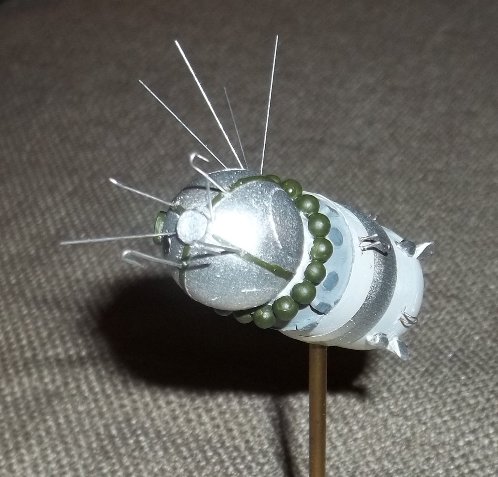
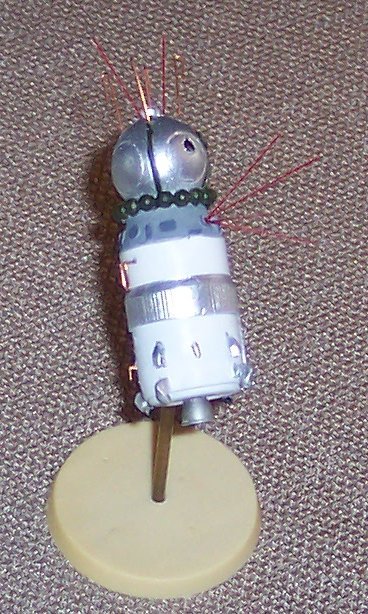
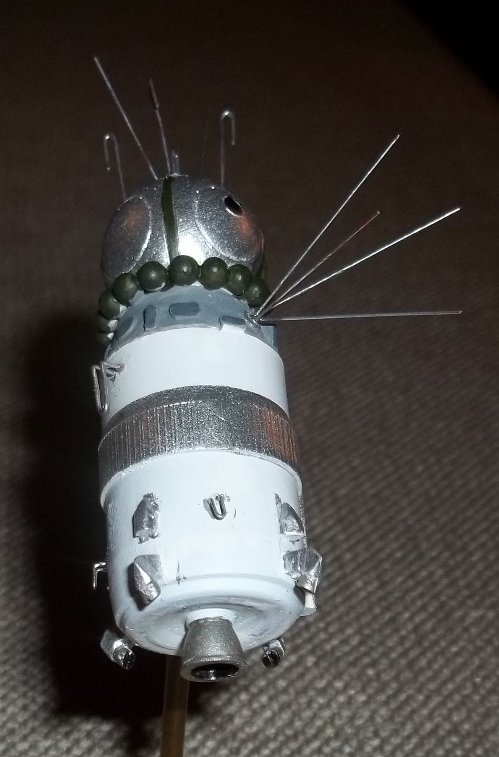
When the paint was all dry, I attached all the various antennae using super glue gel. Seven wire antennae are provided, pre-shaped. My piece #12 that I thought was missing re-appeared, so I did not have to make a replacement. The nylon "whiskers" comprise the remainder of the antennae suit and are pre-cut to length, so make sure the short ones go on the front. Again, you will have to check references for the alignment of all of these.

aRRa 1/144th Vostok Assembly 2

Antennae attached before painting
I painted the antennae after attaching them.  Some people thought I should do it the other way around, but I did not want to risk losing some of these small pieces. Once they were all solidly glued down, it was easy to gently paint them silver and none of them were knocked off in the process.

aRRa 1/144th Vostok Quarter

Model with a quarter on the base for scale.
The finished model measures 2.5 inches from the engine bell to the tip of the forward antennae.  That's 7 cm. Size is an issue and you need to work with many small parts.

Conclusion

This was a nice little build and the length of time it took me for completion aRRa 1/144th Vostok Rear View

Rear view
was my fault, not the kit's. My biggest complaint is that the alignment of the three parts of the spacecraft and all the various antennae is critical.More detail in the instructions would have been useful. I don't blame aRRa for not wanting to cast the little tanks and providing the beads is an understandable solution. I was able to find seamless pieces to replace them which made that part of construction easier.

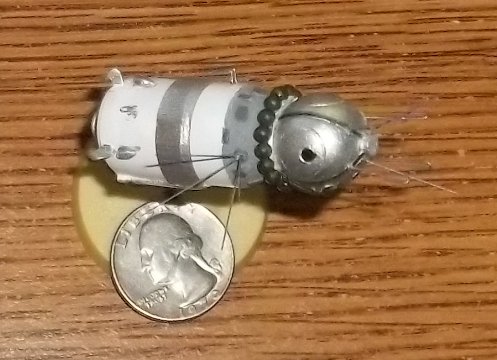
There are some construction challenges posed by the small size of the kit, but it is quite buildable and provides a very nice finished product. Total build time was probably 20-25 hours, not counting bead searching. I certainly recommend the kit to anyone with an interest in the subject in this scale.

My thanks to aRRa for the review kit. aRRa 1/144th Vostok Front View

Front view